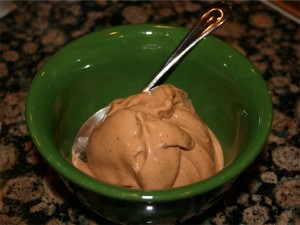
Raw Banana Cacao Sorbet

This one’s a keeper! I can’t believe I haven’t posted this recipe before. It’s been so long since I’ve had too many bananas that I’ve had to freeze them. Thus, it’s been a long time since I’ve had this sorbet.

If you love bananas dipped in chocolate, this recipe is for you.

It’s also really easy.

Recipe:

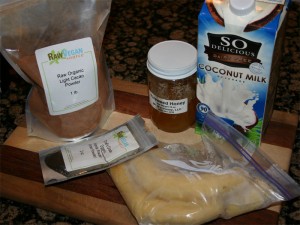
  • 3 frozen ripe bananas
  • ½ cup coconut milk
  • ½ teaspoon vanilla powder
  • 1 heaping tablespoon cacao powder
  • 1 heaping tablespoon raw honey

Start by pealing and freezing the bananas the day before (or a few days before). I would recommend a zip-lock baggy that you squeeze the air out of. You don’t want them to turn brown (ha! Like you’ll notice with the added cacao.).

When you’re ready to blend, break the frozen bananas into 1 inch lengths (or cut them for they are pretty hard) and then add all ingredients to Vita-mix. It doesn’t take very long to blend and you’ll want to use the tamper to press the banana into the blades.

With three bananas you get 4 to 5 servings – unless you like big servings (which I do).

I highly recommend this one. The only real problem is making sure there are ripe bananas available to use. 

Hope you like it too!

Melt in your mouth Raw Granola

I normally don’t like granola. It’s not the taste of it that bothers me but, rather, how my body processes it. Even though I chew everything like a million times, something just doesn’t digest the best as it goes through me. All the power bars that are packed with dense calorie based ‘nutrition’ I usually just leave on the shelf.

Well, the other day I decided to give a raw version a try. I’m not sure what attracted me to the recipe, but it felt like the thing to do so I gave the “It’s RAW granola …. gRAWnola time!!!!” recipe from The Raw Seed website a try.

The thing that stands out about this recipe is that it’s mainly sunflower seeds, pumpkin (squash) seeds and raisins!  No grains, no nuts and a little bit of flavorings. Meredith, from The Raw Seed, calls this recipe Cinnamon Raisin Banana Granola. I would call it Orange Raisin Banana Granola with a hint of cinnamon!

Recipe:

Visit The Raw Seed Websites Granola recipe.

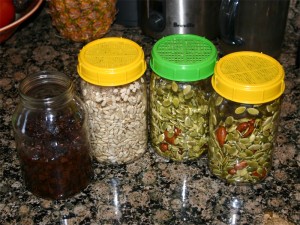
Meredith mentions that “using sprouted seeds is optional.” Well, I took that option.

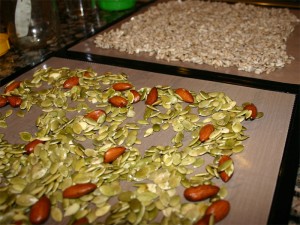
As you can see, I made a little modification to the recipe. Not only did I add a few almonds, but I also added the two cups raisins to water to rehydrate them.

Sticking with the ‘option’ on the recipe, After getting the seeds started and rinsing them off really well, they went straight into the dehydrator until the next day.

I don’t have any pictures of mixing this stuff, but that all happened in the food processor. I ran the seeds just long enough to break some of them down but not all of them.

After placing the dry ingredients in the big mixing bowl, I rain the rest of the ingredients through the Vita-mix. That’s where the soaked raisins really broke down well.

Another thing that I did that was a slight variation on the recipe is that I used a little extra orange juice. Next time I’d probably just through a pealed orange in the mix for the pulp would probably to the mixture good.

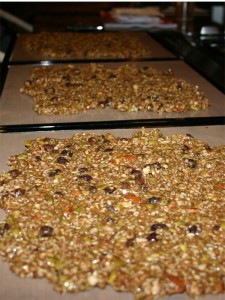
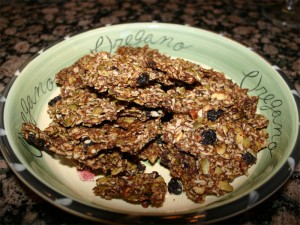
After 12 hours per side, you get crunchy granola!

When Lori tasted this, her eyes lit up. I think I remember her saying something like: Hey, I could eat this stuff! Can you tell she has some reservations with regards to some of the things that I experiment with? Not everything is good enough to blog about! Lol…

Lunch time!  I think I’ll nibble on some homemade raw granola!  Thanks Meredith for sharing!

Fermented Cashew Cheesecake

Wow! Who would have ever thought that something as ugly as a cashew could be transformed into a decadent desert with a little fungal help! If you haven’t made the time to brew up some Rejuvelac so you can make a fermented nut cheesecake, well, you just haven’t lived! Really. I’ve now made three and everyone that’s tried it has nothing but praise (they like it – really).

After starting my first batch of Rejuvelac (a couple weeks ago), I did a little research to figure out what to do with it. When Googling around, I found The Raw Seed website. Hidden on that sight is an amazing fermented nut cheesecake recipe! It’s got some great pictures too, so I highly recommend stopping by (The Raw Seed Cheesecake). They’ve also got some videos there, but I still haven’t found the time to watch them all the way through. I guess this one is so easy that the videos should have been about 90 seconds long!

Wha-da-ya-think?
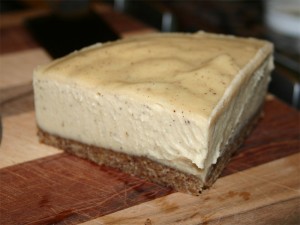
Does that look good or what? That was the bulk of my lunch today!  Yes, I know it’s a quarter of the cake! But it’s only an 8 inch spring-form. This slice is probably about the size of a slice of ‘real’ cheesecake you’d get at The Cheesecake Factory. It’s also loaded with oils so I give it an A+ for keeping me warm in the winter.

This is the third one that I’ve made so far and I’ve already been asked to make a fourth – for a wedding party (of all events). So I’ve learned a bit about it that I can actually share – more than simply the pictures. So here it is…

Process (Recipe):
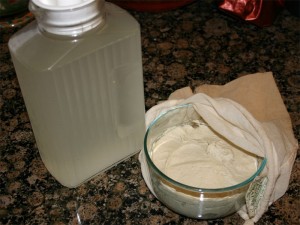
To start, you’ve got to create the Rejuvelac. The Raw Seed has a little video that outlines the process, or you can look back at what I did here and here. Making good Rejuvelac is key to making this work.

I’ve also soaked 2 cups raw cashews over the day and rinsed them well.

Now, following the recipe outlined at The Raw Seed, I take the two cups soaked cashews, the teaspoon nutritional yeast and 2/3 cup Rejuvelac and blend until it’s smooth as butter.

This is what you see in the bowl. I took the picture as I was wrapping it up so it can ferment for the next 24 hours. I’ve also got an old nut milk bag that I’m wrapping it in so as to keep bad stuff out.

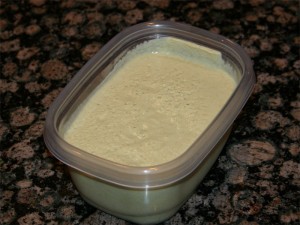
The next day, it looks like this:
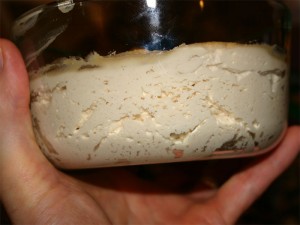
Notice all the little ‘air’ pockets around the edge of the bowl. The normally heavy feeling ground up nuts are light a fluffy. It’s spongy!

Next, we process up the crust.
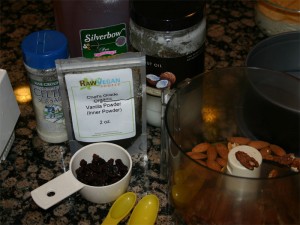
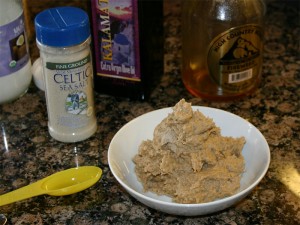
If you look closely, you’ll notice that I’ve got ½ cup almonds, ½ cup pecans, ¼ cup raisins, ½ teaspoon vanilla powder, 1 Tablespoon honey, 1 Tablespoon coconut oil and more than a pinch of salt. This all gets blended in the food processor until it starts to stick. At that point, you press it into a oiled spring-form pan. Looks something like this:
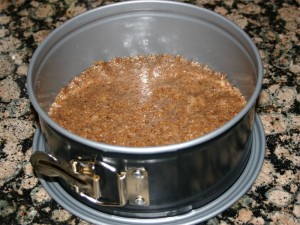
Now we get out the blender to mix the fermented nuts with 2/3 cup liquid coconut oil, ½ cup honey, ½ teaspoon vanilla powder and 1/8th teaspoon salt. Even though the nuts are light a creamy, it’s hard work for the blender to mix. Turn it on and do just that. It’s going to end up rather thick, so you’re not going to get it to run out of the blender. This is something that you’re going to have to dig out.

Once you’ve got it all in the spring-form, smoothen the top and give it a gentle giggle to help it settle. You don’t want air pockets in the cake. Here is what you should end up with.
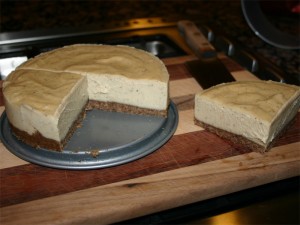
The pecans give the crust a strong appeal that’s complemented well with caramel. If you have a little latte syrup sitting around, drizzle a bead back and forth over the top as an accent. When I did this, everyone marveled at the presentation for they don’t know me as a chief at all!

This is another desert that I highly recommend. And it’s much easier on the digestion than you might think when you think about eating a cake of all nuts. The Fermentation really changes this. After having tasted fermented cashews, I’ll probably never want them any other way.

Let me know what you think!

Update:

Ok.  I’ve made a few slight modifications to this cheesecake recipe. For starters, I’m now using a full size cheesecake spring-form. The little 8 inch just doesn’t cut it. It’s not BIG enough!

For the crust – I really like pecans and dates. The flavors seem to go better with the fermented cashews. I spell it out like this:

Filling:

  • 3 cups cashews (soaked for 8 hours)
  • 1 tbsp nutritional yeast
  • 1 cup rejuvelac

Split into two halve and blend each half independently. 3 cups cashews is too much for a blender. 1 cup is not enough, so look at running almost two cups, remove a cup or more and then add the remaining nuts. Place this mixture in a bowl, cover with cheesecloth (or nut milk bag) and let stand for 24 hours.

Crust:

  • 1 cup almonds (soaked overnight and let sit)
  • 1/1 cup pecans straight from the freezer
  • About 6 large medjool dates (makes for a sweeter crust)
  • ½+ tsp vanilla powder (get the best you can find)
  • ½ tsp sea salt
  • 1 Tbsp melted coconut oil

Run it in the food processor like shown above and press it into the pan.

Back to filling:

  • 1 cup melted coconut oil
  • 2/3rds cup honey
  • 1 tsp vanilla powder
  • 1/8th tsp Sea Salt
  • Plus fermented cashews

Melt the coconut oil and place it on the blender first. Add honey and then the fermented (bread dough) cashews (then add the remaining ingredients). The order is pretty important. You want the oil first so that as things get spinning it get lubricated. Placing the cashews in first makes it really hard for the blender to suck in the oil.

I guess my spring-form pan is about 12 inches. The resulting cheesecake will have a very thin crust and a cake that’s a bit over an inch high. It’s perfect for the person that complains about large treats after dinner. Just cut it small and it won’t seem too big to anyone!

Zucchini hummus (and Raw Tahini)

Now that we’re at the end of the summer, the zucchini plants in the garden are in full production. It’s hard to keep up with all the fruit that they put out. Twice now, I’ve given away a number of large zucchini and I’ve even made zucchini chips!

But what I really wanted is to make the fruit into something that I can have as a lunch food – hummus – and not have it heavy like what’s made form sprouted garbanzo beans. And, as it so happens, today is a great day to try Zucchini hummus!

I poked around the internet until I found something that looked reasonable.  As it turns out, a video posted by RawFoodFamilyLife caught my eye.

Look!  Kids are eating it and actually having fun. I’ve got to say, from my point of view, these kids have no idea how well they are being taken care of!

In any case, I paused the video part way through and typed out the recipe.

Recipe:

  • 3 to 4 zucchini pealed
  • 2 to 3 teaspoons tahini
  • 1 squeezed lemon
  • 1 little glove garlic
  • 1 tablespoon of cumin
  • ¼ cup olive oil
  • Tiny bit of salt

From the looks of it, they just blend until it’s smooth and enjoy.

But it wasn’t that easy for me. I didn’t want to run to the store and pick up some tahini, so I surfed around a bit more to see if I could find a reasonable tahini recipe.  As it turns out, I found one that fit the bill:

Making Raw Tahini

This one was from GeekGoneRaw. I stumbled across a Creamed Sesame tahini dessert that I figured I could use the tahini part for my hummus.  I’ve copied his recipe here.

Raw tahini:
Sprouted sesame seeds
Raw and unfiltered honey, to taste
Cold-pressed coconut oil and sesame oil
Himalayan salt
(water)

Soak sesame seeds for 8 hours. Drain water, rinse thoroughly and sprout for another 8 hours. The seeds won’t actually grow, the idea is to get rid of the enzyme inhibitors, so that the calcium and other nutrients are better absorbed. Once this is done, place the seeds in a food processor or blender, add honey. Then blend in 50:50 coconut and sesame oil. Add salt. Taste and adjust. I like my tahini with a nice balance of savory and sweet. If you find that cold-pressed sesame oil is too strong in flavor, substitute for more coconut oil.

So the challenge is to get the tahini going so that I can make the hummus. If you read the recipe closely, you’ll see that it takes a while to get the sesame seeds to sprout. Thus, while I’m letting the zucchini grow, I started the sesame seeds.

After a day, I was ready to go.

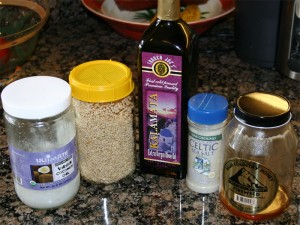
Just so happened that I had everything that he called for the in recipe and, because there really wasn’t any measurements to follow, I simply added two cups sprouted sesame seeds, 1 Tbs coconut oil, 1 Tbs Olive Oil and 1 Tbs Honey. Followed by a little more than a pinch of salt.

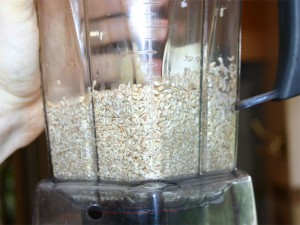
Started with two cups seeds.

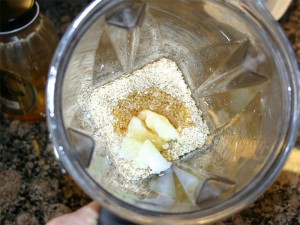
Added everything else to it and blended. I didn’t want to make too much, but I probably should have made more. It’s hard working with so little in the blender.  In any case, it turned out great!

I had company visiting that I got to try it. I offered up a small pinch, about the size of a peanut. She placed it in her mouth and the expression turned to pleasantly sweet . after a few seconds the bitters from the seeds kicked in and her eyes widened with an “Oh My God!” For a second, she thought that she’d been tricked and then realized that it was really good. Shortly thereafter, she was rattling off different things that would be good with it.

Me, well, I just wanted to add it to the hummus!

And I did.

Turned out a little runnier than I’d expected, but it’s got really good flavor. I love the cumin. I’m looking forward to my lunches this week.

Enjoy!

Blueberry Bliss Cheesecake

I’m excited because not only am I going to be able to show you a beautiful desert, but I’m going to be able to point you to the complete recipe!

This is one of the first raw deserts I learned to make. It’s wonderfully simple and seems to deliver amazing results every time. I’ve served it at Thanksgiving and eaten it for lunch many a times! Yum.

So here it is – Blueberry Bliss!

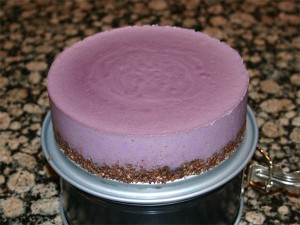
Look at that! Right out of the spring-form!

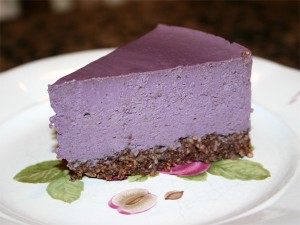
If that’s too much, here’s a little serving.

It’s amazing how the close-up shows all the details. I worked for at least a minute jiggling and dropping this spring-form just after pouring the berry mixture in and I still didn’t get all the bubbles out.

When making this desert, the one thing that I’d recommend more than anything else is to make sure you use the best cashews that you can find. Don’t get anything that’s old. Get whole nuts (beans) as fresh as can be.

Also, I use frozen berries (See my Oh My God – Blueberry Sorbet for a picture of the brand). But, when you use frozen berries, they thaw down to at least ½ size. Thus, I pour 4 cups berries into a measuring cup and place them in the dehydrator until they’ve warmed up to 100 degrees. Thus, with the recipe, I’m using a few more berries then what Carmella uses.

Also note that I also place the cacao butter/coconut mixture in the dehydrator to melt along with the berries.

Without further ado, the best write-up is from the source. The Sunny Raw Kitchen’s Bliss-full Blueberry Cheesecake.

Well, what did you think of her desert?  The blueberries over the top just seem … a little over the top. Thus, you don’t see that in my picture.

I also changed the crust a little simplifying it.

What the heck, I’ve changed it quite a bit. I guess I should include my measurements for comparison.

Crust:

  • ¾ cup soaked almonds
  • ¼ cup coconut flakes
  • 1 tablespoon cacao
  • 1 teaspoon vanilla powder
  • Pinch Celtic Sea Salt
  • 2 Medjhool dates
  • Little squeeze Raw Agave

I guess I don’t really like brazil nuts and I’ve found that I like the coconut flakes a little better than the powdered stuff. I put it all together like she does – using a food processor. With the almonds I soak them for maybe 6-8 hours and then let them dry. You want to work with dry nuts

Filling:

  • 4 cups frozen blueberries
  • 1 cup dry cashews – the best you can find
  • 5 Tbsp melted coconut butter
  • 2 Tbsp melted cacao butter
  • ¼ cup honey
  • 1 Tbsp lemon juice
  • Big pinch of Celtic Sea Salt.

Now, the real trick is getting it creamy without overdoing it. So, I approach the process just a little different than she does. I place the nuts in the blender and give them a whirl. It only takes 20 seconds (or so) before the nuts stick together and let the blade run free. At this point, I add everything else. The juice from the melted blueberries soaks down into the nuts softening them a little while you’re piling everything else on top.

Then, when you actually blend this up, let it run a little longer than you would normally do for smoothies. Remember that you started with warm ingredients, but you don’t want to cook them. Thus, feel the side of the blender as it’s getting creamy and make sure it’s not too hot.

Before pouring it into the spring-form, taste it. You should find yourself licking your fingers!

After you’ve poured the berry mixture into the pan, tap the pan so as to encourage the air bubbles to come to the surface. This might take a little extra coxing, so don’t by distracted by that little bit of mixture that you want to keep tasting!

When it cools, the butter and nuts will set-up giving it that standard cheesecake feel. I normally let it sit overnight.

It’s absolutely a keeper recipe. I make it for lunches!

Enjoy.