Raw Sunflower Red Hummus

This one tastes great and is just too easy to not share with the world. With just a little preparation, you can whip up some great tasting raw humus that will fill you up for lunch yet not make you feel like a nap is in order in just a few minutes. I like to call this my Sunflower Red Hummus.

The other day, I was pressed for time yet wanted this hummus. I’d already soaked the sunflower seeds and let them sprout overnight so they were ready. I looked at the clock and saw that I had fifteen minutes to prepare and cleanup before I had to run. Well, the total time was twenty minutes (including the quick cleanup) so I had to run really fast to make up that time!

Recipe:

  • 2 cups sprouted raw living sunflower seeds
  • 1 sweet red, yellow or orange bell pepper
  • 1 medium tomato
  • 1 carrot (or a few small garden carrots that you just dug and cleaned up!)
  • ½ a Myers lemon
  • ½ clove raw garlic
  • 2 tablespoons raw cold pressed olive oil
  • 1 teaspoon cumin
  • 1 teaspoon smoked paprika (or a little less)
  • ¼ teaspoon salt
  • ¼ teaspoon cyan pepper!

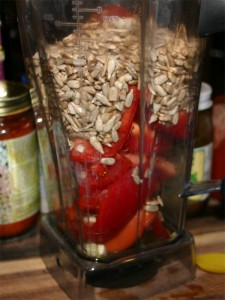
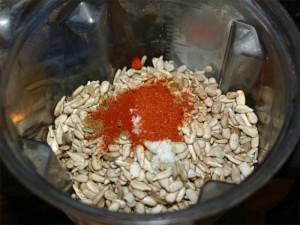
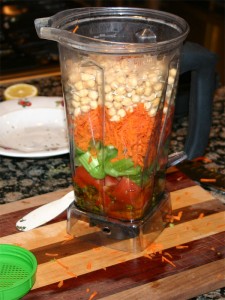
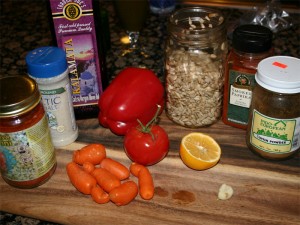
All the wet ingredients go in first. And, well, you probably already know this from the picture below, but you’re going to blend this in a high powered blender until it’s creamy and smooth. So, if you put the wet ingredients o the bottom, they bill break down quickly and create volume that will carry down the rest. You might need to help some of the seeds and be careful not to get the seasoning on your plunger (if you need to use one).

This is a pretty heavy mixture so you’ve got to have a heavy-duty blender in order to keep it from bogging down. But it will. It will also heat up pretty quickly so watch out for that. I usually start out just fast enough to get the fruit (veggies) to spin and then turn the blender up as high as it will go and still turn the contents of the blender. If you flip the machine all the way to high, it all just lifts up and, well, you’re no longer ‘blending’ at that point. 🙂

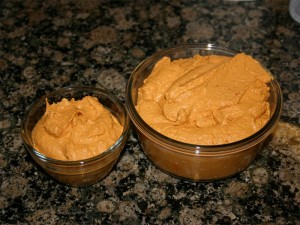
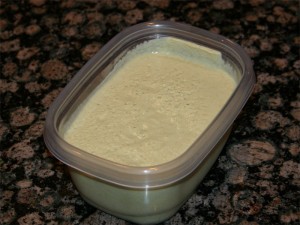
The little cup on the left is exactly 1 cup. I like to fill it ¾ the way and it’s just the right amount for lunch. The bigger container just happened to work with my time constraints for the other little containers needed washing!

Once prepared, it easily lasts for a few days in the fridge. You’ll see the top darken (oxidize), but the rest should stay just made fresh.

This one is so easy that it’s hard to get wrong. My only real advice is to go light on the garlic. The picture shows a whole clove. I cut it in half before adding it. Too much raw garlic tends to overpower the other subtle flavors that really make this hummus shine.

It’s been a long winter and just a couple days ago I started to notice the spring air. It blew in and within about 24 hours all the plants that had been waiting to bloom sprung into early spring pinks, yellows and greens. We’re well past the equinox, so it feels a month late. Whether it’s early or late, it’s still warmly welcomed!

Kale Chips

Wow! That cashew nutritional yeast mixture is dynamite!

I’ve wanted to make kale chips for a while now but never really set my mind on it. Today, I set aside time to harvest some beautiful fresh kale from the garden and mix up the recipe that I found on Leiji Turune’s youtube site. Actually, it was under this video and I’ve copied it here.

Because this recipe takes a little preparation, I set a cup of cashews up to soak before heading to yoga this morning and figured they would be ready to go by the time I got home. Lucky for me, they were! 

Here is what Leiji has to say about these amazing chips, my commentary will continue below: 

Since I mention the yummy “cheesy” kale chips in this video, I thought I’d briefly share the recipe with everyone. Here it is: 

Approximately (I never measure anything so these are just approximations)- 

1.5- 2 cups soaked cashews (soak for about 1-4 hrs) Make sure to rinse them very well to remove enzyme inhibitors
6-8 tbsp nutritional yeast (not raw, but a source of vitamin B12- good for vegans) Add more or less depending on how “cheesy” you want it to taste.
About 1/4- 1/2 tsp celtic sea salt- I would recommend adding a little salt, tasting it, then adding more or less- You want the mixture to taste not too salty, or bland- just right for your tastebuds
1/2 small lemon juiced
Couple pinches of garlic (use other herbs if desired)
1/2 jalapeno pepper (optional) 

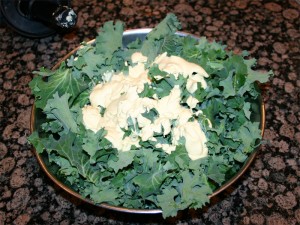
Process everything listed above in a food processor until smooth. You want to have 2 big bowls of kale already washed a broken into pieces (basically 2 big heads of kale.) Take the mixture with your hands and work in into the kale pieces- add more or less depending on how flavourful & “cheesy” you want it. 

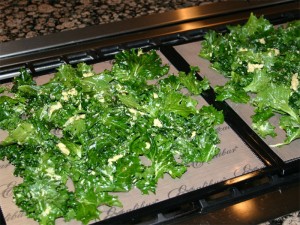
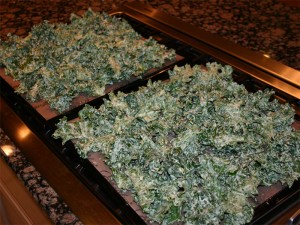
Spread kale on teflex trays and dehydrate for approx. 7-8 hrs at 105 degrees fahrenheit. Leave them in longer if you want them crispier. 

Next, enjoy! They are very addictive and healthy! BTW, if you don’t have a dehydrator, that’s ok. You can still use the mixture as a dip/ dressing- do the same thing, where you work the mixture into the kale with your hands and then enjoy! Seriously delicious- such a simple, fast & tasty way to get in those very important dark leafy greens! YUMMEROO! 🙂 

So, I set out to copy this recipe.

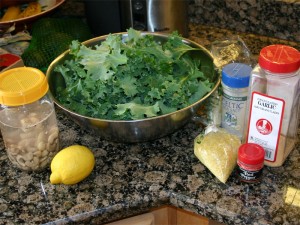
I gathered up everything that it called for and started dumping it in the blender. The thing I didn’t do was make two bowls full of kale, like the recipe calls for. I tried to cut down the recipe slightly by adding just one cup cashews to go with the one bowl of greens. That, was probably my mistake (the first time I attempted this recipe). When I got everything stacked in the blender, it barley looked like anything! After mixing it for a while, the tamper barely touched the mixture. It was kind of a pain to keep mixing. 

When finished, it looked like peanut butter! Having seen other people massage it into the kale, I figured that would work. But, then again, it could be that THIS was my mistake! You see, the wet kale (that I’d just washed) just didn’t want to ‘bond’ with the cashew peanut butter. Next time, I will definitely add water to the mixture until it looks like a think salad dressing (which, is that I did the second time which continues below). I mean, it’s going in the dehydrator so a little more water really shouldn’t hurt. 

But I plowed ahead with the cashew peanut butter and Wow, these chips still taste great! 

The results from the first attempt didn’t sit right with me. The cashew peanut butter didn’t cover the kale smoothly so it was a bit hit-or-miss with flavor. 

But I’ve messed things up worse the first time through. Fortunately, there was more kale in the garden (not anymore) so I got to stoke up the blender one more time to see if I could get the cashews to ‘run.’ 

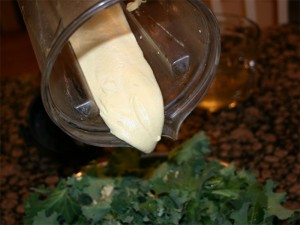
I was a little surprised at how much water it took to get the cashews to flow in the blender. Just like the first time, the nuts immediately turn into peanut butter. But, I added spoonful after spoonful of water until it started to flow like a milkshake; a really thick one. 

I also added a bit more red pepper to see if I could get it a bigger kick. You know me, bigger and better – until you over do it! Lol… 


If you compare these trays to the first two, you’ll see that the chips are covered completely differently – evenly. I didn’t have problems with the mixture NOT sticking to the wet kale for it stuck to everything! That nutritional yeast is like GLUE. I sure hope it doesn’t digest like glue. That would be a bit nasty. 

Both times, I made sure to wash my hands thoroughly before massaging the cashew ‘cheese’ into the kale so I could enjoy the best part – licking my hands clean afterwards. Eew you may say, but that nutritional yeast mixed with the soaked nuts just tastes amazing. If I get to making nut cheese, I would probably, most certainly, add nutritional yeast to the mixture. I can’t believe I’ve waited so long to make kale chips! 

I’ve now got a number of lunch size bags of chips. You have to be kind of careful with these chips because the ‘cheese’ mixture doesn’t stick very hard. If you bump the bag hard, the flavor tends to get knocked off. 

That’s ok, for what sticks is loaded with flavor! This really is a winner recipe! It’s not 100% raw, but it’s 100% yummy – like Leiji says!

Zucchini hummus (and Raw Tahini)

Now that we’re at the end of the summer, the zucchini plants in the garden are in full production. It’s hard to keep up with all the fruit that they put out. Twice now, I’ve given away a number of large zucchini and I’ve even made zucchini chips!

But what I really wanted is to make the fruit into something that I can have as a lunch food – hummus – and not have it heavy like what’s made form sprouted garbanzo beans. And, as it so happens, today is a great day to try Zucchini hummus!

I poked around the internet until I found something that looked reasonable.  As it turns out, a video posted by RawFoodFamilyLife caught my eye.

Look!  Kids are eating it and actually having fun. I’ve got to say, from my point of view, these kids have no idea how well they are being taken care of!

In any case, I paused the video part way through and typed out the recipe.

Recipe:

  • 3 to 4 zucchini pealed
  • 2 to 3 teaspoons tahini
  • 1 squeezed lemon
  • 1 little glove garlic
  • 1 tablespoon of cumin
  • ¼ cup olive oil
  • Tiny bit of salt

From the looks of it, they just blend until it’s smooth and enjoy.

But it wasn’t that easy for me. I didn’t want to run to the store and pick up some tahini, so I surfed around a bit more to see if I could find a reasonable tahini recipe.  As it turns out, I found one that fit the bill:

Making Raw Tahini

This one was from GeekGoneRaw. I stumbled across a Creamed Sesame tahini dessert that I figured I could use the tahini part for my hummus.  I’ve copied his recipe here.

Raw tahini:
Sprouted sesame seeds
Raw and unfiltered honey, to taste
Cold-pressed coconut oil and sesame oil
Himalayan salt
(water)

Soak sesame seeds for 8 hours. Drain water, rinse thoroughly and sprout for another 8 hours. The seeds won’t actually grow, the idea is to get rid of the enzyme inhibitors, so that the calcium and other nutrients are better absorbed. Once this is done, place the seeds in a food processor or blender, add honey. Then blend in 50:50 coconut and sesame oil. Add salt. Taste and adjust. I like my tahini with a nice balance of savory and sweet. If you find that cold-pressed sesame oil is too strong in flavor, substitute for more coconut oil.

So the challenge is to get the tahini going so that I can make the hummus. If you read the recipe closely, you’ll see that it takes a while to get the sesame seeds to sprout. Thus, while I’m letting the zucchini grow, I started the sesame seeds.

After a day, I was ready to go.

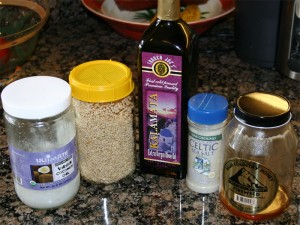
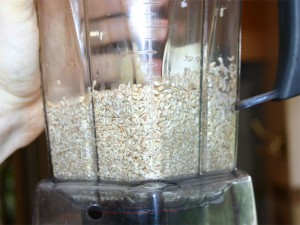
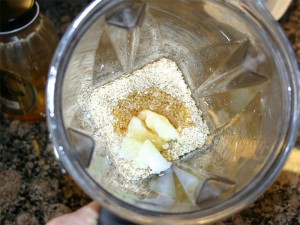
Just so happened that I had everything that he called for the in recipe and, because there really wasn’t any measurements to follow, I simply added two cups sprouted sesame seeds, 1 Tbs coconut oil, 1 Tbs Olive Oil and 1 Tbs Honey. Followed by a little more than a pinch of salt.

Started with two cups seeds.

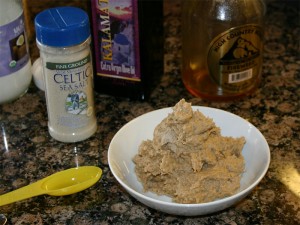
Added everything else to it and blended. I didn’t want to make too much, but I probably should have made more. It’s hard working with so little in the blender.  In any case, it turned out great!

I had company visiting that I got to try it. I offered up a small pinch, about the size of a peanut. She placed it in her mouth and the expression turned to pleasantly sweet . after a few seconds the bitters from the seeds kicked in and her eyes widened with an “Oh My God!” For a second, she thought that she’d been tricked and then realized that it was really good. Shortly thereafter, she was rattling off different things that would be good with it.

Me, well, I just wanted to add it to the hummus!

And I did.

Turned out a little runnier than I’d expected, but it’s got really good flavor. I love the cumin. I’m looking forward to my lunches this week.

Enjoy!

Mike Blongiewicz’s Raw Home-Made Hummus

I’m pretty impressed. Turns out it’s really easy to make this version of home-made Hummus and it tastes good enough to eat! In fact, I got a couple comfortable nods just like Mike did in his video. It’s smooth – flavor wise – yet comforting. I’m sure I’m going to enjoy this the next couple days for lunch.

And thanks Marie for the query (See comment here), for when I found this video I felt inspired to sprout some garbanzo beans.

Making your own raw home-made hummus by Mike Blongiewicz:

I like how easy he laid out the ingredients. I only added two cloves garlic for I like it a bit more mild. The lemon I went heavier with for I like that tang. For the veggies, I just added one medium tomato, almost all of one large carrot and three stocks of celery. I like to figure that it’s close enough.

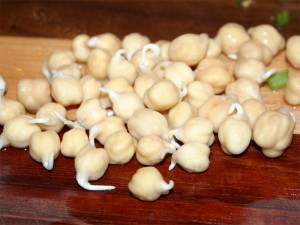
To all that, I added 36 hour old sprouted garbanzo beans. I like to wait until the roots are about as long as the bean.

Sprouted Garbanzo beans

Just like Mike, I added the liquid first.

Everything ready to go

When I powered on the blender, a swear I saw the lights flicker! This mixture sure did bog down that vita-mix. I’m sure if you’ve got a light duty blender, you’ll want to use a food processor instead.

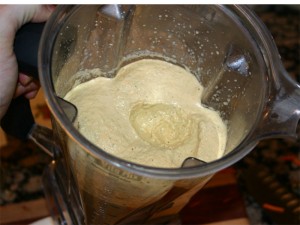
After about 60 seconds, it was rolling like a vanilla shake (just like the video) so I figured it was done.

Lunch for three days

This made about 6 cups – or three lunches. I love how the basil flakes shine through. That big dip in the center was the taster. I’m absolutely positive that this will go well with carrot sticks and celery.

Overall, I’m thinking this is a really good raw hummus base. I’ll really know in a couple days when it’s all gone!

Give it a try, I think you’ll like it too.