Same fruit, different greens – smoothie

There are times when you know that a different type of green would just mix better with a particular type of fruit, but that opportunity to actually give it a try doesn’t come along very offend. Yet, for me, this last week I was blessed with 5 lbs of amazingly great black grapes, a ripe pineapple and 10 fresh young Thai coconuts! That’s right, 10.

What an amazing deal on coconuts. Last weekend Lori and I stopped into the local Uwajimaya and the first thing we saw was the 10 for $10 posted above the coconuts. Knowing that I wanted to make cacao pudding and smoothies (using the water) I figured 10 was a good round number that we’d be able to put to work.

So, what was Dave’s experiment? Well, it was short lived, and consisted of making the same smoothie using the following different greens: Parsley, Lettuce and Beet Greens.

Recipe:

  • ½ to ¾ cup water
  • 1 inch ripe pineapple
  • Big handful ripe black grapes
  • 6 young fresh Thai coconut water ice cubes
  • Greens of your choice.
  • 1 probiotic optional

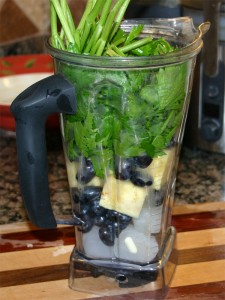
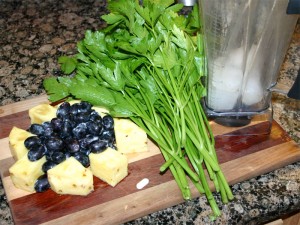
They all looked pretty much like this:

And, because I’m an advocate for getting a full day’s worth of greens, I show this blender as being FULL.

The first time, I added Parsley. The parsley in the garden still looks beautiful. The weather has turned a little cooler so it’s pretty much stopped growing, which means it starts to turn bitter. I don’t mind, but Lori simply hates parsley – regardless if it’s bitter or sweet (more for me… lol). I figure I’ve got a week or so before my garden crop turns to mush and I LOVE parsley, thus today, bitter or not, it’s mixed in.

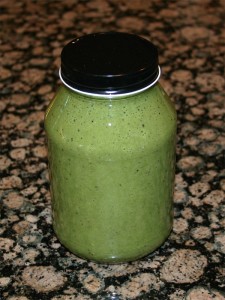
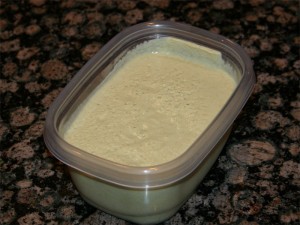
That full blender made a bit more than this quart. The taste was definitely ‘full’ (from the parsley) and sweet (from the grapes). To me, it’s a great combo.

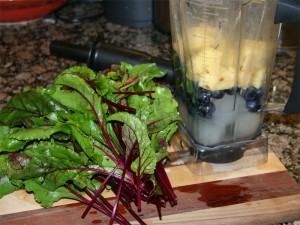
Next day, Beet Greens.

The color is a little more brown form the beets, but the flavor is a lot more smooth. Drinkability wise, this smoothie was better than the parsley based one. Parsley is really strong!

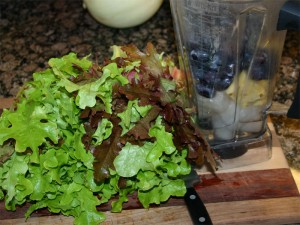
Third day, lettuce.

Notice that big pile of leaves! The lettuce that I planted at the end of July is now bolting. When the plant bolts, the leaves pick up a deeper bitter flavor. Yet, I don’t want to let this bounty go to waste. And, because Lettuce is lower on the mineral charts than the other two, I figured I’d just pile it in.

The end result was the best of the three. Lori liked this one the best, yet the entire mixture is not something that stands out as being a killer-combo. Yet, it meets my goals of making greens consumable!

I wish I’d picked up some spinach or tried the same recipe with Swiss Chard, but I guess I’ll have to wait to finish this experiment another day.

No matter how you look at it, it’s all about masking the off flavors of the greens in a fruit melody that’s not too sweet. This combination of ingredients played out just fine this week so I wanted to share.

Kale Chips

Wow! That cashew nutritional yeast mixture is dynamite!

I’ve wanted to make kale chips for a while now but never really set my mind on it. Today, I set aside time to harvest some beautiful fresh kale from the garden and mix up the recipe that I found on Leiji Turune’s youtube site. Actually, it was under this video and I’ve copied it here.

Because this recipe takes a little preparation, I set a cup of cashews up to soak before heading to yoga this morning and figured they would be ready to go by the time I got home. Lucky for me, they were! 

Here is what Leiji has to say about these amazing chips, my commentary will continue below: 

Since I mention the yummy “cheesy” kale chips in this video, I thought I’d briefly share the recipe with everyone. Here it is: 

Approximately (I never measure anything so these are just approximations)- 

1.5- 2 cups soaked cashews (soak for about 1-4 hrs) Make sure to rinse them very well to remove enzyme inhibitors
6-8 tbsp nutritional yeast (not raw, but a source of vitamin B12- good for vegans) Add more or less depending on how “cheesy” you want it to taste.
About 1/4- 1/2 tsp celtic sea salt- I would recommend adding a little salt, tasting it, then adding more or less- You want the mixture to taste not too salty, or bland- just right for your tastebuds
1/2 small lemon juiced
Couple pinches of garlic (use other herbs if desired)
1/2 jalapeno pepper (optional) 

Process everything listed above in a food processor until smooth. You want to have 2 big bowls of kale already washed a broken into pieces (basically 2 big heads of kale.) Take the mixture with your hands and work in into the kale pieces- add more or less depending on how flavourful & “cheesy” you want it. 

Spread kale on teflex trays and dehydrate for approx. 7-8 hrs at 105 degrees fahrenheit. Leave them in longer if you want them crispier. 

Next, enjoy! They are very addictive and healthy! BTW, if you don’t have a dehydrator, that’s ok. You can still use the mixture as a dip/ dressing- do the same thing, where you work the mixture into the kale with your hands and then enjoy! Seriously delicious- such a simple, fast & tasty way to get in those very important dark leafy greens! YUMMEROO! 🙂 

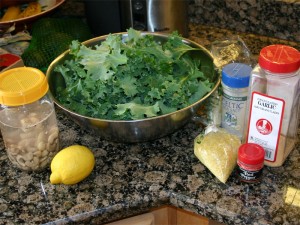
So, I set out to copy this recipe.

I gathered up everything that it called for and started dumping it in the blender. The thing I didn’t do was make two bowls full of kale, like the recipe calls for. I tried to cut down the recipe slightly by adding just one cup cashews to go with the one bowl of greens. That, was probably my mistake (the first time I attempted this recipe). When I got everything stacked in the blender, it barley looked like anything! After mixing it for a while, the tamper barely touched the mixture. It was kind of a pain to keep mixing. 

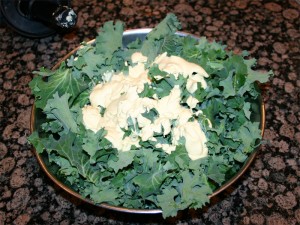
When finished, it looked like peanut butter! Having seen other people massage it into the kale, I figured that would work. But, then again, it could be that THIS was my mistake! You see, the wet kale (that I’d just washed) just didn’t want to ‘bond’ with the cashew peanut butter. Next time, I will definitely add water to the mixture until it looks like a think salad dressing (which, is that I did the second time which continues below). I mean, it’s going in the dehydrator so a little more water really shouldn’t hurt. 

But I plowed ahead with the cashew peanut butter and Wow, these chips still taste great! 

The results from the first attempt didn’t sit right with me. The cashew peanut butter didn’t cover the kale smoothly so it was a bit hit-or-miss with flavor. 

But I’ve messed things up worse the first time through. Fortunately, there was more kale in the garden (not anymore) so I got to stoke up the blender one more time to see if I could get the cashews to ‘run.’ 

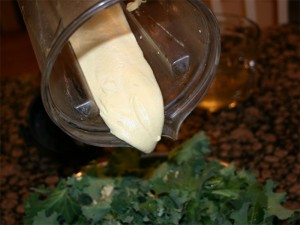
I was a little surprised at how much water it took to get the cashews to flow in the blender. Just like the first time, the nuts immediately turn into peanut butter. But, I added spoonful after spoonful of water until it started to flow like a milkshake; a really thick one. 

I also added a bit more red pepper to see if I could get it a bigger kick. You know me, bigger and better – until you over do it! Lol… 


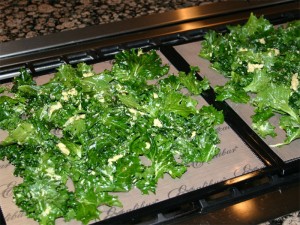
If you compare these trays to the first two, you’ll see that the chips are covered completely differently – evenly. I didn’t have problems with the mixture NOT sticking to the wet kale for it stuck to everything! That nutritional yeast is like GLUE. I sure hope it doesn’t digest like glue. That would be a bit nasty. 

Both times, I made sure to wash my hands thoroughly before massaging the cashew ‘cheese’ into the kale so I could enjoy the best part – licking my hands clean afterwards. Eew you may say, but that nutritional yeast mixed with the soaked nuts just tastes amazing. If I get to making nut cheese, I would probably, most certainly, add nutritional yeast to the mixture. I can’t believe I’ve waited so long to make kale chips! 

I’ve now got a number of lunch size bags of chips. You have to be kind of careful with these chips because the ‘cheese’ mixture doesn’t stick very hard. If you bump the bag hard, the flavor tends to get knocked off. 

That’s ok, for what sticks is loaded with flavor! This really is a winner recipe! It’s not 100% raw, but it’s 100% yummy – like Leiji says!

Beautiful on Raw & Yoga

You know how every once in a while you find something that touches you just enough that you KNOW the person is speaking the truth, well, I came across that again this morning. Would have come across it a couple days ago if only I had more time in front of the computer! (lol)  I started it two days ago, but couldn’t get all the way through the seven minutes. So, I saved that explorer open until this morning and I’m glad I did. I recommend seeing the entire video in one sitting.

When I first came across this video I was simply looking for video on the lotus yoga position and I found this. I did not make the connection between Tony Zavasta and the book Raw Food and Hot Yoga until the very end of the video:

Wish I could just link in the Amazon book and it’s description, but I can’t find it there. It can be found on Tonya’s website here.

I’ve seen that book on shelves for the last couple years, but never really felt the desire to bring it home. I might have to take a closer look now.

But the most interesting thing that she mentions is the help that she’s gotten through eating raw AND doing yoga. Minute 2:57 in:

I have news for you, old age is already robbing you of your vitality. Lightness and youthfulness comes from flexibility in your joints. So can we get our youthfulness back? Well, we’ll never be 17 again, that’s for sure, but the answer is still YES, you can still recover your youthful agility.

Shortly thereafter:

Before you opt for surgery, give bikram brattice a try.

To which I totally (100%) agree. The tears come @ 5:00 and then the real solution comes at 5:40:

but, there is something else that helped greatly. I have not been eating any cooked food for the last 12 years. Raw food delivered the best nourishment for your body. But it is yoga practice that will help your body make the best of it. … but it is your embracing the raw food diet that will make this transformation happen sooner and the results more dramatic.

I started yoga 1 ½ years ago and at that point also made a conscious effort to eat as much raw food as I could – including (most importantly the easy one) green smoothies. When I started, I could hardly bend over. Touching my toes was not an option. Now, I place my hand flat on the floor and bend my elbows deeply.

The most interesting part is that NO ONE ELSE in the class has made the type of progress that I have made. Other’s still talk about going out for a latte, and then moan when they try to stretch the following day. I me, my personal experience would attest to the fact that if you Alkalize your body it will respond positively.

Tonya looks pretty amazing at the age of 52 after having gone through 11 surgeries. More importantly, she comes across as being amazing! Alkalize your body – use it and see what happens!

Collard burrito anyone?

By chance, stumbled across this demonstration and couldn’t help but laugh at the videos. I’ve never met Adam Graham, but now that I’ve seen a couple videos, I half feel that I have!

I’ve wondered for a long time now how the raw foodies roll their collard greens, and, well, know I know thanks to the following video. I have to warn you that you might get sucked in by his humor or the ‘60’s camera angles (felt like I got caught up in an old Batman TV program without the “Bang” and “Boom” balloons.)

I think I’m going to have to visit LiveFoodExperience again! Let me know if you find something there that’s just got to be seen by everyone.

Zucchini hummus (and Raw Tahini)

Now that we’re at the end of the summer, the zucchini plants in the garden are in full production. It’s hard to keep up with all the fruit that they put out. Twice now, I’ve given away a number of large zucchini and I’ve even made zucchini chips!

But what I really wanted is to make the fruit into something that I can have as a lunch food – hummus – and not have it heavy like what’s made form sprouted garbanzo beans. And, as it so happens, today is a great day to try Zucchini hummus!

I poked around the internet until I found something that looked reasonable.  As it turns out, a video posted by RawFoodFamilyLife caught my eye.

Look!  Kids are eating it and actually having fun. I’ve got to say, from my point of view, these kids have no idea how well they are being taken care of!

In any case, I paused the video part way through and typed out the recipe.

Recipe:

  • 3 to 4 zucchini pealed
  • 2 to 3 teaspoons tahini
  • 1 squeezed lemon
  • 1 little glove garlic
  • 1 tablespoon of cumin
  • ¼ cup olive oil
  • Tiny bit of salt

From the looks of it, they just blend until it’s smooth and enjoy.

But it wasn’t that easy for me. I didn’t want to run to the store and pick up some tahini, so I surfed around a bit more to see if I could find a reasonable tahini recipe.  As it turns out, I found one that fit the bill:

Making Raw Tahini

This one was from GeekGoneRaw. I stumbled across a Creamed Sesame tahini dessert that I figured I could use the tahini part for my hummus.  I’ve copied his recipe here.

Raw tahini:
Sprouted sesame seeds
Raw and unfiltered honey, to taste
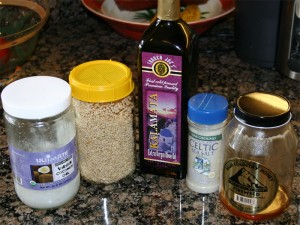
Cold-pressed coconut oil and sesame oil
Himalayan salt
(water)

Soak sesame seeds for 8 hours. Drain water, rinse thoroughly and sprout for another 8 hours. The seeds won’t actually grow, the idea is to get rid of the enzyme inhibitors, so that the calcium and other nutrients are better absorbed. Once this is done, place the seeds in a food processor or blender, add honey. Then blend in 50:50 coconut and sesame oil. Add salt. Taste and adjust. I like my tahini with a nice balance of savory and sweet. If you find that cold-pressed sesame oil is too strong in flavor, substitute for more coconut oil.

So the challenge is to get the tahini going so that I can make the hummus. If you read the recipe closely, you’ll see that it takes a while to get the sesame seeds to sprout. Thus, while I’m letting the zucchini grow, I started the sesame seeds.

After a day, I was ready to go.

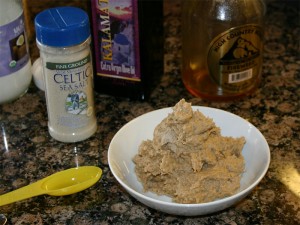
Just so happened that I had everything that he called for the in recipe and, because there really wasn’t any measurements to follow, I simply added two cups sprouted sesame seeds, 1 Tbs coconut oil, 1 Tbs Olive Oil and 1 Tbs Honey. Followed by a little more than a pinch of salt.

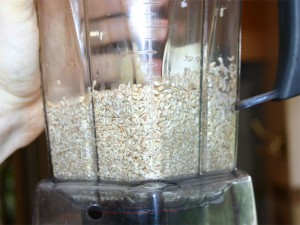
Started with two cups seeds.

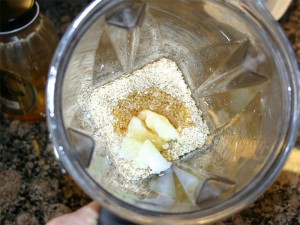
Added everything else to it and blended. I didn’t want to make too much, but I probably should have made more. It’s hard working with so little in the blender.  In any case, it turned out great!

I had company visiting that I got to try it. I offered up a small pinch, about the size of a peanut. She placed it in her mouth and the expression turned to pleasantly sweet . after a few seconds the bitters from the seeds kicked in and her eyes widened with an “Oh My God!” For a second, she thought that she’d been tricked and then realized that it was really good. Shortly thereafter, she was rattling off different things that would be good with it.

Me, well, I just wanted to add it to the hummus!

And I did.

Turned out a little runnier than I’d expected, but it’s got really good flavor. I love the cumin. I’m looking forward to my lunches this week.

Enjoy!