Fermented Cashew Cheesecake

Wow! Who would have ever thought that something as ugly as a cashew could be transformed into a decadent desert with a little fungal help! If you haven’t made the time to brew up some Rejuvelac so you can make a fermented nut cheesecake, well, you just haven’t lived! Really. I’ve now made three and everyone that’s tried it has nothing but praise (they like it – really).

After starting my first batch of Rejuvelac (a couple weeks ago), I did a little research to figure out what to do with it. When Googling around, I found The Raw Seed website. Hidden on that sight is an amazing fermented nut cheesecake recipe! It’s got some great pictures too, so I highly recommend stopping by (The Raw Seed Cheesecake). They’ve also got some videos there, but I still haven’t found the time to watch them all the way through. I guess this one is so easy that the videos should have been about 90 seconds long!

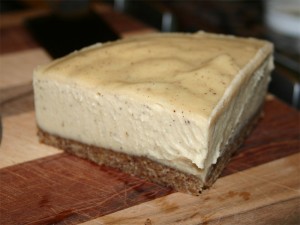
Wha-da-ya-think?

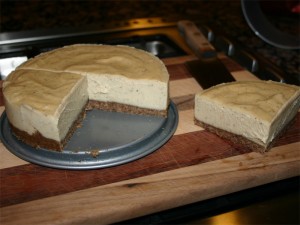
Does that look good or what? That was the bulk of my lunch today!  Yes, I know it’s a quarter of the cake! But it’s only an 8 inch spring-form. This slice is probably about the size of a slice of ‘real’ cheesecake you’d get at The Cheesecake Factory. It’s also loaded with oils so I give it an A+ for keeping me warm in the winter.

This is the third one that I’ve made so far and I’ve already been asked to make a fourth – for a wedding party (of all events). So I’ve learned a bit about it that I can actually share – more than simply the pictures. So here it is…

Process (Recipe):

To start, you’ve got to create the Rejuvelac. The Raw Seed has a little video that outlines the process, or you can look back at what I did here and here. Making good Rejuvelac is key to making this work.

I’ve also soaked 2 cups raw cashews over the day and rinsed them well.

Now, following the recipe outlined at The Raw Seed, I take the two cups soaked cashews, the teaspoon nutritional yeast and 2/3 cup Rejuvelac and blend until it’s smooth as butter.

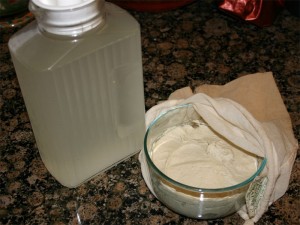
This is what you see in the bowl. I took the picture as I was wrapping it up so it can ferment for the next 24 hours. I’ve also got an old nut milk bag that I’m wrapping it in so as to keep bad stuff out.

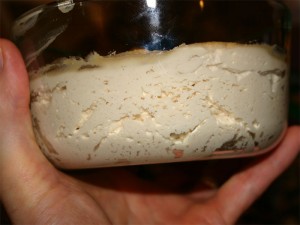
The next day, it looks like this:

Notice all the little ‘air’ pockets around the edge of the bowl. The normally heavy feeling ground up nuts are light a fluffy. It’s spongy!

Next, we process up the crust.

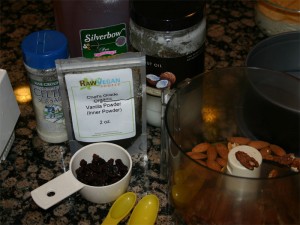
If you look closely, you’ll notice that I’ve got ½ cup almonds, ½ cup pecans, ¼ cup raisins, ½ teaspoon vanilla powder, 1 Tablespoon honey, 1 Tablespoon coconut oil and more than a pinch of salt. This all gets blended in the food processor until it starts to stick. At that point, you press it into a oiled spring-form pan. Looks something like this:
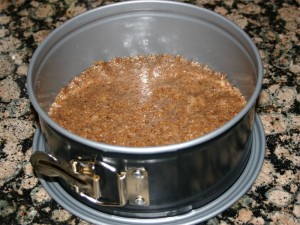
Now we get out the blender to mix the fermented nuts with 2/3 cup liquid coconut oil, ½ cup honey, ½ teaspoon vanilla powder and 1/8th teaspoon salt. Even though the nuts are light a creamy, it’s hard work for the blender to mix. Turn it on and do just that. It’s going to end up rather thick, so you’re not going to get it to run out of the blender. This is something that you’re going to have to dig out.

Once you’ve got it all in the spring-form, smoothen the top and give it a gentle giggle to help it settle. You don’t want air pockets in the cake. Here is what you should end up with.

The pecans give the crust a strong appeal that’s complemented well with caramel. If you have a little latte syrup sitting around, drizzle a bead back and forth over the top as an accent. When I did this, everyone marveled at the presentation for they don’t know me as a chief at all!

This is another desert that I highly recommend. And it’s much easier on the digestion than you might think when you think about eating a cake of all nuts. The Fermentation really changes this. After having tasted fermented cashews, I’ll probably never want them any other way.

Let me know what you think!

Update:

Ok.  I’ve made a few slight modifications to this cheesecake recipe. For starters, I’m now using a full size cheesecake spring-form. The little 8 inch just doesn’t cut it. It’s not BIG enough!

For the crust – I really like pecans and dates. The flavors seem to go better with the fermented cashews. I spell it out like this:

Filling:

  • 3 cups cashews (soaked for 8 hours)
  • 1 tbsp nutritional yeast
  • 1 cup rejuvelac

Split into two halve and blend each half independently. 3 cups cashews is too much for a blender. 1 cup is not enough, so look at running almost two cups, remove a cup or more and then add the remaining nuts. Place this mixture in a bowl, cover with cheesecloth (or nut milk bag) and let stand for 24 hours.

Crust:

  • 1 cup almonds (soaked overnight and let sit)
  • 1/1 cup pecans straight from the freezer
  • About 6 large medjool dates (makes for a sweeter crust)
  • ½+ tsp vanilla powder (get the best you can find)
  • ½ tsp sea salt
  • 1 Tbsp melted coconut oil

Run it in the food processor like shown above and press it into the pan.

Back to filling:

  • 1 cup melted coconut oil
  • 2/3rds cup honey
  • 1 tsp vanilla powder
  • 1/8th tsp Sea Salt
  • Plus fermented cashews

Melt the coconut oil and place it on the blender first. Add honey and then the fermented (bread dough) cashews (then add the remaining ingredients). The order is pretty important. You want the oil first so that as things get spinning it get lubricated. Placing the cashews in first makes it really hard for the blender to suck in the oil.

I guess my spring-form pan is about 12 inches. The resulting cheesecake will have a very thin crust and a cake that’s a bit over an inch high. It’s perfect for the person that complains about large treats after dinner. Just cut it small and it won’t seem too big to anyone!

Kale Chips

Wow! That cashew nutritional yeast mixture is dynamite!

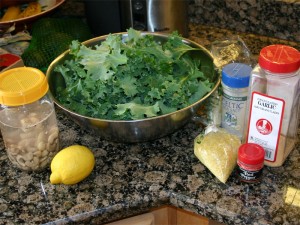
I’ve wanted to make kale chips for a while now but never really set my mind on it. Today, I set aside time to harvest some beautiful fresh kale from the garden and mix up the recipe that I found on Leiji Turune’s youtube site. Actually, it was under this video and I’ve copied it here.

Because this recipe takes a little preparation, I set a cup of cashews up to soak before heading to yoga this morning and figured they would be ready to go by the time I got home. Lucky for me, they were! 

Here is what Leiji has to say about these amazing chips, my commentary will continue below: 

Since I mention the yummy “cheesy” kale chips in this video, I thought I’d briefly share the recipe with everyone. Here it is: 

Approximately (I never measure anything so these are just approximations)- 

1.5- 2 cups soaked cashews (soak for about 1-4 hrs) Make sure to rinse them very well to remove enzyme inhibitors
6-8 tbsp nutritional yeast (not raw, but a source of vitamin B12- good for vegans) Add more or less depending on how “cheesy” you want it to taste.
About 1/4- 1/2 tsp celtic sea salt- I would recommend adding a little salt, tasting it, then adding more or less- You want the mixture to taste not too salty, or bland- just right for your tastebuds
1/2 small lemon juiced
Couple pinches of garlic (use other herbs if desired)
1/2 jalapeno pepper (optional) 

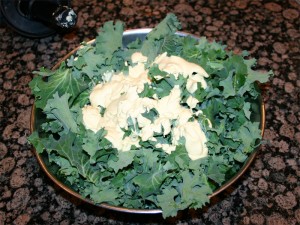
Process everything listed above in a food processor until smooth. You want to have 2 big bowls of kale already washed a broken into pieces (basically 2 big heads of kale.) Take the mixture with your hands and work in into the kale pieces- add more or less depending on how flavourful & “cheesy” you want it. 

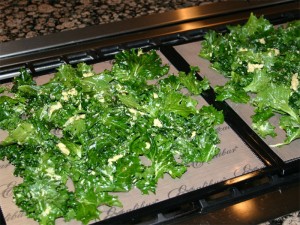
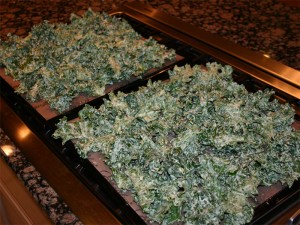
Spread kale on teflex trays and dehydrate for approx. 7-8 hrs at 105 degrees fahrenheit. Leave them in longer if you want them crispier. 

Next, enjoy! They are very addictive and healthy! BTW, if you don’t have a dehydrator, that’s ok. You can still use the mixture as a dip/ dressing- do the same thing, where you work the mixture into the kale with your hands and then enjoy! Seriously delicious- such a simple, fast & tasty way to get in those very important dark leafy greens! YUMMEROO! 🙂 

So, I set out to copy this recipe.

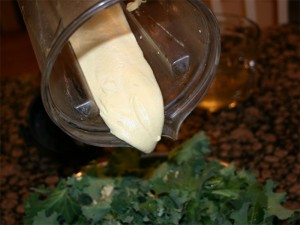
I gathered up everything that it called for and started dumping it in the blender. The thing I didn’t do was make two bowls full of kale, like the recipe calls for. I tried to cut down the recipe slightly by adding just one cup cashews to go with the one bowl of greens. That, was probably my mistake (the first time I attempted this recipe). When I got everything stacked in the blender, it barley looked like anything! After mixing it for a while, the tamper barely touched the mixture. It was kind of a pain to keep mixing. 

When finished, it looked like peanut butter! Having seen other people massage it into the kale, I figured that would work. But, then again, it could be that THIS was my mistake! You see, the wet kale (that I’d just washed) just didn’t want to ‘bond’ with the cashew peanut butter. Next time, I will definitely add water to the mixture until it looks like a think salad dressing (which, is that I did the second time which continues below). I mean, it’s going in the dehydrator so a little more water really shouldn’t hurt. 

But I plowed ahead with the cashew peanut butter and Wow, these chips still taste great! 

The results from the first attempt didn’t sit right with me. The cashew peanut butter didn’t cover the kale smoothly so it was a bit hit-or-miss with flavor. 

But I’ve messed things up worse the first time through. Fortunately, there was more kale in the garden (not anymore) so I got to stoke up the blender one more time to see if I could get the cashews to ‘run.’ 

I was a little surprised at how much water it took to get the cashews to flow in the blender. Just like the first time, the nuts immediately turn into peanut butter. But, I added spoonful after spoonful of water until it started to flow like a milkshake; a really thick one. 

I also added a bit more red pepper to see if I could get it a bigger kick. You know me, bigger and better – until you over do it! Lol… 


If you compare these trays to the first two, you’ll see that the chips are covered completely differently – evenly. I didn’t have problems with the mixture NOT sticking to the wet kale for it stuck to everything! That nutritional yeast is like GLUE. I sure hope it doesn’t digest like glue. That would be a bit nasty. 

Both times, I made sure to wash my hands thoroughly before massaging the cashew ‘cheese’ into the kale so I could enjoy the best part – licking my hands clean afterwards. Eew you may say, but that nutritional yeast mixed with the soaked nuts just tastes amazing. If I get to making nut cheese, I would probably, most certainly, add nutritional yeast to the mixture. I can’t believe I’ve waited so long to make kale chips! 

I’ve now got a number of lunch size bags of chips. You have to be kind of careful with these chips because the ‘cheese’ mixture doesn’t stick very hard. If you bump the bag hard, the flavor tends to get knocked off. 

That’s ok, for what sticks is loaded with flavor! This really is a winner recipe! It’s not 100% raw, but it’s 100% yummy – like Leiji says!

Blueberry Bliss Cheesecake

I’m excited because not only am I going to be able to show you a beautiful desert, but I’m going to be able to point you to the complete recipe!

This is one of the first raw deserts I learned to make. It’s wonderfully simple and seems to deliver amazing results every time. I’ve served it at Thanksgiving and eaten it for lunch many a times! Yum.

So here it is – Blueberry Bliss!

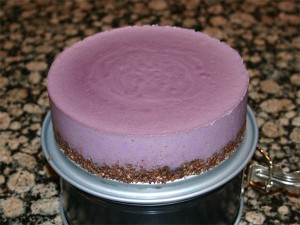
Look at that! Right out of the spring-form!

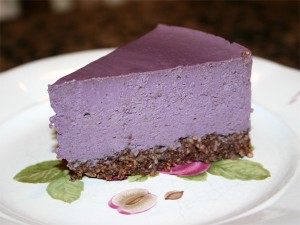
If that’s too much, here’s a little serving.

It’s amazing how the close-up shows all the details. I worked for at least a minute jiggling and dropping this spring-form just after pouring the berry mixture in and I still didn’t get all the bubbles out.

When making this desert, the one thing that I’d recommend more than anything else is to make sure you use the best cashews that you can find. Don’t get anything that’s old. Get whole nuts (beans) as fresh as can be.

Also, I use frozen berries (See my Oh My God – Blueberry Sorbet for a picture of the brand). But, when you use frozen berries, they thaw down to at least ½ size. Thus, I pour 4 cups berries into a measuring cup and place them in the dehydrator until they’ve warmed up to 100 degrees. Thus, with the recipe, I’m using a few more berries then what Carmella uses.

Also note that I also place the cacao butter/coconut mixture in the dehydrator to melt along with the berries.

Without further ado, the best write-up is from the source. The Sunny Raw Kitchen’s Bliss-full Blueberry Cheesecake.

Well, what did you think of her desert?  The blueberries over the top just seem … a little over the top. Thus, you don’t see that in my picture.

I also changed the crust a little simplifying it.

What the heck, I’ve changed it quite a bit. I guess I should include my measurements for comparison.

Crust:

  • ¾ cup soaked almonds
  • ¼ cup coconut flakes
  • 1 tablespoon cacao
  • 1 teaspoon vanilla powder
  • Pinch Celtic Sea Salt
  • 2 Medjhool dates
  • Little squeeze Raw Agave

I guess I don’t really like brazil nuts and I’ve found that I like the coconut flakes a little better than the powdered stuff. I put it all together like she does – using a food processor. With the almonds I soak them for maybe 6-8 hours and then let them dry. You want to work with dry nuts

Filling:

  • 4 cups frozen blueberries
  • 1 cup dry cashews – the best you can find
  • 5 Tbsp melted coconut butter
  • 2 Tbsp melted cacao butter
  • ¼ cup honey
  • 1 Tbsp lemon juice
  • Big pinch of Celtic Sea Salt.

Now, the real trick is getting it creamy without overdoing it. So, I approach the process just a little different than she does. I place the nuts in the blender and give them a whirl. It only takes 20 seconds (or so) before the nuts stick together and let the blade run free. At this point, I add everything else. The juice from the melted blueberries soaks down into the nuts softening them a little while you’re piling everything else on top.

Then, when you actually blend this up, let it run a little longer than you would normally do for smoothies. Remember that you started with warm ingredients, but you don’t want to cook them. Thus, feel the side of the blender as it’s getting creamy and make sure it’s not too hot.

Before pouring it into the spring-form, taste it. You should find yourself licking your fingers!

After you’ve poured the berry mixture into the pan, tap the pan so as to encourage the air bubbles to come to the surface. This might take a little extra coxing, so don’t by distracted by that little bit of mixture that you want to keep tasting!

When it cools, the butter and nuts will set-up giving it that standard cheesecake feel. I normally let it sit overnight.

It’s absolutely a keeper recipe. I make it for lunches!

Enjoy.