Yum – Raw Granola

A few days ago my wife and I attended an all day meditation class. We were asked to bring something to share during the lunch break. I knew that I wouldn’t have the time just before class to prepare anything, so I kind of put the idea of bringing something out of my mind and tried to neglect it. My wife didn’t. She suggested that we bring some granola that I’d make a couple days earlier. Her thinking was that it was done, raw, I could make more AND it tasted great. I agreed and didn’t think much more about it.

During the lunch, I was glad to see that multiple people picked it up and gave it a try. Turns out that the bowl was emptied quite quickly. A number of people sought out the chief (me) in order to figure out what was in it and they politely share their application. It’s not often that I go somewhere with my wife and not see everyone praising her over one of her fabulous concoctions!

Originally, I mentioned for the folks to just connect to this blog and search for granola. The search in the upper right hand side works really well at finding keywords and the article would simple come up. If you go and do that, you’ll find that the old granola article that I posted referenced a recipe that is no longer on the web! Dang. The old site that has been down for a while now and the folks that ran it seemed to have disappeared somewhere east of the rockies. Looks like the original recipe is gone for good.

So, from memory, here it is. Note that I make it different each time so the ratios really depend on what you have available to you when you start mixing. The one key ingredient, ground cinnamon powder, you’ve got to have that.

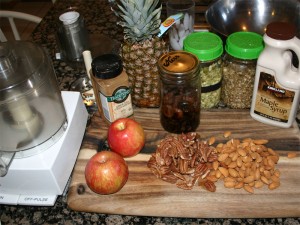
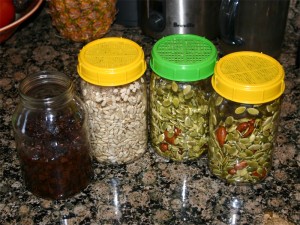
IMG_9456_ingredients

  • 1-2 cups raw hulled sunflower seeds soaked overnight
  • 1 (or more) cup raw hulled pumpkin seeds soaked overnight
  • 1 cup raisins soaked overnight
  • ½ cup dried apricots soaked overnight
  • 1 cup almonds soaked overnight
  • 1 cup pecans soaked overnight
  • 2 apples
  • 1 heaping spoon full ground cinnamon powder
  • ½ ripe pineapple (optional)
  • ¼ to ½ cup maple syrup

You’ll also need a food processor and dehydrator.

Step 1, soak the nuts and seeds! Give them time to rehydrate and start growing. With the nuts, soak for 6-8 hours and then rinse them off good. With the seeds, do the same but also let them grow for a while. Say, overnight. Make sure to rinse them good before using them for the granola. Also, soak the raisins and apricots. Yet, with the raisins and apricots, rinse them a few times before soaking them. You want to get any residue off the fruit before letting it hydrate. When we use this fruit, we’re also going to use the water that it’s soaking in. When you soak fruit, the water picks up a lot of the sugar. Since we’ll be removing the water in the dehydrator, there is no need to drain out that extra sugar!

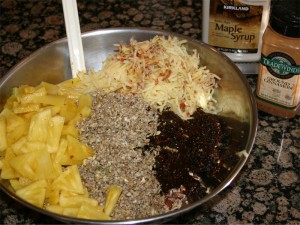
IMG_9460_bowl

As you can see in the above picture, I’ve run each main ingredient through the food processor. I pulsed each one and then poured it into the bowl. Each time, I made sure that there was some texture left with the particular ingredient. I don’t really like large chunks, so if you were to look at the almonds and pecans, you’d see that the biggest pieces are about ¼ to ½ the nut.

When it came to the apples, I cored them and ran them through the grader option. With the raisins and apricots, I mixed it until it was paste. The fruit is the glue that holds everything together.

When I added the pineapple this time, I wanted that chewy fruity feel so I cut it down to pie shaped pieces knowing that the dehydrator will take it down the rest of the way.

Step 2, mix it all together. Get everything evenly distributed and then add a large heaping spoon full of ground cinnamon powder and the maple syrup. Mix it more until the herb is spread evenly.

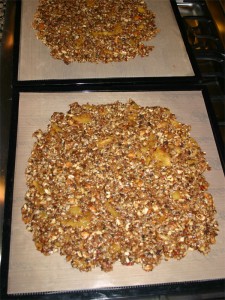
IMG_9462_sheets

I like sheets of granola, thus I spread this large bowl out on four dehydrator sheets. Notice that I pressed it down to the width of the pineapple chunks.

Step 3, dehydrate overnight or maybe a bit longer.

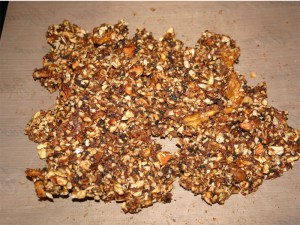
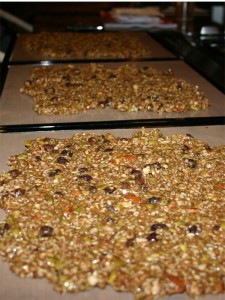
IMG_9465_finished

You can peel it off and eat at any point, I like it when it’s still bendable but breaks apart if bent too far. This is usually 24 hours at 115 degrees.

When it’s done, you can’t tell there was ever any apple added. You’ll see the dark raisin and nut pieces, but everything else just kind of blends in like cereal.

Oh, most people think of this as candy! With all the fruit, it’s really sweet. I treat it like candy too. In a way, it’s like peanut brittle. The last picture doesn’t really show it, but in order to store it in an airtight zip lock bag, I fold the sheets over and over again until the pieces are 2-3 inches in size. Thus, each time I go for a snack, I get a cookie size piece to enjoy!

Note that the real trick here is the ground cinnamon powder. It’s just not the same without it!


Raw Chocolate Dipped Truffles

Today, winter officially arrived with a morning rain and afternoon snowstorm. It was just above freezing, so what fell came down in large flakes and quickly covered everything. Fortunately the cloud only took an hour to pass by so the snowpack came in around a half inch. It’s beautiful to look at, but you don’t want to venture out.

Thus, it’s a great day to make truffles! … and eat them too!

A few days ago I went hunting for a really easy raw truffle recipe that would only take a half hour or so from start to finish. I looked around a bit, but didn’t find anything that caught my eye until I visited Lisa’s Raw on $10 a Day (or less!) blog. If you haven’t noticed, that blog has been linked in here for nearly a year! I love her commitment to the blog and how well she puts together the artwork. It’s just fun to read and beautiful to look at.

Yet, anyway, if you scroll back a bit in her blog, you’ll find that on the 2nd, the menu included a dessert – Double Chocolate Truffles! When I saw what she posted, I immediately new that I’d found the truffles I’d been looking for.

Today, everything came together in such a fine way that I got to make this recipe my own. And yes, they are as good as they look – but I couldn’t settle for just eight, so I kind of doubled the recipe. I wanted to give away a few and cut down on the chocolate just a little (I’m virtually out now, … need to visit Raw Vegan Source again). Too much raw chocolate will keep you up all night. So I almost doubled everything that Lisa shared with the world (except the cacao). Here is my version!

Recipe – Raw Chocolate Dipped Truffles:

Truffle balls:

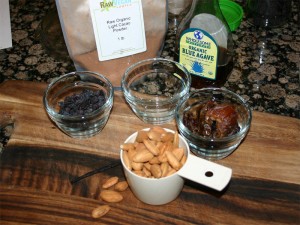
  • 1 cup soaked (dried) raw almonds
  • ½ cup raisins
  • ½ cup (8) medjool dates (pitted)
  • 3 tablespoons cacao powder
  • Scrapings of the inside of one vanilla bean
  • Pinch salt

Chocolate Dip:

  • 4 Tablespoons melted raw coconut oil
  • 4 Tablespoons raw agave
  • 4 Tablespoons Raw cacao powder

Soak a bit more than a cup of almonds for 4-6 hours before starting. Rinse and dry completely so as to not add any water to the mixture (cacao and water don’t mix).

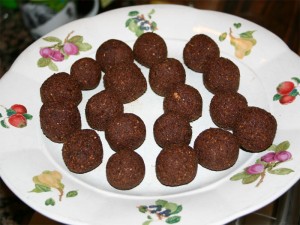
To make the balls, add the almonds, raisins, salt and scrapings from the inside of the vanilla bean into the food processor and grind up. After you’ve worked it a bit, add the dates. You’ll need to play with it a bit in order to really get it broken down nicely. Once it’s nice and smooth, roll into small truffles and place in the freezer for 15-20 minutes. You just want to get them cold, not frozen. Meanwhile, it gives you time to cleanup and put together the dip.

For the dip, add all three ingredients (oil, agave and cacao powder) and quickly mix. It doesn’t take much, but make sure you don’t have lumpy cacao. That makes mixing it up a little harder to do.

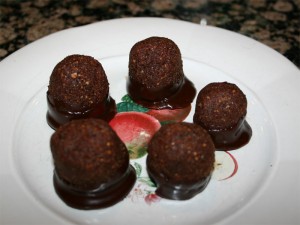
After the balls have cooled and your chocolate dip is ready, roll the bottom of the cold truffle through the melted chocolate and place it on parchment paper. The coconut oil should quickly firm up. It might take a couple more minutes in the freezer, but they’ll look like this:

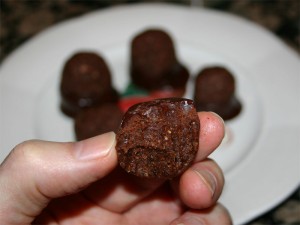
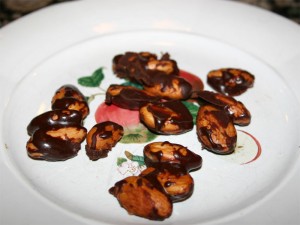
And as you can see from the first picture (way above), I thoroughly enjoyed that treat! The ball is mildly sweet and a soft nutty chew. You have to hunt for the vanilla and the chocolate flavor is tame allowing you to actually discern the raisins. The Chocolate glaze is powerfully dark and rich. It makes you want to suck on it just a bit before chewing through the rest of it.

This is truly a winter time treat!

Oh, I never like throwing out anything – especially when it comes to raw chocolate!

I just happened to have a few soaked almonds left over that I rolled through the bowl that I used for dipping the truffles and I wound up with … turtles!

These were amazing too! These were the first things to disappear. There is something about sweet chocolate on almonds that I just can’t pass up. Now, if I’d just used cacao butter rather than coconut, these would have firmed up at room temperature. But no worries for they disappeared within about five minutes!

These truffles really did mix up fast with no fuss. I’d highly recommend them if you’ve got a craving!

Make and experience joy – these truffles just might help!

Melt in your mouth Raw Granola

I normally don’t like granola. It’s not the taste of it that bothers me but, rather, how my body processes it. Even though I chew everything like a million times, something just doesn’t digest the best as it goes through me. All the power bars that are packed with dense calorie based ‘nutrition’ I usually just leave on the shelf.

Well, the other day I decided to give a raw version a try. I’m not sure what attracted me to the recipe, but it felt like the thing to do so I gave the “It’s RAW granola …. gRAWnola time!!!!” recipe from The Raw Seed website a try.

The thing that stands out about this recipe is that it’s mainly sunflower seeds, pumpkin (squash) seeds and raisins!  No grains, no nuts and a little bit of flavorings. Meredith, from The Raw Seed, calls this recipe Cinnamon Raisin Banana Granola. I would call it Orange Raisin Banana Granola with a hint of cinnamon!

Recipe:

Visit The Raw Seed Websites Granola recipe.

Meredith mentions that “using sprouted seeds is optional.” Well, I took that option.

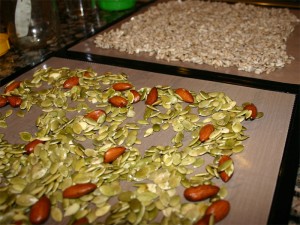
As you can see, I made a little modification to the recipe. Not only did I add a few almonds, but I also added the two cups raisins to water to rehydrate them.

Sticking with the ‘option’ on the recipe, After getting the seeds started and rinsing them off really well, they went straight into the dehydrator until the next day.

I don’t have any pictures of mixing this stuff, but that all happened in the food processor. I ran the seeds just long enough to break some of them down but not all of them.

After placing the dry ingredients in the big mixing bowl, I rain the rest of the ingredients through the Vita-mix. That’s where the soaked raisins really broke down well.

Another thing that I did that was a slight variation on the recipe is that I used a little extra orange juice. Next time I’d probably just through a pealed orange in the mix for the pulp would probably to the mixture good.

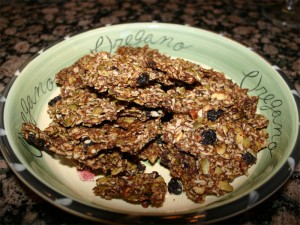
After 12 hours per side, you get crunchy granola!

When Lori tasted this, her eyes lit up. I think I remember her saying something like: Hey, I could eat this stuff! Can you tell she has some reservations with regards to some of the things that I experiment with? Not everything is good enough to blog about! Lol…

Lunch time!  I think I’ll nibble on some homemade raw granola!  Thanks Meredith for sharing!

Fermented Cashew Cheesecake

Wow! Who would have ever thought that something as ugly as a cashew could be transformed into a decadent desert with a little fungal help! If you haven’t made the time to brew up some Rejuvelac so you can make a fermented nut cheesecake, well, you just haven’t lived! Really. I’ve now made three and everyone that’s tried it has nothing but praise (they like it – really).

After starting my first batch of Rejuvelac (a couple weeks ago), I did a little research to figure out what to do with it. When Googling around, I found The Raw Seed website. Hidden on that sight is an amazing fermented nut cheesecake recipe! It’s got some great pictures too, so I highly recommend stopping by (The Raw Seed Cheesecake). They’ve also got some videos there, but I still haven’t found the time to watch them all the way through. I guess this one is so easy that the videos should have been about 90 seconds long!

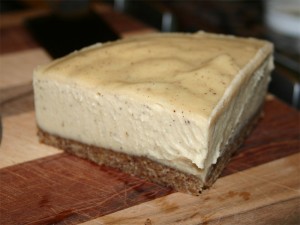
Wha-da-ya-think?

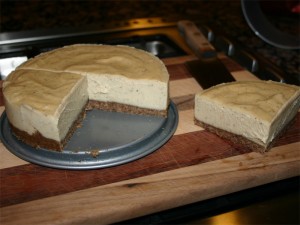
Does that look good or what? That was the bulk of my lunch today!  Yes, I know it’s a quarter of the cake! But it’s only an 8 inch spring-form. This slice is probably about the size of a slice of ‘real’ cheesecake you’d get at The Cheesecake Factory. It’s also loaded with oils so I give it an A+ for keeping me warm in the winter.

This is the third one that I’ve made so far and I’ve already been asked to make a fourth – for a wedding party (of all events). So I’ve learned a bit about it that I can actually share – more than simply the pictures. So here it is…

Process (Recipe):

To start, you’ve got to create the Rejuvelac. The Raw Seed has a little video that outlines the process, or you can look back at what I did here and here. Making good Rejuvelac is key to making this work.

I’ve also soaked 2 cups raw cashews over the day and rinsed them well.

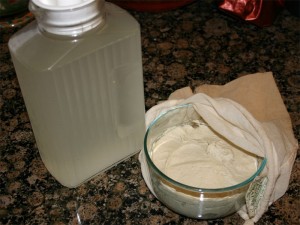
Now, following the recipe outlined at The Raw Seed, I take the two cups soaked cashews, the teaspoon nutritional yeast and 2/3 cup Rejuvelac and blend until it’s smooth as butter.

This is what you see in the bowl. I took the picture as I was wrapping it up so it can ferment for the next 24 hours. I’ve also got an old nut milk bag that I’m wrapping it in so as to keep bad stuff out.

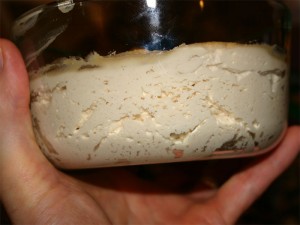
The next day, it looks like this:

Notice all the little ‘air’ pockets around the edge of the bowl. The normally heavy feeling ground up nuts are light a fluffy. It’s spongy!

Next, we process up the crust.

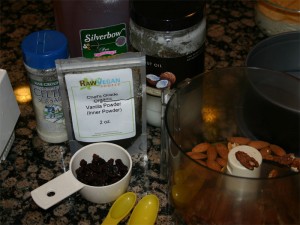
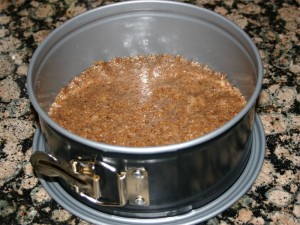
If you look closely, you’ll notice that I’ve got ½ cup almonds, ½ cup pecans, ¼ cup raisins, ½ teaspoon vanilla powder, 1 Tablespoon honey, 1 Tablespoon coconut oil and more than a pinch of salt. This all gets blended in the food processor until it starts to stick. At that point, you press it into a oiled spring-form pan. Looks something like this:

Now we get out the blender to mix the fermented nuts with 2/3 cup liquid coconut oil, ½ cup honey, ½ teaspoon vanilla powder and 1/8th teaspoon salt. Even though the nuts are light a creamy, it’s hard work for the blender to mix. Turn it on and do just that. It’s going to end up rather thick, so you’re not going to get it to run out of the blender. This is something that you’re going to have to dig out.

Once you’ve got it all in the spring-form, smoothen the top and give it a gentle giggle to help it settle. You don’t want air pockets in the cake. Here is what you should end up with.

The pecans give the crust a strong appeal that’s complemented well with caramel. If you have a little latte syrup sitting around, drizzle a bead back and forth over the top as an accent. When I did this, everyone marveled at the presentation for they don’t know me as a chief at all!

This is another desert that I highly recommend. And it’s much easier on the digestion than you might think when you think about eating a cake of all nuts. The Fermentation really changes this. After having tasted fermented cashews, I’ll probably never want them any other way.

Let me know what you think!

Update:

Ok.  I’ve made a few slight modifications to this cheesecake recipe. For starters, I’m now using a full size cheesecake spring-form. The little 8 inch just doesn’t cut it. It’s not BIG enough!

For the crust – I really like pecans and dates. The flavors seem to go better with the fermented cashews. I spell it out like this:

Filling:

  • 3 cups cashews (soaked for 8 hours)
  • 1 tbsp nutritional yeast
  • 1 cup rejuvelac

Split into two halve and blend each half independently. 3 cups cashews is too much for a blender. 1 cup is not enough, so look at running almost two cups, remove a cup or more and then add the remaining nuts. Place this mixture in a bowl, cover with cheesecloth (or nut milk bag) and let stand for 24 hours.

Crust:

  • 1 cup almonds (soaked overnight and let sit)
  • 1/1 cup pecans straight from the freezer
  • About 6 large medjool dates (makes for a sweeter crust)
  • ½+ tsp vanilla powder (get the best you can find)
  • ½ tsp sea salt
  • 1 Tbsp melted coconut oil

Run it in the food processor like shown above and press it into the pan.

Back to filling:

  • 1 cup melted coconut oil
  • 2/3rds cup honey
  • 1 tsp vanilla powder
  • 1/8th tsp Sea Salt
  • Plus fermented cashews

Melt the coconut oil and place it on the blender first. Add honey and then the fermented (bread dough) cashews (then add the remaining ingredients). The order is pretty important. You want the oil first so that as things get spinning it get lubricated. Placing the cashews in first makes it really hard for the blender to suck in the oil.

I guess my spring-form pan is about 12 inches. The resulting cheesecake will have a very thin crust and a cake that’s a bit over an inch high. It’s perfect for the person that complains about large treats after dinner. Just cut it small and it won’t seem too big to anyone!