Raw Chocolate Mousse

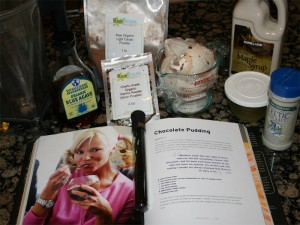
Since today is another snow day, I figured I would share one of my all time favorite recipes. I found this in the book Raw Food Real World by Matthew Kenney and Sarma Melngailis. If you haven’t seen this book, here’s what it looks like so you can pick it up the next time you’re raw book shopping:

If you remember, a long time ago, I posted a picture of the Raw Food Real World Lasagne. It was amazing. If you want to take a trip back on memory lane, see my old father’s day dinner post!

But today is all about the chocolate mousse. If for no other reason, you’ll want to pick up the book just for this recipe!

Maybe it was the sex appeal that Sarma brings to the facing page that makes this just a pit more savory. I guess I also have a bit of a soft spot in my heart for fuzzy pink sweaters. But the pig tails?  Ah, no thanks.  J 

The hardest part about making this recipe is finding the Young Thai Coconuts. I’ve always got my eyes out for a sale, but that doesn’t seem to happen enough. This time, I found a few that looked good and healthy (See How to pick out a good coconut). The big surprise I had came when I opened them and found that there was lots of great coconut meat that I could make mousse with!  Thus, check out the picture in the measuring cup. I opened them earlier in the day, poured a little coconut water over them and wrapped them up so that it would be no problem when it came time to put it all together.

Notice the test-tube in the crease of the book. One change that I make in their recipe is that I use the scraping of one vanilla bean rather than the liquid vanilla extract. Yes, it’s more expensive, but you don’t get any chemical taste in the final spoon full.

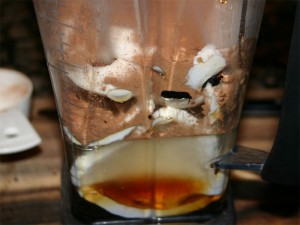
And I love the fact that you just throw everything in the blender and whip it up!

The only thing you really have to look out for is getting coconut shell in the blender. Thus, when you remove the meat from the shell, look it over closely. I’ve missed some shell before and it totally ruins the emotional effect that this dessert lets you experience. You really don’t want to break up the bliss.

I’ve learned that a little goes a long way with this recipe.

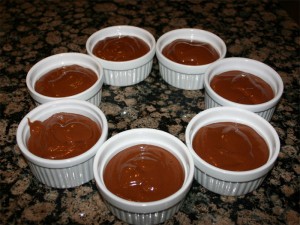
I now pick out reasonably small containers to let it both set up in and serve in. These little ramekins work great.

I can’t wait for the next sale on Young Thai Coconuts just so I can make this dessert again!

Enjoy!

How to pick out a good coconut

Sometimes you come across something that you can totally relate too! This little video from Meredith Frantz (and her boyfriend – from The Raw Seed) has just that. Not for the fact that they are wearing vests on Friday or that they have that stoned look to them, but for the fact that you buy coconuts from Asian markets not Whole Foods!

That comment in this video is so true! The coconuts at Whole Foods just don’t … move. It’s like they buy them just to say they’ve got ‘em. It’s not about making quality nuts available to their customers, but it’s about upholding their image. Thus, I almost always just walk right by them.

The unfortunate thing for me is that the Asian market is now another 3 miles away.  They moved – the wrong direction.

In any case, I’ve included their video for it has a key point in it that anyone buying a raw young coconut will want to learn. Being the spoiler that I am, that information comes at just about 2:45 into the video. The bottom of the coconut will give away the state of the interior.

Without further ado, the video… Oh, watch out for that cleaver she’s flinging around! 

I have to admit that I’m impressed by the way she chops that nut open. My guess is that she’s opened more than just one of those puppies. His technique is a little stiff.

But that’s not the point here. The nuts shouldn’t have dark spots, soft spots, discoloration or splits in the bottom. And the one thing that they didn’t mention is always pick out the heaviest one first! The heavier it is, the more liquid it has in it.

I guess picking out a coconut shouldn’t be all that hard. Just keep the above tips in mind when you go shopping and I’m sure you’ll be satisfied with you chop your way into it.

Raw Coconut Cream Pie

Turns out that this little pie is becoming a staple around here. I love the creaminess of the filling and how it complements the sweet crust. Everything in it mixes perfectly and it really does satisfy any cream pie craving that you might have.

When I first starting making this recipe, I followed the directions explicitly. Now I find that it doesn’t really matter much and you can change things up enough to call it your own!

Originally, the I followed the recipe from this book.

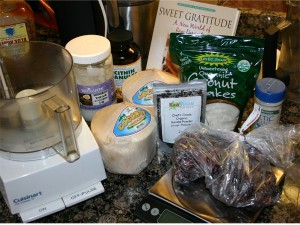
Now I kind of follow what’s in my head. I don’t like it quite as sweet and I like powdered vanilla rather than extract. I also cut back on the salt but add more coconut meat (the best part). The collection of goods that you’ll need to get this one done looks like this:

Notice here I’ve got:

  • 2 young Thai coconuts
  • ¾ cup Raw Coconut oil
  • 2 Tbs Lecithin granules
  • Unsweetened raw organic coconut flakes
  • Chef’s grade organic vanilla powder
  • Celtic Sea Salt
  • Bag of Deglet Noor Dates

Tools:

Cuisinart for processor, small food scale and a Vita-Mix blender. I don’t know how you’d make this recipe without these tools.

Let’s get creating!

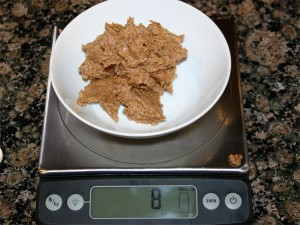
The first thing you’ll need the Cusinart for is to make date paste. I weighed out 8 ounces of Deglet Noor dates before dropping them one by one into the running Cusinart. Because these puppies are so dry, they tend to chop up rather than mush up. You want them mushy, thus you might need to add a bit of water. I added about 1 Tablespoon’s worth.

After scraping the food processor, I got out just about what I put in (water probably made the difference). ½ this paste you’ll use for the crust, the other half to sweeten the filling.

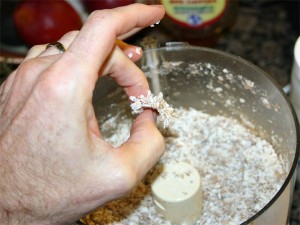
So, move four ounces back to the food processor and add at least 2 cups coconut flakes. At this point, you’ll want to also add about 1 (small) teaspoon vanilla powder and just a pinch of salt. Now we want to process the flakes to mix with the date paste so that it becomes just a little sticky.

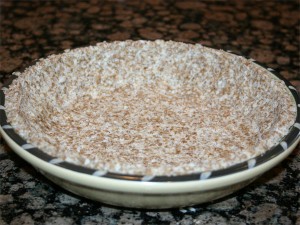
I had to add a little water (maybe a teaspoon’s worth) to get it to stand up like that. At this point, it’s really to move to the pie container. As it turns out, we have some perfect size salad bowls that double as a pie ‘tin’ for this pie.

The secret to working this crust together is to start on the sides. Using one hand, press the mixture into the side of the pan and with the other hand, make sure it doesn’t exceed the height of the bowl. You’ll probably work around the pie a few times getting it just right. When the sides are well formed and just the right thickness, you work on the bottom with whatever is left over.

Now set that aside for a few moments because we’re now going to whip up the filling.

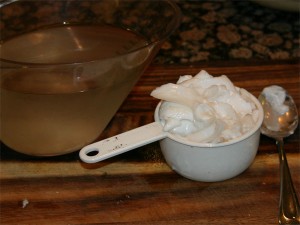
The best part of the pie is the meat! Here, I’ve got just over a cup of meat that I’m going to mix in. This is what I scraped out of those two Young Thai Coconuts. Notice that there is a bit more coconut water than what we’ll use.

To the blender, add two cups coconut water (at room temperature), the meat (shown above), ¾ melted coconut oil, at least 1 teapsoon powdered Vanilla, a big pinch of Celtic Sea Salt, the last 4 ounces date paste and 2 Tbs lecithin granules.

Blend.

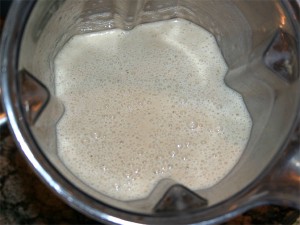
When you start bending, you’ll notice that the top of the mixture will be quite viscous. As the oil really goes to work, the mixture will thin out and almost start dancing in the blender before you’re minute (of counting) is up.

The unfortunate part is that there are a lot of bubbles in the final solution. I try to gently shake some of them out, but when you pure it into the crust, you’ll get bubbles!

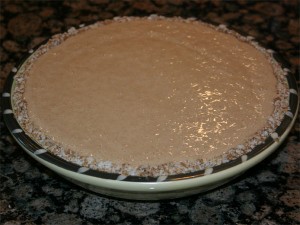
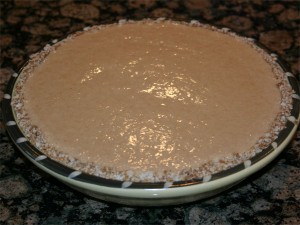
If you’re careful, you can use gravity to remove some of the bubbles. After pouring the mixture into the crust, I gently jiggle the pie so as to make the bubbles rise to the surface. Then I lift the pie a couple millimeters off the counter and let it drop. If it were a metal pan – like a spring form – I’d lift it higher and work it thoroughly until all the bubbles rise and pop. But in this case, I’ve got a ceramic bowl that I have to be really careful with. Thus it’s a delicate process of working the bubbles out for me.

At this point, it goes in the fridge long enough for the coconut oil to congeal and the lecithin to setup. Most the time I simply let it sit overnight.

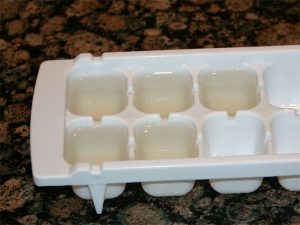
Oh, and don’t forget about the extra coconut water that you might have. If you don’t simply drink it, make ice cubes!

These ice cubes are great for making sorbet!  See my Blueberry Coconut Sorbet, you won’t be sorry!

Blueberry Bliss Cheesecake

I’m excited because not only am I going to be able to show you a beautiful desert, but I’m going to be able to point you to the complete recipe!

This is one of the first raw deserts I learned to make. It’s wonderfully simple and seems to deliver amazing results every time. I’ve served it at Thanksgiving and eaten it for lunch many a times! Yum.

So here it is – Blueberry Bliss!

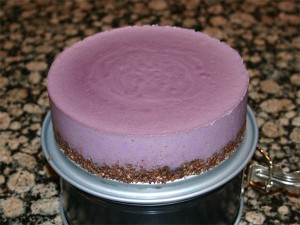
Look at that! Right out of the spring-form!

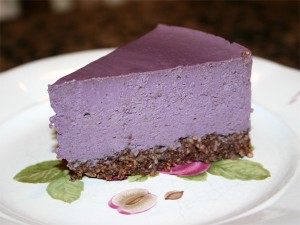
If that’s too much, here’s a little serving.

It’s amazing how the close-up shows all the details. I worked for at least a minute jiggling and dropping this spring-form just after pouring the berry mixture in and I still didn’t get all the bubbles out.

When making this desert, the one thing that I’d recommend more than anything else is to make sure you use the best cashews that you can find. Don’t get anything that’s old. Get whole nuts (beans) as fresh as can be.

Also, I use frozen berries (See my Oh My God – Blueberry Sorbet for a picture of the brand). But, when you use frozen berries, they thaw down to at least ½ size. Thus, I pour 4 cups berries into a measuring cup and place them in the dehydrator until they’ve warmed up to 100 degrees. Thus, with the recipe, I’m using a few more berries then what Carmella uses.

Also note that I also place the cacao butter/coconut mixture in the dehydrator to melt along with the berries.

Without further ado, the best write-up is from the source. The Sunny Raw Kitchen’s Bliss-full Blueberry Cheesecake.

Well, what did you think of her desert?  The blueberries over the top just seem … a little over the top. Thus, you don’t see that in my picture.

I also changed the crust a little simplifying it.

What the heck, I’ve changed it quite a bit. I guess I should include my measurements for comparison.

Crust:

  • ¾ cup soaked almonds
  • ¼ cup coconut flakes
  • 1 tablespoon cacao
  • 1 teaspoon vanilla powder
  • Pinch Celtic Sea Salt
  • 2 Medjhool dates
  • Little squeeze Raw Agave

I guess I don’t really like brazil nuts and I’ve found that I like the coconut flakes a little better than the powdered stuff. I put it all together like she does – using a food processor. With the almonds I soak them for maybe 6-8 hours and then let them dry. You want to work with dry nuts

Filling:

  • 4 cups frozen blueberries
  • 1 cup dry cashews – the best you can find
  • 5 Tbsp melted coconut butter
  • 2 Tbsp melted cacao butter
  • ¼ cup honey
  • 1 Tbsp lemon juice
  • Big pinch of Celtic Sea Salt.

Now, the real trick is getting it creamy without overdoing it. So, I approach the process just a little different than she does. I place the nuts in the blender and give them a whirl. It only takes 20 seconds (or so) before the nuts stick together and let the blade run free. At this point, I add everything else. The juice from the melted blueberries soaks down into the nuts softening them a little while you’re piling everything else on top.

Then, when you actually blend this up, let it run a little longer than you would normally do for smoothies. Remember that you started with warm ingredients, but you don’t want to cook them. Thus, feel the side of the blender as it’s getting creamy and make sure it’s not too hot.

Before pouring it into the spring-form, taste it. You should find yourself licking your fingers!

After you’ve poured the berry mixture into the pan, tap the pan so as to encourage the air bubbles to come to the surface. This might take a little extra coxing, so don’t by distracted by that little bit of mixture that you want to keep tasting!

When it cools, the butter and nuts will set-up giving it that standard cheesecake feel. I normally let it sit overnight.

It’s absolutely a keeper recipe. I make it for lunches!

Enjoy.