Melt in your mouth Raw Granola

I normally don’t like granola. It’s not the taste of it that bothers me but, rather, how my body processes it. Even though I chew everything like a million times, something just doesn’t digest the best as it goes through me. All the power bars that are packed with dense calorie based ‘nutrition’ I usually just leave on the shelf.

Well, the other day I decided to give a raw version a try. I’m not sure what attracted me to the recipe, but it felt like the thing to do so I gave the “It’s RAW granola …. gRAWnola time!!!!” recipe from The Raw Seed website a try.

The thing that stands out about this recipe is that it’s mainly sunflower seeds, pumpkin (squash) seeds and raisins!  No grains, no nuts and a little bit of flavorings. Meredith, from The Raw Seed, calls this recipe Cinnamon Raisin Banana Granola. I would call it Orange Raisin Banana Granola with a hint of cinnamon!

Recipe:

Visit The Raw Seed Websites Granola recipe.

Meredith mentions that “using sprouted seeds is optional.” Well, I took that option.

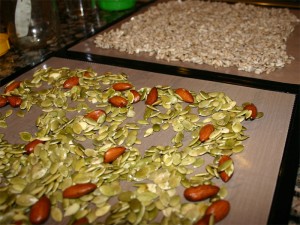
As you can see, I made a little modification to the recipe. Not only did I add a few almonds, but I also added the two cups raisins to water to rehydrate them.

Sticking with the ‘option’ on the recipe, After getting the seeds started and rinsing them off really well, they went straight into the dehydrator until the next day.

I don’t have any pictures of mixing this stuff, but that all happened in the food processor. I ran the seeds just long enough to break some of them down but not all of them.

After placing the dry ingredients in the big mixing bowl, I rain the rest of the ingredients through the Vita-mix. That’s where the soaked raisins really broke down well.

Another thing that I did that was a slight variation on the recipe is that I used a little extra orange juice. Next time I’d probably just through a pealed orange in the mix for the pulp would probably to the mixture good.

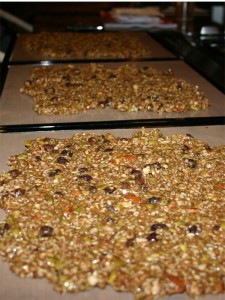
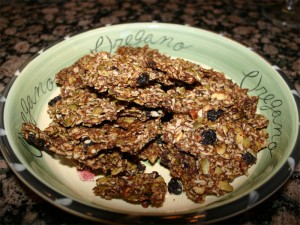
After 12 hours per side, you get crunchy granola!

When Lori tasted this, her eyes lit up. I think I remember her saying something like: Hey, I could eat this stuff! Can you tell she has some reservations with regards to some of the things that I experiment with? Not everything is good enough to blog about! Lol…

Lunch time!  I think I’ll nibble on some homemade raw granola!  Thanks Meredith for sharing!

How to pick out a good coconut

Sometimes you come across something that you can totally relate too! This little video from Meredith Frantz (and her boyfriend – from The Raw Seed) has just that. Not for the fact that they are wearing vests on Friday or that they have that stoned look to them, but for the fact that you buy coconuts from Asian markets not Whole Foods!

That comment in this video is so true! The coconuts at Whole Foods just don’t … move. It’s like they buy them just to say they’ve got ‘em. It’s not about making quality nuts available to their customers, but it’s about upholding their image. Thus, I almost always just walk right by them.

The unfortunate thing for me is that the Asian market is now another 3 miles away.  They moved – the wrong direction.

In any case, I’ve included their video for it has a key point in it that anyone buying a raw young coconut will want to learn. Being the spoiler that I am, that information comes at just about 2:45 into the video. The bottom of the coconut will give away the state of the interior.

Without further ado, the video… Oh, watch out for that cleaver she’s flinging around! 

I have to admit that I’m impressed by the way she chops that nut open. My guess is that she’s opened more than just one of those puppies. His technique is a little stiff.

But that’s not the point here. The nuts shouldn’t have dark spots, soft spots, discoloration or splits in the bottom. And the one thing that they didn’t mention is always pick out the heaviest one first! The heavier it is, the more liquid it has in it.

I guess picking out a coconut shouldn’t be all that hard. Just keep the above tips in mind when you go shopping and I’m sure you’ll be satisfied with you chop your way into it.

Fermented Cashew Cheesecake

Wow! Who would have ever thought that something as ugly as a cashew could be transformed into a decadent desert with a little fungal help! If you haven’t made the time to brew up some Rejuvelac so you can make a fermented nut cheesecake, well, you just haven’t lived! Really. I’ve now made three and everyone that’s tried it has nothing but praise (they like it – really).

After starting my first batch of Rejuvelac (a couple weeks ago), I did a little research to figure out what to do with it. When Googling around, I found The Raw Seed website. Hidden on that sight is an amazing fermented nut cheesecake recipe! It’s got some great pictures too, so I highly recommend stopping by (The Raw Seed Cheesecake). They’ve also got some videos there, but I still haven’t found the time to watch them all the way through. I guess this one is so easy that the videos should have been about 90 seconds long!

Wha-da-ya-think?
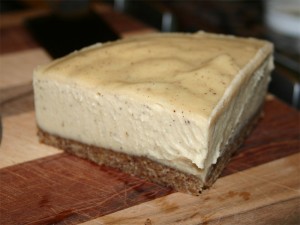
Does that look good or what? That was the bulk of my lunch today!  Yes, I know it’s a quarter of the cake! But it’s only an 8 inch spring-form. This slice is probably about the size of a slice of ‘real’ cheesecake you’d get at The Cheesecake Factory. It’s also loaded with oils so I give it an A+ for keeping me warm in the winter.

This is the third one that I’ve made so far and I’ve already been asked to make a fourth – for a wedding party (of all events). So I’ve learned a bit about it that I can actually share – more than simply the pictures. So here it is…

Process (Recipe):
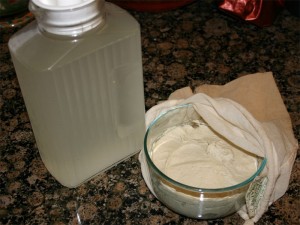
To start, you’ve got to create the Rejuvelac. The Raw Seed has a little video that outlines the process, or you can look back at what I did here and here. Making good Rejuvelac is key to making this work.

I’ve also soaked 2 cups raw cashews over the day and rinsed them well.

Now, following the recipe outlined at The Raw Seed, I take the two cups soaked cashews, the teaspoon nutritional yeast and 2/3 cup Rejuvelac and blend until it’s smooth as butter.

This is what you see in the bowl. I took the picture as I was wrapping it up so it can ferment for the next 24 hours. I’ve also got an old nut milk bag that I’m wrapping it in so as to keep bad stuff out.

The next day, it looks like this:
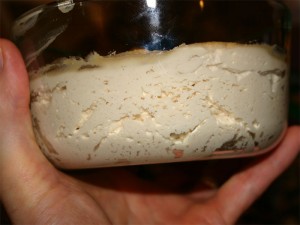
Notice all the little ‘air’ pockets around the edge of the bowl. The normally heavy feeling ground up nuts are light a fluffy. It’s spongy!

Next, we process up the crust.
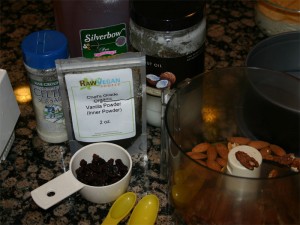
If you look closely, you’ll notice that I’ve got ½ cup almonds, ½ cup pecans, ¼ cup raisins, ½ teaspoon vanilla powder, 1 Tablespoon honey, 1 Tablespoon coconut oil and more than a pinch of salt. This all gets blended in the food processor until it starts to stick. At that point, you press it into a oiled spring-form pan. Looks something like this:
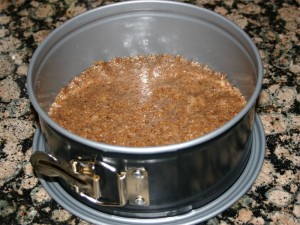
Now we get out the blender to mix the fermented nuts with 2/3 cup liquid coconut oil, ½ cup honey, ½ teaspoon vanilla powder and 1/8th teaspoon salt. Even though the nuts are light a creamy, it’s hard work for the blender to mix. Turn it on and do just that. It’s going to end up rather thick, so you’re not going to get it to run out of the blender. This is something that you’re going to have to dig out.

Once you’ve got it all in the spring-form, smoothen the top and give it a gentle giggle to help it settle. You don’t want air pockets in the cake. Here is what you should end up with.
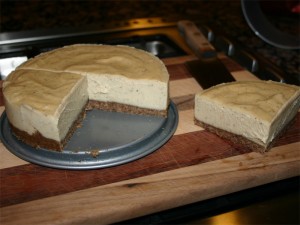
The pecans give the crust a strong appeal that’s complemented well with caramel. If you have a little latte syrup sitting around, drizzle a bead back and forth over the top as an accent. When I did this, everyone marveled at the presentation for they don’t know me as a chief at all!

This is another desert that I highly recommend. And it’s much easier on the digestion than you might think when you think about eating a cake of all nuts. The Fermentation really changes this. After having tasted fermented cashews, I’ll probably never want them any other way.

Let me know what you think!

Update:

Ok.  I’ve made a few slight modifications to this cheesecake recipe. For starters, I’m now using a full size cheesecake spring-form. The little 8 inch just doesn’t cut it. It’s not BIG enough!

For the crust – I really like pecans and dates. The flavors seem to go better with the fermented cashews. I spell it out like this:

Filling:

  • 3 cups cashews (soaked for 8 hours)
  • 1 tbsp nutritional yeast
  • 1 cup rejuvelac

Split into two halve and blend each half independently. 3 cups cashews is too much for a blender. 1 cup is not enough, so look at running almost two cups, remove a cup or more and then add the remaining nuts. Place this mixture in a bowl, cover with cheesecloth (or nut milk bag) and let stand for 24 hours.

Crust:

  • 1 cup almonds (soaked overnight and let sit)
  • 1/1 cup pecans straight from the freezer
  • About 6 large medjool dates (makes for a sweeter crust)
  • ½+ tsp vanilla powder (get the best you can find)
  • ½ tsp sea salt
  • 1 Tbsp melted coconut oil

Run it in the food processor like shown above and press it into the pan.

Back to filling:

  • 1 cup melted coconut oil
  • 2/3rds cup honey
  • 1 tsp vanilla powder
  • 1/8th tsp Sea Salt
  • Plus fermented cashews

Melt the coconut oil and place it on the blender first. Add honey and then the fermented (bread dough) cashews (then add the remaining ingredients). The order is pretty important. You want the oil first so that as things get spinning it get lubricated. Placing the cashews in first makes it really hard for the blender to suck in the oil.

I guess my spring-form pan is about 12 inches. The resulting cheesecake will have a very thin crust and a cake that’s a bit over an inch high. It’s perfect for the person that complains about large treats after dinner. Just cut it small and it won’t seem too big to anyone!

ORMUS based Rejuvelac – it works!

It’s alive!

Turns out that it’s not as hard as it first appears to make Rejuvelac! Mainly just takes time for there is very little work involved. And the taste, well, it’s not bad! It definitely doesn’t have the impact on me as the Kefir Apple juice has on Natasha from Raw Radiant Health! It’s pleasantly yeasty, with a little tang. This is something that’s actually doable!

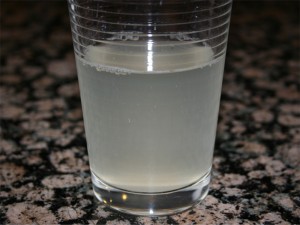
As evidence, here is what it looks like:

Notice the light white color and the bubbles at the top. When this is brewing, you can see the motion in the water. When you touch the container, the bubbles all kick loose and rise to the top. My second batch looks to have a bit of a darker color to it.

Here’s what I did.

Recipe:

  • 1 cup hard red winter wheat
  • Couple quarts distilled water
  • 3 Tablespoons ORMUS (Sea Salt Precipitate)

I followed the common sprouting instructions for the wheat. That entails soaking the wheat for 8 or so hours, rinsing and letting sprout for another 48. I’ve got a standard quart size mason jar with a sprouting lid that works just fine. (I’ve got a picture of the sprouting jar here.) Then, after rinsing them a last time, I poured the seeds; roots, stems and seeds into a two quart jar for brewing. Using an eyedropper, I measured about 3 tablespoons wet ORMUS onto the wheat and then covered with distilled water. I believe the last time I tried to do this I used regular tap water – which most likely was the reason for the bad tasting finished product. You basically want to make sure you don’t kill the wild yeasts on the wheat by overdoing any chlorine. Once the jar was full, I lightly placed the lid on and set it on top of the fridge to brew. When I felt like it, I gently turned the bottle to mix up the water just a little.

After brewing for 48 hours or so, I stirred lightly and poured most of the water into the serving container that I could store in the fridge. I purposely left some ORMUS that settled on the bottom and some extra fluid to turbo-charge the second brewing. I figure that shouldn’t take but 24 hours.

One of the better descriptions that I found for brewing can be found on the Superfoods~for~Superhealth website in their Rejuvelac Recipe page. The only thing that I did differently is that I didn’t blend it before hand. That just seemed like too much work for this simple drink. And, because it has ORMUS in it, I really wanted to see how it would be absorbed by the micro organisms.

I wish I’d taken a picture of the mixture an hour or so after I set it up to brew. The ORMUS that was in suspension settled out on the top layer of wheat giving it a ghostly – snowy look. As the yeast went to work, the ORMUS thinned out and nearly disappeared. A small layer ended up on the bottom of the jar, but I’d guess the rest went into solution – which is exactly what I set out to do.

Now comes the second half of the experiment – the consuming of the tonic! So far, it’s not bad. Actually, it’s pretty good. In a couple weeks I’ll update the story, but for now, it seems to agree with me.

Oh, as a side note, the probiotics that I’ve been taking, well, I set out to test them. I found that, because they are yeasts (just like Rejuvelac) they will grow in a sugar water mixture. Well, that is, if you have a good – living – probiotic!  At the same time that I started the Rejuvelac, I also mixed up some sugar water and placed the contents of a probiotic capsle in it. The Rejuvelac is done, and I can’t see any growth what so ever with the probiotic starter! What really makes me feel bad is that I spent 33 bucks on that jar and I know it’s all just simply dead. Looks like I’ll have to try to get my money back.

Hope you find the motivation to start and make your own Rejuvelac!

Oh, a thought just came to me! I’ve been meaning to make some raw seed cheese, well, I know have the rejuvelac that I can use as a starter. Looks like I’m going to have something else to do this next weekend!

Take care.

RawRadiantHealth and Apple Juice Kefir

Went looking for another fermented concoction that I would whip together other than Rejuvelac and once again found Kefir drinks. I’m not into milk, so I looked around at the water and coconut versions. I have to say that it looks pretty easy, but I’m starting to wonder…

The reason?

Well, it’s because I’ve watched this video from Natasha from Raw Radiant Health. It’s actually a pretty nice spin on the water version for she uses the juice of apples. It all looks great until you get to the 5:40 mark in this video. The look in her face when she smells it – Oh – it seems the truth radiates out!  Lol.

Pay particular close attention just after she drinks it! Notice the vibes she gives out just before she says (6:12) “and I drink it down. Actually it’s quite nice. It’s not that bad…” Ah!  I can’t help but laugh every time! She can’t help but shutter! Just like when you drink wheatgrass! Lol…

I won’t let that deter me!  I’m putting Kifer on my shopping list. Maybe in a few days, I’ll be drinking a fresh juice ORMUS kefir tea!  We shall see, and I guarantee that I won’t make a video out of it!