Fermented Cashew Cheesecake

Wow! Who would have ever thought that something as ugly as a cashew could be transformed into a decadent desert with a little fungal help! If you haven’t made the time to brew up some Rejuvelac so you can make a fermented nut cheesecake, well, you just haven’t lived! Really. I’ve now made three and everyone that’s tried it has nothing but praise (they like it – really).

After starting my first batch of Rejuvelac (a couple weeks ago), I did a little research to figure out what to do with it. When Googling around, I found The Raw Seed website. Hidden on that sight is an amazing fermented nut cheesecake recipe! It’s got some great pictures too, so I highly recommend stopping by (The Raw Seed Cheesecake). They’ve also got some videos there, but I still haven’t found the time to watch them all the way through. I guess this one is so easy that the videos should have been about 90 seconds long!

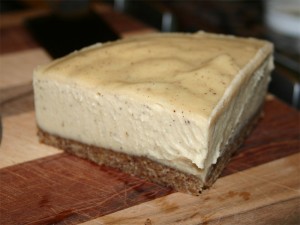
Wha-da-ya-think?

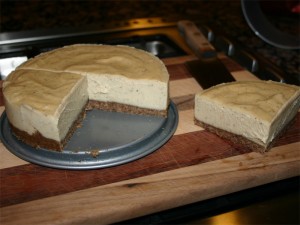
Does that look good or what? That was the bulk of my lunch today!  Yes, I know it’s a quarter of the cake! But it’s only an 8 inch spring-form. This slice is probably about the size of a slice of ‘real’ cheesecake you’d get at The Cheesecake Factory. It’s also loaded with oils so I give it an A+ for keeping me warm in the winter.

This is the third one that I’ve made so far and I’ve already been asked to make a fourth – for a wedding party (of all events). So I’ve learned a bit about it that I can actually share – more than simply the pictures. So here it is…

Process (Recipe):

To start, you’ve got to create the Rejuvelac. The Raw Seed has a little video that outlines the process, or you can look back at what I did here and here. Making good Rejuvelac is key to making this work.

I’ve also soaked 2 cups raw cashews over the day and rinsed them well.

Now, following the recipe outlined at The Raw Seed, I take the two cups soaked cashews, the teaspoon nutritional yeast and 2/3 cup Rejuvelac and blend until it’s smooth as butter.

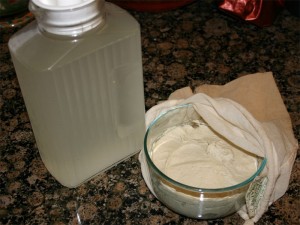
This is what you see in the bowl. I took the picture as I was wrapping it up so it can ferment for the next 24 hours. I’ve also got an old nut milk bag that I’m wrapping it in so as to keep bad stuff out.

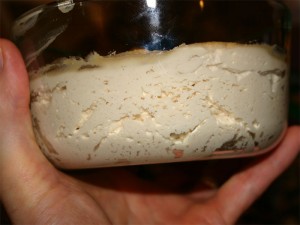
The next day, it looks like this:

Notice all the little ‘air’ pockets around the edge of the bowl. The normally heavy feeling ground up nuts are light a fluffy. It’s spongy!

Next, we process up the crust.

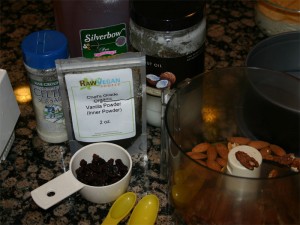
If you look closely, you’ll notice that I’ve got ½ cup almonds, ½ cup pecans, ¼ cup raisins, ½ teaspoon vanilla powder, 1 Tablespoon honey, 1 Tablespoon coconut oil and more than a pinch of salt. This all gets blended in the food processor until it starts to stick. At that point, you press it into a oiled spring-form pan. Looks something like this:
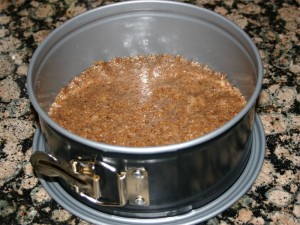
Now we get out the blender to mix the fermented nuts with 2/3 cup liquid coconut oil, ½ cup honey, ½ teaspoon vanilla powder and 1/8th teaspoon salt. Even though the nuts are light a creamy, it’s hard work for the blender to mix. Turn it on and do just that. It’s going to end up rather thick, so you’re not going to get it to run out of the blender. This is something that you’re going to have to dig out.

Once you’ve got it all in the spring-form, smoothen the top and give it a gentle giggle to help it settle. You don’t want air pockets in the cake. Here is what you should end up with.

The pecans give the crust a strong appeal that’s complemented well with caramel. If you have a little latte syrup sitting around, drizzle a bead back and forth over the top as an accent. When I did this, everyone marveled at the presentation for they don’t know me as a chief at all!

This is another desert that I highly recommend. And it’s much easier on the digestion than you might think when you think about eating a cake of all nuts. The Fermentation really changes this. After having tasted fermented cashews, I’ll probably never want them any other way.

Let me know what you think!

Update:

Ok.  I’ve made a few slight modifications to this cheesecake recipe. For starters, I’m now using a full size cheesecake spring-form. The little 8 inch just doesn’t cut it. It’s not BIG enough!

For the crust – I really like pecans and dates. The flavors seem to go better with the fermented cashews. I spell it out like this:

Filling:

  • 3 cups cashews (soaked for 8 hours)
  • 1 tbsp nutritional yeast
  • 1 cup rejuvelac

Split into two halve and blend each half independently. 3 cups cashews is too much for a blender. 1 cup is not enough, so look at running almost two cups, remove a cup or more and then add the remaining nuts. Place this mixture in a bowl, cover with cheesecloth (or nut milk bag) and let stand for 24 hours.

Crust:

  • 1 cup almonds (soaked overnight and let sit)
  • 1/1 cup pecans straight from the freezer
  • About 6 large medjool dates (makes for a sweeter crust)
  • ½+ tsp vanilla powder (get the best you can find)
  • ½ tsp sea salt
  • 1 Tbsp melted coconut oil

Run it in the food processor like shown above and press it into the pan.

Back to filling:

  • 1 cup melted coconut oil
  • 2/3rds cup honey
  • 1 tsp vanilla powder
  • 1/8th tsp Sea Salt
  • Plus fermented cashews

Melt the coconut oil and place it on the blender first. Add honey and then the fermented (bread dough) cashews (then add the remaining ingredients). The order is pretty important. You want the oil first so that as things get spinning it get lubricated. Placing the cashews in first makes it really hard for the blender to suck in the oil.

I guess my spring-form pan is about 12 inches. The resulting cheesecake will have a very thin crust and a cake that’s a bit over an inch high. It’s perfect for the person that complains about large treats after dinner. Just cut it small and it won’t seem too big to anyone!

Amazing Peach Sorbet

This recipe is so simple and delicious that anyone should be able to whip it up in just a few minutes. I guarantee that it will take you ten times longer to eat this than what it takes to put it together for the flavor is to delicate that you’ll want to savor every spoonful.

Be prepared, for this will make a meal!

Recipe:

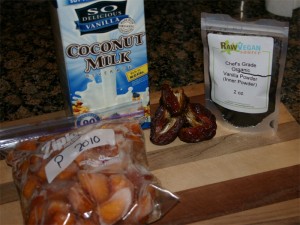
  • 1 cup coconut milk
  • 4-5 large medjool dates (pitted)
  • ½ to ¾ tsp vanilla powder
  • ¾ bag of frozen peaches

First thing to notice here is that I prepared last summer! When boxes of peaches came on for ‘cheap’ I bought a bunch and saved them in the freezer. Each quart size bag as the equivalent of eight medium peaches so this recipe calls for about six. Note that the skins and pits have been removed so what comes out of the bag is pure peach ‘meat’.

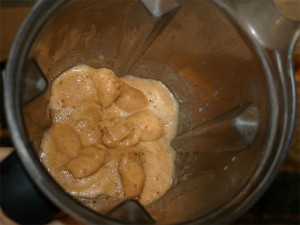
Add the coconut milk into your 3-horse power blender (I strongly advise that you only use something that really has the muscle to get through this), drop in the dates, about a teaspoon vanilla powder and then about 6 frozen peaches. I use a knife break apart the frozen block of peaches. I make sure each piece I break off is no bigger than about ½ a peach (size wise – large ice cube size).

With all this in the blender you’ll want to start out on about 4 or 5 and use the tamper to press the frozen peach down into the blades. This is pretty hard to do. You’ll almost feel like standing on it in order to force the peaches down. As soon as the mixture starts to grip in, start counting in your head and turn the blender above 7. Quickly work the peaches down with the tamper and make sure to not let it develop an air bubble down at the blades. This hectic grinding process shouldn’t take more than 30 seconds. If so, you’ll end up with a milk shake rather than ice cream.

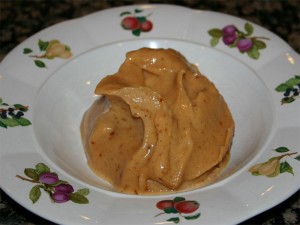
The little specs that you see in this mixture is the dates. Yum!

This six peach mixture makes two beautifully decadent servings. You’ll want to savor every bite. The little bits of dates come across as little cold sweet carmelly tidbits.

I highly recommend this desert (meal) and I believe you will too.

Let me know what you think if you try it!

Cherry Swiss chard Smoothie with Cacao

It’s been a while since I posted a smoothie recipe, so it looks like today is a great day to share with the world a cherry concoction with one of my favorite base ingredients – Honeydew melon! If there’s one thing that I’ve learned that makes a smoothie really stand out, it’s the liquid base that you use. To me, water just doesn’t cut it.

I know all the purists state that the green smoothie that you make should  be as simple as possible. But if it doesn’t taste fantastic, where are you going to find the motivation to keep making them? I mean, really think about it. If you’re going out of your way to make something that’s generally not cheap, wouldn’t you really want to make it enjoyable?

Well, this one is!

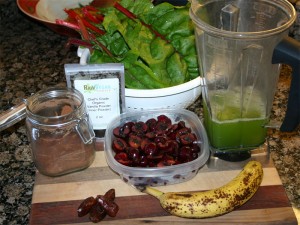
  • About 1 ½ cups fresh pitted cherries
  • 1 banana
  • 1 ½ cups fresh honeydew melon juice
  • 4 little dates
  • About a heaping spoon full raw cacao
  • Small amount Vanilla powder (just part of a teaspoon)
  • One bowl garden fresh Swiss chard

For this year, this recipe is being posted after cherry season has come and gone, but if you were lucky enough to store some away, you’ll still be able to make it while the Honeydew melon are plentiful. Swiss chard can still be found in stores (as it can year round) so that shouldn’t be a problem.

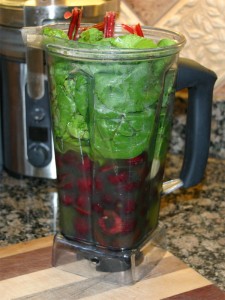
Take note that this quantity will fill the blender!

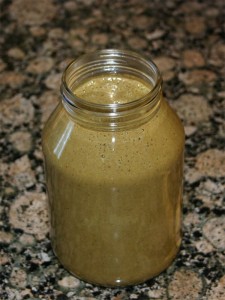
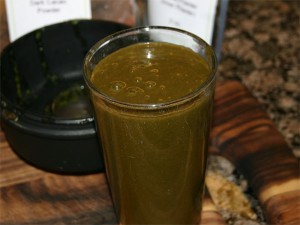
This one always turns out brown from the mixture of green and red. And, if you look close, you’ll be able to see that I didn’t run this one as long as I normally do – there are little pieces of cherry still visible. Yum. Give it a try and let me know what you think!

Cherry Chocolate Swiss chard Smoothie

Well, it’s been a little while since I’ve had the opportunity to share on the blog here. The road has taken many-a-turns, but I’ve barely been able to sit down and relax for a couple weeks now. If it’s not one thing, it’s another.

Fortunately, I’ve been able to shrug off the stress. Could it be that the green smoothies are helping? Maybe it’s the fresh garden greens. But in any case, as long as I’m still feeling good, it doesn’t matter what’s the source of the goodness really is. Sometimes I like to think that it’s the time spent weeding and watering the garden. Other times, it’s just breathing the fresh air on the back deck while listening to the birds singing in the trees.

Sometimes, you can’t help but wonder if it’s the anandamide in the cacao that I’ve added to this smoothie!

Melon juice makes this one!

So here we go.

  • Almost 2 cups Honeydew melon juice
  • About 2 cups pitted cherries
  • One banana
  • Four little dates
  • A spoon full cacao
  • About ¼ teaspoon vanilla powder
  • Bunch of garden fresh Swiss chard

Add everything into the blender starting with the wettest stuff first.

Looks like half fruit

Keep the speed fairly low until you get the mixture to start turning. After that, flip it on hit and count to about 60.

The creamy result

The end result is amazingly creamy with a full cherry BANG! It’s like a cherry tootsie pop. The Honey drew draws out the favor of the fresh cherries to really make them stand out.

This recipe is a total keeper for me. It’s too bad that I don’t have a larger store of cherries, for I’d be making this one way more often. Yet, then again, if I simply made this one over and over again, I’d miss out on all the other great fruit that comes out midsummer!

Planted some more lettuce, spinach and beets with the intention of making those my late fall smoothie greens. Hope they come up in this heat.

Enjoy.

Mint-Chocolate Smoothie

If fresh fruit and greens it not your thing, mint-chocolate might be what the doctor’s calling for! I’m thankful to have a couple different types of mint growing in the garden, and as it turns out, this variety of spearmint is coming on strong right now. It’s amazingly refreshing when added to a smoothie and, as luck would have it, it doesn’t take much.

What I absolutely love about this smoothie is the fresh garden lettuce! Yes. It’s been a cold wet spring that there was absolutely no sunlight for growing – just enough to survive. The zucchini plants that I put in in may just sat there for more than a month. It wasn’t until the clouds parted that the plants actually started to grow. And, now that the sun has arrived, I’ve got a bounty of lettuce. These leaves are delicately succulent with no bitters. They’re so good, you could just graze your want through the garden – which is what I did today for lunch.

In any case, I had company over this morning and offered them a green smoothie. Being grateful guests, they willingly agreed to whatever I wanted to make. Knowing that one of my guests has a love affair with chocolate, I decided to sneak in just a little:

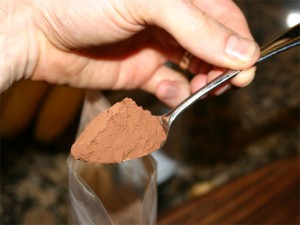
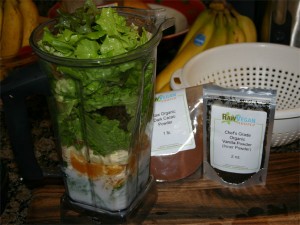
Little cacao goes a long way

And as you can see, it really wasn’t much. But the combination of flavors all mixed together to make for a mouth watering delight.

Mint-Chocolate Lettuce Smoothie

Love that garden lettuce

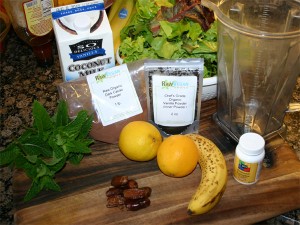
Clockwise from left (sort of):

Add milk, probiotic, dates to blender. Peal leaves off mint stocks and use only the leaves. Peal oranges and make sure no seeds make it into the blender. Add bananas and then stuff in the lettuce.

It all fit!

It’s hard to imagine that that entire bowl of lettuce fit into the blender at one time. It took a little packing, but it wasn’t too bad.

Blend for about 60 seconds. You’ll want to start out slow  and get the greens turning before you whip it up to high for the 60 seconds.

When good and smooth, add the little spoonful of cacao and about ¼ teaspoon vanilla. It really doesn’t take much vanilla at all. Blend for a couple seconds so the powders mix in.

Serve.

Just part of the results

With the volume from the oranges, bananas and coconut milk, the end result was nearly 8 cups. After using the nice glasses for the guests, I ended up with what was left over. It was probably 2 cups that tasted great and went down smooth.

I’m going to have to get me some descent party glasses that I can use for breakfast on the weekends. As much as I love me quart size jar (with lid), I don’t really need it around the house on a lazy Sunday morning.

If you love mint and chocolate, you’ll probably love this one. Life’s too short to not give it a try!

Enjoy.