Blueberry Coconut Sorbet

Looks like blueberry treats are the in thing for me this week.  Lol.  I wonder if I’ll start turning blue like the bad girl in the movie Willy Wonka and the Chocolate Factory? As it turns out, I drank a little too much carrot juice last spring and noticed that my skin started to pick up the color of carrots. I think I’d rather turn blue.

This Blueberry Sorbet is to die for! When I served this to my daughter a couple days ago, her first words where “Oh my God” as the semi-frozen cream melted in her mouth. She couldn’t get over how fresh it tasted. It’s definitely decadent.

I’ve been making this for a while and it freezes great. If you make too much (which I try to always do) you just pour it into a Tupperware container (or Glad or whatever) and place it in the freezer. Make sure you freeze it in single serving sizes because it doesn’t serve up like ice cream.

So here we go. I will assure you that it’s definitely worth your time here.
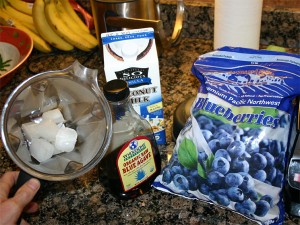
The Young Thai Coconut water ice cubes make this!

The list of ingredients is really simple:

  • 6 Young Thai Coconut water ice cubes
  • ½ – ¾ cup coconut milk (vanilla flavor)
  • Frozen blueberries
  • Raw Agave

Ok, this one will take a little creative writing for I don’t normally measure how much I use of everything when I whip this up. Thus the next picture may help.
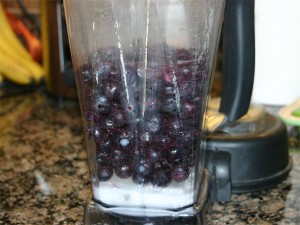
4 cups berries, 3/4 up coconut milk (I think), 6 ice cubes and agave

Looks like I put in about four cups frozen berries. Because they are hard and cold, they will blend down a bit. I think the finished amount was about 3 cups. With the agave, you put in as much as you would like – for me, it’s a squirt about 2 seconds log. I would guess about 2 tablespoons worth.

When blending, start slow and work your way up (speed wise). You’ll definitely have to work this one. The berries will not want to drop into the blades so you’ll have to coax them. I end up turning the blender on and off a number of times as I work this mixture with the Vita-mix supplied plunger.

But the end result is definitely worth it!
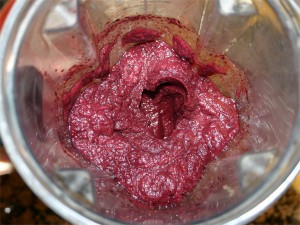
Just Amazing!

The real trick with this one is the young Thai Coconut milk (water) that you freeze into ice cubes. The recipe is definitely not the same if you pass on this process. Thus, the next time you make Coconut Cream Pie, save the extra water in ice cube trays knowing that it won’t be long before you’ll be making this amazing sorbet! Also note that the Coconut Cream Pie posting has information about opening coconuts that you might want to review if you haven’t opened them before.

I have to admit that the best part about making this recipe is that it’s really fast. You don’t have to soak anything or thaw anything, you just drop it all in and blend it up.

This frozen blueberry roll that I’ve been on makes me think that I’ve got to get to the store and buy some more fresh fruit! It’s cherry season and I shouldn’t be spending my time with frozen stuff. The fresh stuff only (really) comes around for a short time every year. I’ve got to take advantage of it.

Try this and let me know what you think.

Blueberry Bliss Cheesecake

I’m excited because not only am I going to be able to show you a beautiful desert, but I’m going to be able to point you to the complete recipe!

This is one of the first raw deserts I learned to make. It’s wonderfully simple and seems to deliver amazing results every time. I’ve served it at Thanksgiving and eaten it for lunch many a times! Yum.

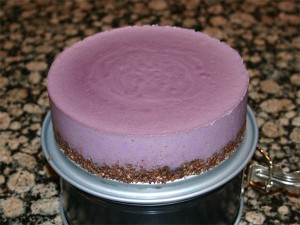
So here it is – Blueberry Bliss!

Look at that! Right out of the spring-form!

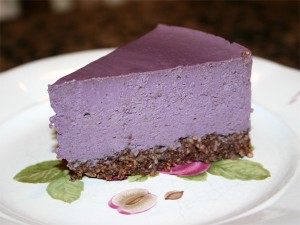
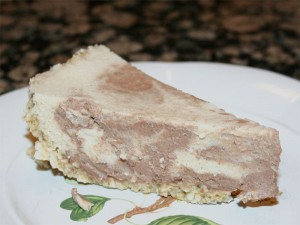
If that’s too much, here’s a little serving.

It’s amazing how the close-up shows all the details. I worked for at least a minute jiggling and dropping this spring-form just after pouring the berry mixture in and I still didn’t get all the bubbles out.

When making this desert, the one thing that I’d recommend more than anything else is to make sure you use the best cashews that you can find. Don’t get anything that’s old. Get whole nuts (beans) as fresh as can be.

Also, I use frozen berries (See my Oh My God – Blueberry Sorbet for a picture of the brand). But, when you use frozen berries, they thaw down to at least ½ size. Thus, I pour 4 cups berries into a measuring cup and place them in the dehydrator until they’ve warmed up to 100 degrees. Thus, with the recipe, I’m using a few more berries then what Carmella uses.

Also note that I also place the cacao butter/coconut mixture in the dehydrator to melt along with the berries.

Without further ado, the best write-up is from the source. The Sunny Raw Kitchen’s Bliss-full Blueberry Cheesecake.

Well, what did you think of her desert?  The blueberries over the top just seem … a little over the top. Thus, you don’t see that in my picture.

I also changed the crust a little simplifying it.

What the heck, I’ve changed it quite a bit. I guess I should include my measurements for comparison.

Crust:

  • ¾ cup soaked almonds
  • ¼ cup coconut flakes
  • 1 tablespoon cacao
  • 1 teaspoon vanilla powder
  • Pinch Celtic Sea Salt
  • 2 Medjhool dates
  • Little squeeze Raw Agave

I guess I don’t really like brazil nuts and I’ve found that I like the coconut flakes a little better than the powdered stuff. I put it all together like she does – using a food processor. With the almonds I soak them for maybe 6-8 hours and then let them dry. You want to work with dry nuts

Filling:

  • 4 cups frozen blueberries
  • 1 cup dry cashews – the best you can find
  • 5 Tbsp melted coconut butter
  • 2 Tbsp melted cacao butter
  • ¼ cup honey
  • 1 Tbsp lemon juice
  • Big pinch of Celtic Sea Salt.

Now, the real trick is getting it creamy without overdoing it. So, I approach the process just a little different than she does. I place the nuts in the blender and give them a whirl. It only takes 20 seconds (or so) before the nuts stick together and let the blade run free. At this point, I add everything else. The juice from the melted blueberries soaks down into the nuts softening them a little while you’re piling everything else on top.

Then, when you actually blend this up, let it run a little longer than you would normally do for smoothies. Remember that you started with warm ingredients, but you don’t want to cook them. Thus, feel the side of the blender as it’s getting creamy and make sure it’s not too hot.

Before pouring it into the spring-form, taste it. You should find yourself licking your fingers!

After you’ve poured the berry mixture into the pan, tap the pan so as to encourage the air bubbles to come to the surface. This might take a little extra coxing, so don’t by distracted by that little bit of mixture that you want to keep tasting!

When it cools, the butter and nuts will set-up giving it that standard cheesecake feel. I normally let it sit overnight.

It’s absolutely a keeper recipe. I make it for lunches!

Enjoy.

Father’s day dinner – Raw Lasagne!

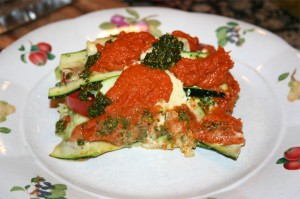
This is by far, way more than I’d expected for father’s day. Wow. I was served the world famous Raw Food Real World Zucchini and Green Zebra Tomato Lasagne for dinner. And yes it’s spelt Lasagne rather than Lasagna. This meal is everything it’s cracked up to be and more. Love the flavors that all mix together and love how filling it is. You’d never expect that from a pile of veggies, but this casserole packs a punch.

Yum.

Lori made this for me and it was her first attempt at putting together a raw main course. Take a look at how nice it turned out.

Doesn't that look beautiful?

Dang. It smells a world better than what the book shows. Lol.

At this point, I’ve found two recipes that are definite keepers from this book.

The second one is the Chocolate Pudding. Double wow. I’ve made that up a few times now and it doesn’t get old. Last time I made it I used frozen Young Thai Coconut meat and frozen Coconut water (ice cubes) and it worked great!

I guess it’s time to search this book for the third recipe that’ll knock my socks off.

Its harvest time: Drying herbs

I love herbs! I love growing them. I love smelling them. I love harvesting more than I can consume and I love eating them.

We’re now in the middle of June and today was harvest day; the day I cut back the oregano and shape it for the summer growth. A few years ago, I picked up a couple plants of common oregano at the nursery in little three inch containers. I planted them in the herb garden, a place just outside the master bedroom door, where there is a little spot of earth that gets full southern exposure to sunlight and watered when the sprinkler kicks in.

After the first year, I bent over some of the new growth and buried the branches underground in order to get the plant to sprout roots on the new limbs. After the roots were big enough to support the new plant, I severed the link between the mother plant and the new start. Now I’ve got Oregano plants all over the place! It doesn’t take long to fill the garden (that is, if you don’t give living plants away).

Oregano is best if you harvest the leaves when they are still relatively young. I like to do it before the first flowering in the spring. Thus today was a perfect day to cut it back. I filled three plastic grocery bags with cuttings and gave one bag to some close friends. The other two were left for me to dry and prep for usage.

It’s actually a lot more fun than you might think going through the harvesting process and hanging your herb to dry. During the cutting, I take good kitchen scissors and cut the branches just below half way. You want to leave enough leaves on the branch that the plant will continue to grow, but you want to have clipping that are long enough to hang. You want the freshest leaves to dry and use. Make sure you clip on a relatively dry day.

Today was hot and sunny. The plants where clean and dry. Just Perfect.

To properly cure the clippings you need a reasonably dark dry place to hang the herbs for a few weeks. You’ll know they are dry enough when the leave crack when you touch them. You’ll also want a good collection of rubber bands.

Here is how I dry Oregano, mint, basil and just about anything else that tickles my fancy.

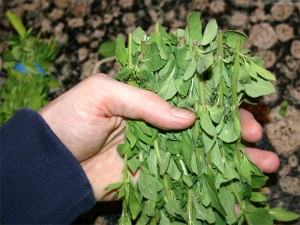
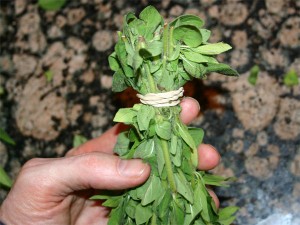
To start with, line your clippings up so the ends are all pretty event. Kind of like this:

When you’ve got a collection of stems that fit nicely in the circle that is formed between your index finger and thumb, you’ve got just about the right amount. With that bunch, wrap a rubber band around it. It might look like this:

After you’ve bunched up your harvest, you need to hang them in a dry place with no direct sunlight. I use my garage. I’ve strung up a piece of garden twine that’s about 10 feet long that’s high enough that you can walk under without touching the hanging herbs.

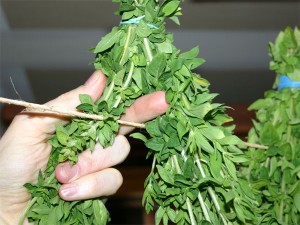
To place the herbs on the twine, I get an old chair that I keep in the garage just for this reason so that I can reach up high enough to set the bunches over the string. To do this, I split the bunch just about in half and work the leaves apart up to nearly the rubber band and then place the plant upside down over the string. This next picture pretty much sums up the process.

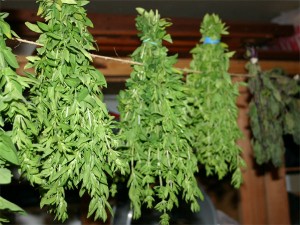
As you can see in the following picture, I space them far enough apart so that they don’t touch.

And if you look closely in the above picture, you’ll not only see the newly harvested oregano that’s being hung, but you’ll see some spearmint that I hung up about two weeks ago in the background. I’ve got a great harvest of spearmint this year. I love it fresh in green smoothies, tea is a second favorite.

Once it’s hung for a few weeks you’ll know it’s dry when the leaves crackle when you touch them. At that point you’ll want to store them for later use. What I use are paper bags. The paper bags you have to ask for when shopping; not the plastic bags. These paper bags keep the herbs dark and wick away any last bits of moisture.

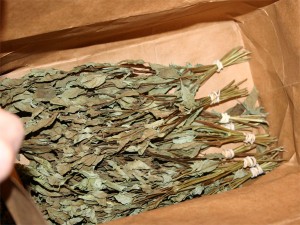
Here is a collection of basil that I dried last year.

Notice that I still haven’t taken the rubber bands off. I guess I got lazy last fall. Normally what I’ll do is unwrap the rubber bands and then strip the leaves off the steam while it’s all in the bag. The steams I’ll throw away and the leaves I’ll keep in the bag for long term storage. The basil that we’ll use for cooking (and what not) I keep stored in a glass mason jar in the herb cabinet. When that jar gets low, I simply refill it from this storage bag.

When it comes to drying basil, I always look for the best looking organic plants at the Saturday market when the plants are in season. When they look good, I’ll buy at least 10 bunches. That’s just about enough to last a year.

This oregano will be more than we’ll consume. That means I’ll be able to give gifts to people! I love sharing the abundance in my life. This is just another way that I get to do this.

If you’ve got a little land, put in an oregano plant and get it to produce a few brothers and sisters. Even if you don’t have full sunlight, these plants are hardy so you should get a pretty good harvest every spring. If you are as lucky as I am, drying it is a pie-of-cake.

Sweet Gratitude’s Coconut Cream Pie

Little slice of heaven

The Pecan Turtle Cheesecake doesn’t compare to this decadent pie! Lori took one bite and her eyes lit up. I think her words where something like: “holy smokes, this is by far the best desert that you’ve made yet.” I think she shook the spoon at me and raised an eyebrow. I have to admit that it’s funny thinking of Lori this way.

But wow! Every bite melts in your mouth and what’s left over is a soft chew of coconut flakes that have been moistened by the fresh coconut milk.

Oh, the fresh coconut milk. I swear that my first experiencing with coconut milk left a sour taste in my mouth. Thinking about it now, I’ll bet that it was literally soured. Yuk. I can remember dumping it out and then trying the meat of the nut. Double yuk.

Yet, here we are today and I’m buying Young Thai Coconuts from WholeFoods for 3 bucks a piece. That soured taste has worn off and I’m a bit more discerning regarding what nut I bring home.

I have to admit that the most exciting part of making the desert is the opening of the coconut. It’s like chopping wood on the kitchen counter. Lord knows I’ve chopped enough fir, maple and alder, now I’m hacking at palm seeds!

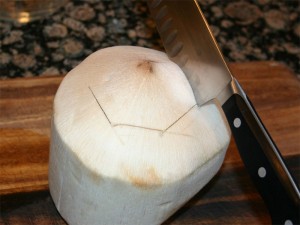
Now just tilt the knife sideways

It’s actually pretty easy to open these things. I’m not sure where I saw someone open one of these a number of months back, but they just hacked around the nut (just like shown in the picture) until the top popped off. I’ve been doing this for a while now and I can attest to the fact that it’s easy. The only real guidance I’d provide is to really use the heel of the knife, again, like shown in the picture.

Better yet, I’ve found a short video that really sums up the process. And, it looks even easier than what I first learned.

I love how easy they’ve made this look. Next time, I’m definitely going to shave the top and give it one simple chop with the chief knife.

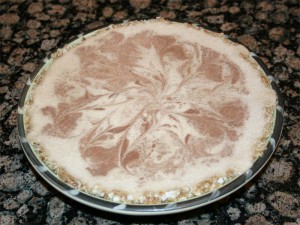
Had to show the swirl

I wish I could invite you all over for a early birthday party and we’d celebrate with this coconut cream pie.

I’m going to keep looking through that book until I find another recipe that’s even better. I’ll let you know if I find something. If you already know what I should make, I’d love to hear from you.

Meanwhile, it’s back to relaxing. It’s been another long day and all I really want to do it turn a few word filled pages until I pass out.