Sesame Milk

There’s just something about sesame milk that keeps me coming back for more. It’s a little bitter, but it could be because of the mineral content, calcium in particular. Did a quick Google search for nutritional information and found this. The Acid Alkaline charts show the dry seeds as being slightly alkaline, but as we’ve all learned sprouting seeds tips them heavily into the alkaline category!

Now the trick is to make them something that you want to ingest. I don’t really like sesame seeds dry. It takes too much work to chew. Try placing a spoonful of dry seeds in your mouth and see how long it takes to chew them up to the point where you can swallow! Soaked and sprouted seeds are totally different. Soak them for four to six hours before draining and letting sprout. The sprout time is about 24 to 36 hours. Past that, the seeds get really bitter and hard to eat no matter what you do to disguise the taste.

The best part about this milk is that it’s really easy to make if you have a high speed blender – which I have.

I’ve got a collection of mason jars for sprouting. The little sprout lids can be purchased at just about any natural food shop. They come in three different sizes, yellow being the smallest. Yellow works great for holding these little seeds at bay.

Ingredients:

  • 1 cup sprouted sesame seeds
  • About 1 cup ice cubes
  • About 3 cups water
  • 2 to 3 little dates
  • Little vanilla powder (doesn’t take much, like 1/8th teaspoon.)

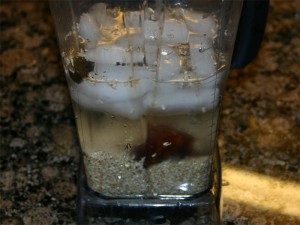
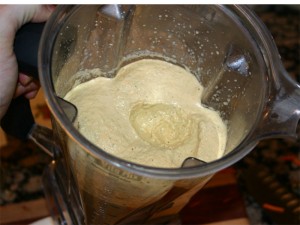
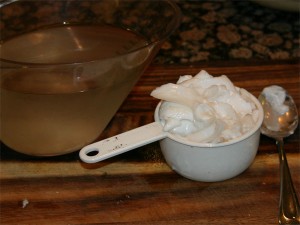
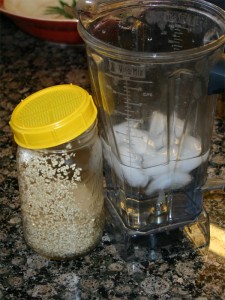
If you look closely at this second picture, you’ll notice that I snapped the fist picture before I’d added all the ingredients to the mixture.  Notice sitting just above the sesame seeds are the dates. On the very surface (in the upper left hand corner) is the vanilla powder.

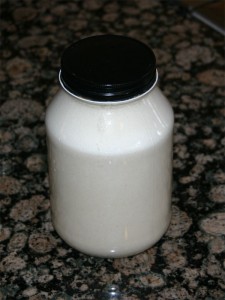
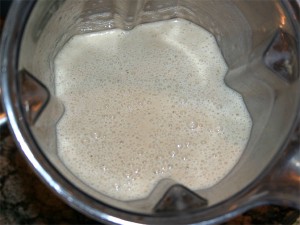
Ultimately, this will all blend together and look like milk.

The main reason for the ice is to keep the mixture colder longer so you can blend it longer without heating the ‘milk’. If you don’t add ice and just use cold water, you’ll end up with warm milk that just seems… wrong.

It’s pretty important to add a couple dates to the drink for the seeds are pretty bitter and it takes a something a little sweet to balance it out.

I like my sesame milk with all the fiber. Others like to run it through a nut milk bag to remove all the hulls. Either way you make it, the best way to consume it is as the base for a green smoothie! Peaches and Sesame ‘cream’ makes for unique taste sensation. I highly recommend giving it a try.

I figured I’d do a little search for a video to add to this post. Found a really nice demonstration by Karen Knowler that I’d recommend watching if you’ve never made nut milk. The only change I’d make to what she shows is that she should be using soaked almonds rather than dry almonds. But here you go anyway, I’m sure you can make that little modification yourself.

Mike Blongiewicz’s Raw Home-Made Hummus

I’m pretty impressed. Turns out it’s really easy to make this version of home-made Hummus and it tastes good enough to eat! In fact, I got a couple comfortable nods just like Mike did in his video. It’s smooth – flavor wise – yet comforting. I’m sure I’m going to enjoy this the next couple days for lunch.

And thanks Marie for the query (See comment here), for when I found this video I felt inspired to sprout some garbanzo beans.

Making your own raw home-made hummus by Mike Blongiewicz:

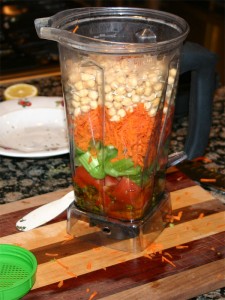
I like how easy he laid out the ingredients. I only added two cloves garlic for I like it a bit more mild. The lemon I went heavier with for I like that tang. For the veggies, I just added one medium tomato, almost all of one large carrot and three stocks of celery. I like to figure that it’s close enough.

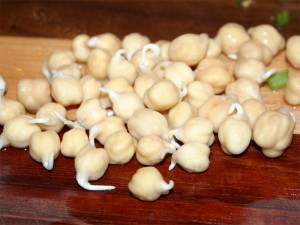
To all that, I added 36 hour old sprouted garbanzo beans. I like to wait until the roots are about as long as the bean.

Sprouted Garbanzo beans

Just like Mike, I added the liquid first.

Everything ready to go

When I powered on the blender, a swear I saw the lights flicker! This mixture sure did bog down that vita-mix. I’m sure if you’ve got a light duty blender, you’ll want to use a food processor instead.

After about 60 seconds, it was rolling like a vanilla shake (just like the video) so I figured it was done.

Lunch for three days

This made about 6 cups – or three lunches. I love how the basil flakes shine through. That big dip in the center was the taster. I’m absolutely positive that this will go well with carrot sticks and celery.

Overall, I’m thinking this is a really good raw hummus base. I’ll really know in a couple days when it’s all gone!

Give it a try, I think you’ll like it too.

Raw Chocolate Bark – the best ever!

It’s hard to find someone that doesn’t like chocolate. For years, I was the only person I knew that would actually say “no thank you” when offered some decadent chocolate concoction. The only thing I would touch was white chocolate or imported Belgium chocolates. The white chocolate really wasn’t all that good and the Belgium chocolates were really hard to come by. At times, I’d pick up a freshly made truffle or two for a special occasion, but you still couldn’t get me to whole-heartedly experience the treats.

Today, it’s a different story. No, you won’t find me running out to buy some confectioner’s favorite $2 oz treat only to have it stuff my nose up and clog my throat. Those days are long over. Instead, I put together my own treats and share it with the people that I really love.

My favorite chocolate concoction right now is Macadamia Nut Apricot Bark. It’s really easy to make, lasts a long time (if you show a little self control) and will always bring a smile to your face – or anyone that you share it with. Everyone that I know that’s tried it has always asked for a second piece.

You have an hour?  If so, clean out a little place in the fridge and break out the raw ingredients for a melt in your mouth treat is just a few pictures away.

Macadamia Nut Apricot Bark Confection

Ingredients

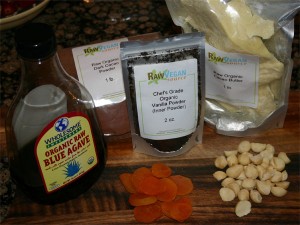
This one is amazingly simple. Gather the following:

The quality of the end result depends on how these ingredients are all mixed together. Let’s go through the process.

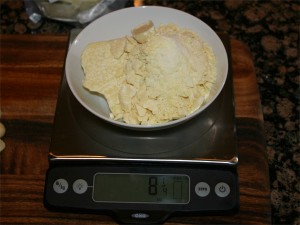
Let’s start with the cacao. If you buy it in a 1 lb bag, divide it in ½. We only want about 8 ounces.

1/2 pound butter

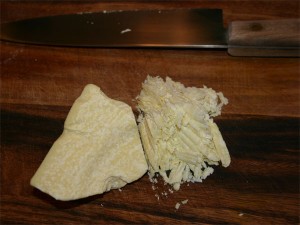
With the larger pieces, place them on a cutting board and shave it down to bits.

Shaving

When you shave the cacao, you increase the surface area that will radically speed up the melting process.

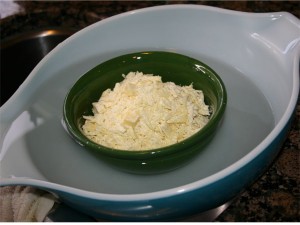
Next, if you don’t have a dehydrator, you’ll want to work up a hot water bath.

Very hot water bath

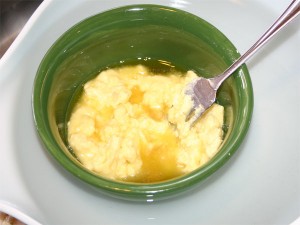
Notice here I’ve got a larger bowl tilted in the sink that I’ve filled with the hottest tap water I can get. To that, I ‘float’ the bowl of shaved cacao. As the heat radiates through the bowl it melts the cacao that touches the bowl to look like this:

mixing to melt faster

It might take about an hour to get the cacao to completely melt and you’ll want to stir it regularly so as to spread the melted cacao around the shaving so that they melt faster.

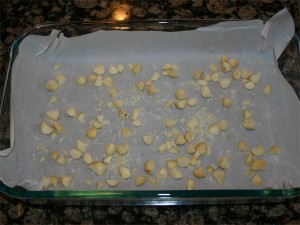
So, while the cacao is busy melting, it’s time to prepare the ‘mold’. I use a glass casserole pan that’s 9 by 12. The larger the pan, the thinner the chocolate bark. I like it on the thinner side so that it’s easy to break up after it hardens.

Inside the casserole pan, I line it with parchment paper. The following picture pretty much sums it up.

Nuts on paper

Now, with the collection of Macadamia Nuts, quarter them. If you chop the nuts up too small, you won’t be able to taste them. If they are two large, they overpower the chocolate. And don’t waste any crumb. Just through that in!

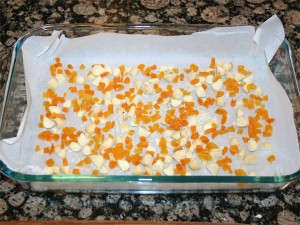
With the apricots, I cut them lengthwise into four strips before cutting them into little cubes. You’ll notice that they are smaller than the Macadamia Nut quarters.

Added Apricots

When I lay them into the pan, I drop them in so that they are pretty evenly spaced. You want each bite to have a bit of nut and fruit.

By this time, the butter should be translucent. Or, basically, look like melted butter. Remove it from the bath and stir in the 1 cup cacao powder and 1 tsp vanilla powder.

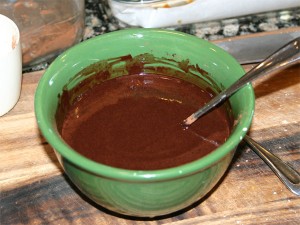
Liquid chocolate

You’ll want to stir this for a while. Make sure all the little dry clumps dissolve and that the vanilla powder breaks down. It tends to stick together so you’ll have to really work it. You’ll know that you’ve got it thoroughly mixed up when you stop stirring and little bubble rise to the surface.

At this point, it’s ready for the Agave. Add the five tablespoons and then start stirring again. The Agave tends to sink to the bottom, because it’s heavier and colder than the warm butter. As you stir it, it will warm (and cool the butter) as it evens out in the mixture.

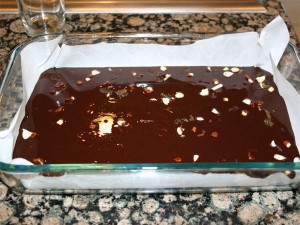
Now, carefully pour it into the pan on top of the nuts and fruit.

Soft

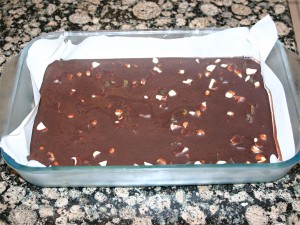
At this point, it’s ready for the fridge. Let it cool (level) until hard. I let it go for a few hours.

Hard

Notice in this picture that the chocolate has shrunk away from the parchment paper just a tad.

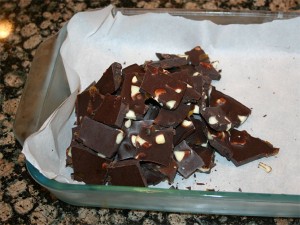
Now comes the fun part, breaking it up into bite size pieces.

Bite size chunks of bliss

These taste like pure butter bits as then warm and melt in your mouth. The nuts satisfy that need to bite down on something and the fruit makes you chew it for a while.

And I have to say there is something magical about this combination of ingredients.

So, there you have it. It’s not hard, it just takes a little time for the cacao to melt. If you show a little self control, one half pound should last a couple weeks. I make it a point to only eat a few bits a day. You’ll be surprised how much of a kick it has, but it’s not like a cup of tea or coffee.

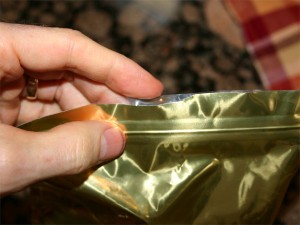
Oh, I just about forgot. The in thing (environmentally) now a days is to sell ‘product’ in little plastic Ziploc top bags. These things can be a pain to open for the plastic likes to stick together. So, to make it a little easier to open, I always make a second cut on the top so that one side is just a little longer than the other.

Tip for making bags easier to open

As you can see, I can now easily grab both sides of the bag to pop open the Ziploc. Give this a try next time you get a bag and see how it helps.

Enjoy your chocolate!

Raw Coconut Cream Pie

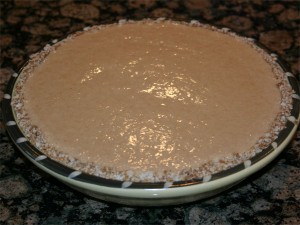
Turns out that this little pie is becoming a staple around here. I love the creaminess of the filling and how it complements the sweet crust. Everything in it mixes perfectly and it really does satisfy any cream pie craving that you might have.

When I first starting making this recipe, I followed the directions explicitly. Now I find that it doesn’t really matter much and you can change things up enough to call it your own!

Originally, the I followed the recipe from this book.

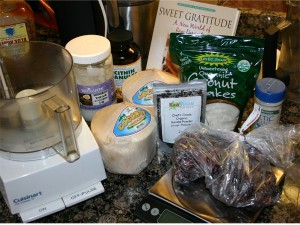
Now I kind of follow what’s in my head. I don’t like it quite as sweet and I like powdered vanilla rather than extract. I also cut back on the salt but add more coconut meat (the best part). The collection of goods that you’ll need to get this one done looks like this:

Notice here I’ve got:

  • 2 young Thai coconuts
  • ¾ cup Raw Coconut oil
  • 2 Tbs Lecithin granules
  • Unsweetened raw organic coconut flakes
  • Chef’s grade organic vanilla powder
  • Celtic Sea Salt
  • Bag of Deglet Noor Dates

Tools:

Cuisinart for processor, small food scale and a Vita-Mix blender. I don’t know how you’d make this recipe without these tools.

Let’s get creating!

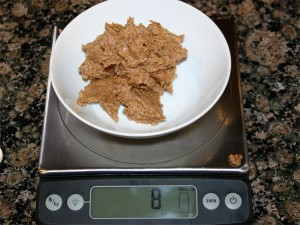
The first thing you’ll need the Cusinart for is to make date paste. I weighed out 8 ounces of Deglet Noor dates before dropping them one by one into the running Cusinart. Because these puppies are so dry, they tend to chop up rather than mush up. You want them mushy, thus you might need to add a bit of water. I added about 1 Tablespoon’s worth.

After scraping the food processor, I got out just about what I put in (water probably made the difference). ½ this paste you’ll use for the crust, the other half to sweeten the filling.

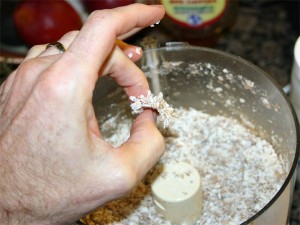
So, move four ounces back to the food processor and add at least 2 cups coconut flakes. At this point, you’ll want to also add about 1 (small) teaspoon vanilla powder and just a pinch of salt. Now we want to process the flakes to mix with the date paste so that it becomes just a little sticky.

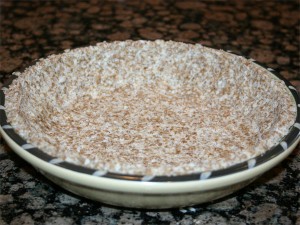
I had to add a little water (maybe a teaspoon’s worth) to get it to stand up like that. At this point, it’s really to move to the pie container. As it turns out, we have some perfect size salad bowls that double as a pie ‘tin’ for this pie.

The secret to working this crust together is to start on the sides. Using one hand, press the mixture into the side of the pan and with the other hand, make sure it doesn’t exceed the height of the bowl. You’ll probably work around the pie a few times getting it just right. When the sides are well formed and just the right thickness, you work on the bottom with whatever is left over.

Now set that aside for a few moments because we’re now going to whip up the filling.

The best part of the pie is the meat! Here, I’ve got just over a cup of meat that I’m going to mix in. This is what I scraped out of those two Young Thai Coconuts. Notice that there is a bit more coconut water than what we’ll use.

To the blender, add two cups coconut water (at room temperature), the meat (shown above), ¾ melted coconut oil, at least 1 teapsoon powdered Vanilla, a big pinch of Celtic Sea Salt, the last 4 ounces date paste and 2 Tbs lecithin granules.

Blend.

When you start bending, you’ll notice that the top of the mixture will be quite viscous. As the oil really goes to work, the mixture will thin out and almost start dancing in the blender before you’re minute (of counting) is up.

The unfortunate part is that there are a lot of bubbles in the final solution. I try to gently shake some of them out, but when you pure it into the crust, you’ll get bubbles!

If you’re careful, you can use gravity to remove some of the bubbles. After pouring the mixture into the crust, I gently jiggle the pie so as to make the bubbles rise to the surface. Then I lift the pie a couple millimeters off the counter and let it drop. If it were a metal pan – like a spring form – I’d lift it higher and work it thoroughly until all the bubbles rise and pop. But in this case, I’ve got a ceramic bowl that I have to be really careful with. Thus it’s a delicate process of working the bubbles out for me.

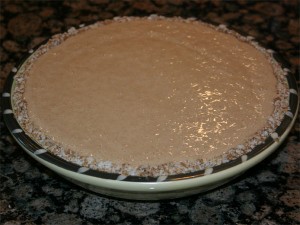
At this point, it goes in the fridge long enough for the coconut oil to congeal and the lecithin to setup. Most the time I simply let it sit overnight.

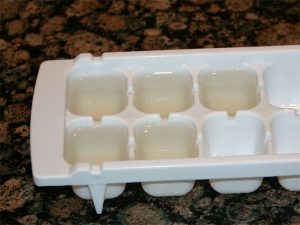
Oh, and don’t forget about the extra coconut water that you might have. If you don’t simply drink it, make ice cubes!

These ice cubes are great for making sorbet!  See my Blueberry Coconut Sorbet, you won’t be sorry!

How to find ripe Strawberries

My wife thought that I was crazy taking a picture of ripe strawberries! She asked “What do you think you’re doing?” and I replied that I was going to make a short note for my blog regarding how to tell if you’ve found ripe strawberries. She laughed, “Everyone knows how to pick out fresh strawberries – you smell them.” I said, “See, that’s why I’m going to make this post.”

You might ask, what qualifies me to know how to pick out a ripe strawberry? Well, it was the open invitation that I had regarding eating all the strawberries that I wanted on a U-pick strawberry farm when I was 18 and 19. You see, when you spend the entire day eating strawberries – and if you don’t pick the ripest ones, well, let’s simply say that you’re reminded about it when they leave your body! Leave your body raw, that is. Ouch. It’s not a pretty site.

Needless to say I asked the farmer and learned how to pick ripe berries every time. And the exiting problem no longer existed yet my desire to consume berries continued.

Most people think that you know when a strawberry is ripe if you smell it. Well, that’s just not the case. The smell gets stronger as the berries get riper, but it’s hard to tell what the ripe smell really is. The stores can take advantage of this by placing out fragrant strawberries that trick you into thinking they are ripe. Everyone smells their produce, right? I mean, that’s the key when picking melons. But not Strawberries.

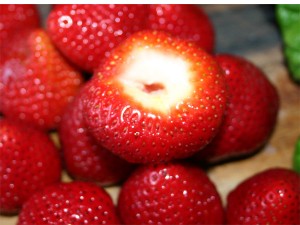
Unripe strawberry:

smells great, but as hard as an apple

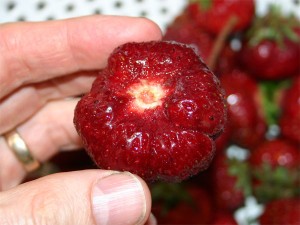
There are visual clues that differentiate ripe strawberries from non-ripe ones. The key most important visual is the color under the crown of the berry. The picture above shows a collection of strawberries that I picked up a month or so ago and I’ve cut off the crown.

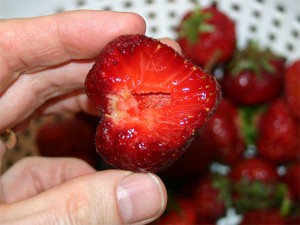
Now, notice how white it is. This is a sure sign that the berry was picked ‘green’. Also, when you cut it in ½ from top to tip – so as to expose the ‘core’ of the berry, that core will be white and hard.

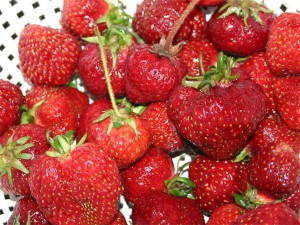
Some ripe strawberries:

no white around the tops

Notice with this collection of berries the fruit just under the crown (flower peddles) are orange-red. This is a really good sign.

crown comes off easily

If you look closer, the removing of the top also gives off subtle clues as to the ripeness of the berry. In this case, the crown twisted off with very little resistance. This is how the plant tells you that the fruit is ready to eat – it’s willing to give up the fruit freely. The top should pull away clean as in the above picture.

The seeds also provide a clue. Ripe berries have red seeds, whereas orange berries indicate that the fruit is not quite ripe yet.

You may notice that there is a little white; it appears that this particular berry could have stayed in the sun one more day.

yum

Now here is that same berry after taking a bite to expose the core. As it turns out, the core ended up on my mouth but it was soft – indicating that the berry was ripe. Also notice the area around the top of the berry that in the previous picture appeared white, well here, we do not see any unripe berry. What we see is the veins that lead to the seeds and what the plant used to nourish the berry.

So, to review:

  • The berries should smell good
  • There should be no white around the top
  • The crowns should come off effortlessly
  • The core should be red – or the berry color
  • Seeds should be red – not orange

One more thing to add; the sweetness of the berry really depends on the amount of sun the plant receives while the berries are ripening. If you’ve every grown berries, you’ve probably noticed that berries that ripen after 3 or 4 days of intense sunlight blow away berries that ripen in the rain! The plant is going to offer up whatever it can and it will do its best with the weather conditions it’s given.

If all else fails, just buy strawberries from your local farmer’s market when they are in season. Plan your shopping day to coincide with the picking that happens after a few really nice sunny days.

Happy pickin’!