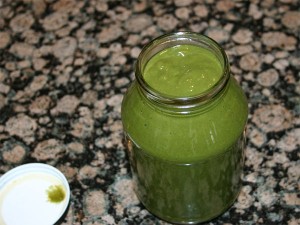
Apricot Mango Swiss chard Smoothie

I know, I know, I didn’t learn the lesson from the first couple apricot smoothies and here I go again – making an apricot smoothie. So, I’ve got twenty lbs of these puppies and I’m trying to figure out a way that may make them taste a bit better.

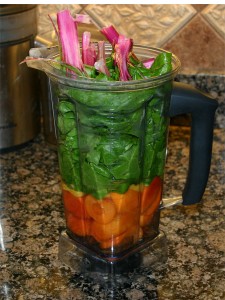
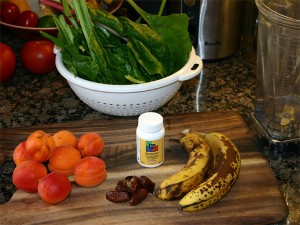
So this time I added more dates and tried mango. In picture form, it looked like this:

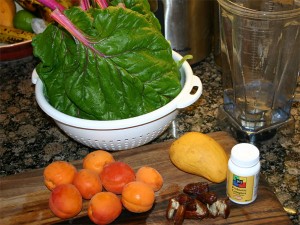
Apricots, Swiss chard, Mango, Deglet Noor dates and water

Notice:

  • 8 of the ripest apricots I could find in the box
  • Some amazing garden fresh Swiss Chard! Wow!
  • 1 Honey mango,
  • 8 or 9 or so Deglet Noor Dates
  • 1 ½ cup water
  • 1 little probiotic (optional)

It looks great stacked in the blender.

This looks nice stacked up and ready to go!

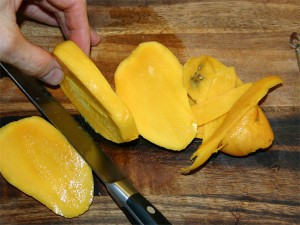
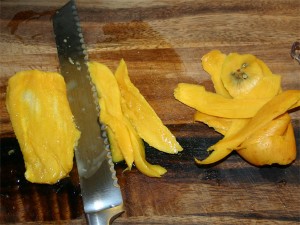
But the part that I really wanted to show with this posting is how I peal mangos. If you remember back a few postings, I linked in a YouTube video on how to peal a mango (view my article here). The woman in the video cut and sliced her way into a real mess. I don’t see it as that bad – even with a really ripe mango!

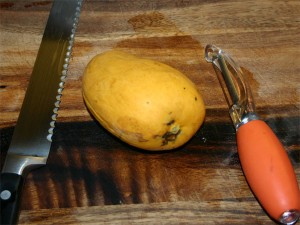
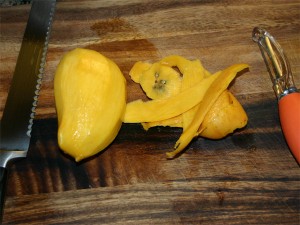
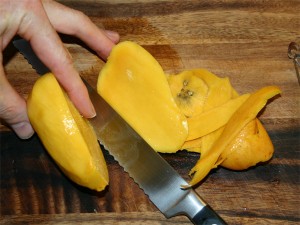
So here is the picture sequence.

Tools - nice sserrated knife and apple peeler
peel the mango

Stand on edge and cut down just off center.
Cut just off center on second side. Notice how thin the seed is!
Now lay the seed down flat and use the back side of the knife to scrap that last bits off the seed.

All it really takes is an apple peeler, a serrated knife and the ability to hold a ‘wet bar of soap’. The hardest part is lining up to cup along the seed. They are so flat that it shapes the fruit, so if you inspect it before cutting, you’ll slice right along the seed almost every time.

In the end, because I spent time picking out the ripest apricots from the collection, I ended up with something that was palatable.

But I still recommend avoiding apricots of you can help it. There are a ton of other choices that make it to market ripe.

Apricot Banana Smoothie with Spinach

Don’t let anyone tell you that all smoothies are created equal. It’s just not true. Some are really bad!

In my opinion, this one falters from the use of sub-prime apricots. Using ripe fruit is really important and, well, this time I guess I didn’t pick up ripe apricots. And I didn’t pick just a few, I picked nearly 40 lbs! I bought them over the phone for 25 bucks and, as it turns out, you get what you pay for.

In an effort to try to make them worthy for consumption, I let them age a little while. You know, how you might let a pineapple age or a banana age. Sometimes it works, other times the fruit is just too green and it doesn’t ripen much at all.

Armed with pounds of apricots, I went searching on the web to see if I could find the best apricot smoothie recipe around. I poked around a little and came across the Incredible Smoothies website. Looking a little deeper, I found a page that outlined their apricot smoothies. I thought to myself – ok, this looks as good as anything I’ve found, I’ll give it a go.

Aiming to make the Apricot-Banana smoothie this is what I mixed together:

Apricots, Spinach, Banana, Dates and water

I’ve got to say it all looks good.

  • 1 cup water
  • 8 little Aricots
  • 2 Bananas
  • 7-8 Deglet Noor Dates
  • A bunch of fresh garden Spinach
  • And a probiotic for good measure (optional)

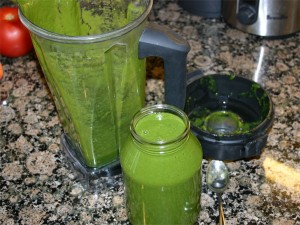
After slicing the apricots in half and tearing out the seeds (wasn’t easy for the fruit was still pretty green), I stacked it all up on the blender and gave it a spin for 60-70 seconds and ended up with this.

Green - as in green apple tart!

Have to tell you it looks great!  Smooth and creamy, light and fragrant – but tart as H….eck. Dang, don’t like to swear much, but this one made me pucker up.

I think I’ve found a new fruit to avoid. I absolutely love raw peaches, but I have a hard time finding plums and apricots that have been picked anywhere near ripe. In a way, I wish I had a couple trees growing out back so I could pick my own 20 lbs – when they turned sweet and juicy.  I guess I’ll just have to wait until we’re clearly into peach season or for when the pears come around.

But for now, avoid green apricots at any cost. Save your money for something a little sweeter!

Raw Coconut Cream Pie

Turns out that this little pie is becoming a staple around here. I love the creaminess of the filling and how it complements the sweet crust. Everything in it mixes perfectly and it really does satisfy any cream pie craving that you might have.

When I first starting making this recipe, I followed the directions explicitly. Now I find that it doesn’t really matter much and you can change things up enough to call it your own!

Originally, the I followed the recipe from this book.

Now I kind of follow what’s in my head. I don’t like it quite as sweet and I like powdered vanilla rather than extract. I also cut back on the salt but add more coconut meat (the best part). The collection of goods that you’ll need to get this one done looks like this:
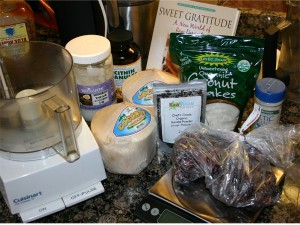
Notice here I’ve got:

  • 2 young Thai coconuts
  • ¾ cup Raw Coconut oil
  • 2 Tbs Lecithin granules
  • Unsweetened raw organic coconut flakes
  • Chef’s grade organic vanilla powder
  • Celtic Sea Salt
  • Bag of Deglet Noor Dates

Tools:

Cuisinart for processor, small food scale and a Vita-Mix blender. I don’t know how you’d make this recipe without these tools.

Let’s get creating!

The first thing you’ll need the Cusinart for is to make date paste. I weighed out 8 ounces of Deglet Noor dates before dropping them one by one into the running Cusinart. Because these puppies are so dry, they tend to chop up rather than mush up. You want them mushy, thus you might need to add a bit of water. I added about 1 Tablespoon’s worth.
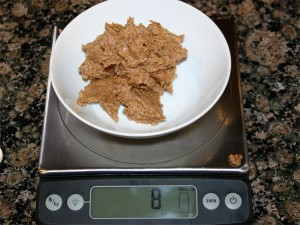
After scraping the food processor, I got out just about what I put in (water probably made the difference). ½ this paste you’ll use for the crust, the other half to sweeten the filling.

So, move four ounces back to the food processor and add at least 2 cups coconut flakes. At this point, you’ll want to also add about 1 (small) teaspoon vanilla powder and just a pinch of salt. Now we want to process the flakes to mix with the date paste so that it becomes just a little sticky.
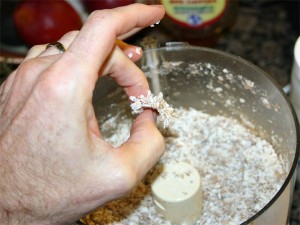
I had to add a little water (maybe a teaspoon’s worth) to get it to stand up like that. At this point, it’s really to move to the pie container. As it turns out, we have some perfect size salad bowls that double as a pie ‘tin’ for this pie.
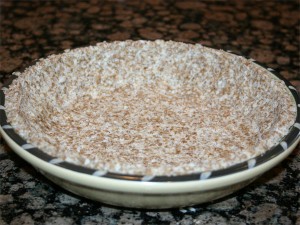
The secret to working this crust together is to start on the sides. Using one hand, press the mixture into the side of the pan and with the other hand, make sure it doesn’t exceed the height of the bowl. You’ll probably work around the pie a few times getting it just right. When the sides are well formed and just the right thickness, you work on the bottom with whatever is left over.

Now set that aside for a few moments because we’re now going to whip up the filling.
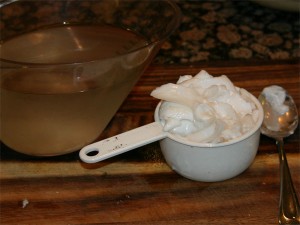
The best part of the pie is the meat! Here, I’ve got just over a cup of meat that I’m going to mix in. This is what I scraped out of those two Young Thai Coconuts. Notice that there is a bit more coconut water than what we’ll use.

To the blender, add two cups coconut water (at room temperature), the meat (shown above), ¾ melted coconut oil, at least 1 teapsoon powdered Vanilla, a big pinch of Celtic Sea Salt, the last 4 ounces date paste and 2 Tbs lecithin granules.

Blend.

When you start bending, you’ll notice that the top of the mixture will be quite viscous. As the oil really goes to work, the mixture will thin out and almost start dancing in the blender before you’re minute (of counting) is up.
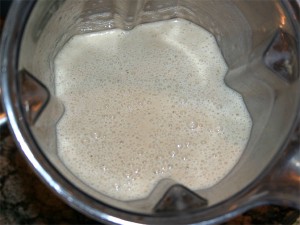
The unfortunate part is that there are a lot of bubbles in the final solution. I try to gently shake some of them out, but when you pure it into the crust, you’ll get bubbles!
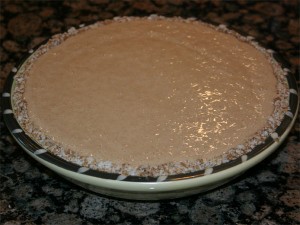
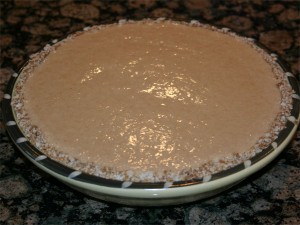
If you’re careful, you can use gravity to remove some of the bubbles. After pouring the mixture into the crust, I gently jiggle the pie so as to make the bubbles rise to the surface. Then I lift the pie a couple millimeters off the counter and let it drop. If it were a metal pan – like a spring form – I’d lift it higher and work it thoroughly until all the bubbles rise and pop. But in this case, I’ve got a ceramic bowl that I have to be really careful with. Thus it’s a delicate process of working the bubbles out for me.

At this point, it goes in the fridge long enough for the coconut oil to congeal and the lecithin to setup. Most the time I simply let it sit overnight.

Oh, and don’t forget about the extra coconut water that you might have. If you don’t simply drink it, make ice cubes!
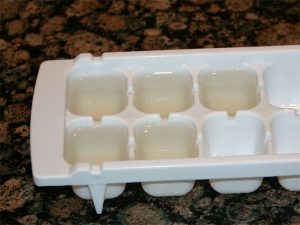
These ice cubes are great for making sorbet!  See my Blueberry Coconut Sorbet, you won’t be sorry!
Beet Melody – the early summer smoothie

Baby beets are finally in season again and the Saturday market always has the best selection. One of my favorite vendors there is Full Circle Farm.

Don't panic - It's organic!

I’ve thought about signing up for their fresh produce delivery program, but it seems that I’m always in town on Saturday morning, so I just take 15 minutes and stop in. And this time, as it turns out, they had four different types of beets in their selection. I grabbed two bunches with the heaviest collection of greens with the idea that the first most valuable part would be my blended breakfast.

Thus, the Beet Melody Smoothie!

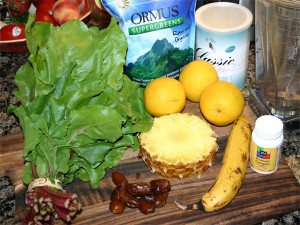
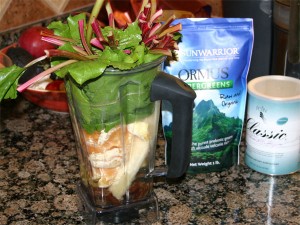
Here’s what I started with:

Beautiful beet tops

As you can see, this smoothie is a bit on the tropical side, for the fruit in abundance in this house happens to be oranges and pineapple. Which, I have no problem with.

If you want to reproduce this, you’ll need:

  • A few seedless oranges (I used three)
  • About an inch of pineapple
  • One banana
  • Seven or Eight little Deglet Noor dates
  • And, of course, beet tops.
  • (optional spoonful ORMUS Supergreens, Reliv Classic and Probiotic)

As you can see in the picture, I’ve already trimmed the beets. Turned out they made a beet-carrot salad last night. The beets were red on the outside and white on the inside. By sight, you’d probably mistaken them as radishes.

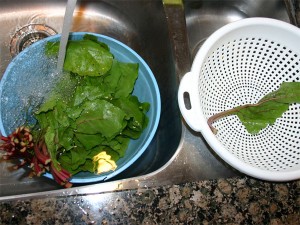
In any case, wash these greens! Anything that sits next to the ground is bound to have a little extra dirt in it. I use a water bath to really get it out.

Easy rinsing process

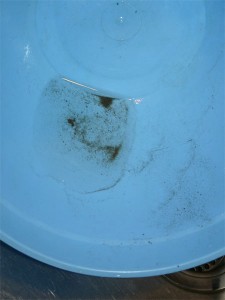
After shaking the greens in the water and carefully rinsing them off, they stack up in the strainer on the right. Afterwards, this is what you’re left with:

Leave the dirt behind!

No worries. We all process a lot of dirt in our lifetimes, a little more shouldn’t hurt. But I really like my minerals in the more bio available form – plant form.

After trimming the outer part of the pineapple, pealing the oranges (and picking out the seeds) and pealing the banana, everything stacks up like this:

This is what you'd normally have to chew up!

When I start blending something this full, I always start out slowly. I use the tamper to move the larger pieces down and get the mixture to start moving. As soon as it does, I remove the tamper, place the clear cap on top of the vita-mix and work it up to full on.

As with most smoothies, I start counting and cleaning. After about 60 seconds most the mess is cleaned up and the smoothie is ready to pure. These are always so easy!

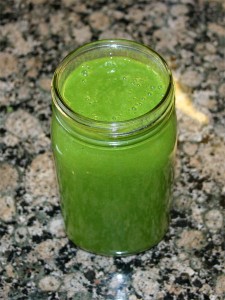
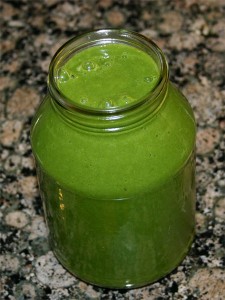
And the results

Remember that the Queen of green smoothies says that to really change your life you’ll want to consume at least 1 quart (1 liter) of green smoothie every day on an empty stomach. All my recipes make between 5 and 6 cups. You’ll probably also notice that there are a few hundred calories in these smoothies. That’s actually a good thing! Fill up on healthy stuff rather than cheeseburgers.

Let me know what you think of this one. Beet greens are better for you than the roots and they’re easy to prepare.

Enjoy!

Strawberry Kiwi – the tart tango!

If you like ‘em tart, this is a great combo! It’s kind of like green apples in a way, it’s got a kick to it. It’s something that should be tried, but it’s not something that you’d want to consume every day. Yet, I bet things would be different if I had a kiwi vine of my own and harvested vine ripe fruit and then combined it with sun ripened strawberries from the garden. I’ll bet it would be a completely different experience.

The beauty of this one can’t be matched.

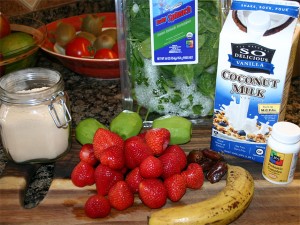
What to mix up:

  • Couple cups strawberries
  • Three pealed kiwi
  • 4-8 little dates (more the better)
  • ½ lb fresh young baby spinach
  • ¾ cup coconut milk (vanilla flavored)
  • 1 little probiotic for good measure.

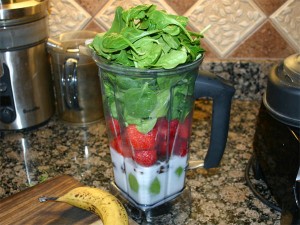
I love the color contrast between the kiwi and the strawberries. I couldn’t bring myself to add the banana to this one.

Note that I really had to pack that spinach in! It’s also fun watching this one mix. It starts out green and quickly turns pink from the strawberries. Then, as you press the spinach down into the blades it starts to pick up the signature green that we’ve all come to love:

Spinach is wonderful. I wish it were a little cheaper.

See ya next time.