How to find ripe Strawberries

My wife thought that I was crazy taking a picture of ripe strawberries! She asked “What do you think you’re doing?” and I replied that I was going to make a short note for my blog regarding how to tell if you’ve found ripe strawberries. She laughed, “Everyone knows how to pick out fresh strawberries – you smell them.” I said, “See, that’s why I’m going to make this post.”

You might ask, what qualifies me to know how to pick out a ripe strawberry? Well, it was the open invitation that I had regarding eating all the strawberries that I wanted on a U-pick strawberry farm when I was 18 and 19. You see, when you spend the entire day eating strawberries – and if you don’t pick the ripest ones, well, let’s simply say that you’re reminded about it when they leave your body! Leave your body raw, that is. Ouch. It’s not a pretty site.

Needless to say I asked the farmer and learned how to pick ripe berries every time. And the exiting problem no longer existed yet my desire to consume berries continued.

Most people think that you know when a strawberry is ripe if you smell it. Well, that’s just not the case. The smell gets stronger as the berries get riper, but it’s hard to tell what the ripe smell really is. The stores can take advantage of this by placing out fragrant strawberries that trick you into thinking they are ripe. Everyone smells their produce, right? I mean, that’s the key when picking melons. But not Strawberries.

Unripe strawberry:
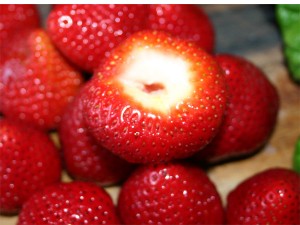
smells great, but as hard as an apple

There are visual clues that differentiate ripe strawberries from non-ripe ones. The key most important visual is the color under the crown of the berry. The picture above shows a collection of strawberries that I picked up a month or so ago and I’ve cut off the crown.

Now, notice how white it is. This is a sure sign that the berry was picked ‘green’. Also, when you cut it in ½ from top to tip – so as to expose the ‘core’ of the berry, that core will be white and hard.

Some ripe strawberries:
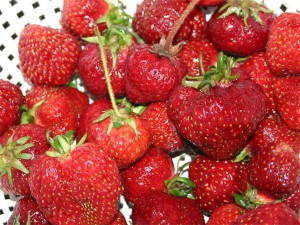
no white around the tops

Notice with this collection of berries the fruit just under the crown (flower peddles) are orange-red. This is a really good sign.
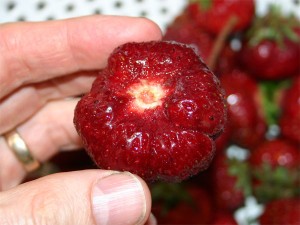
crown comes off easily

If you look closer, the removing of the top also gives off subtle clues as to the ripeness of the berry. In this case, the crown twisted off with very little resistance. This is how the plant tells you that the fruit is ready to eat – it’s willing to give up the fruit freely. The top should pull away clean as in the above picture.

The seeds also provide a clue. Ripe berries have red seeds, whereas orange berries indicate that the fruit is not quite ripe yet.

You may notice that there is a little white; it appears that this particular berry could have stayed in the sun one more day.
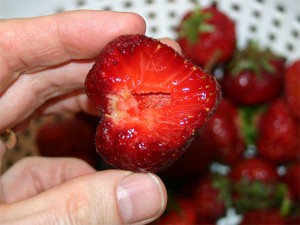
yum

Now here is that same berry after taking a bite to expose the core. As it turns out, the core ended up on my mouth but it was soft – indicating that the berry was ripe. Also notice the area around the top of the berry that in the previous picture appeared white, well here, we do not see any unripe berry. What we see is the veins that lead to the seeds and what the plant used to nourish the berry.

So, to review:

  • The berries should smell good
  • There should be no white around the top
  • The crowns should come off effortlessly
  • The core should be red – or the berry color
  • Seeds should be red – not orange

One more thing to add; the sweetness of the berry really depends on the amount of sun the plant receives while the berries are ripening. If you’ve every grown berries, you’ve probably noticed that berries that ripen after 3 or 4 days of intense sunlight blow away berries that ripen in the rain! The plant is going to offer up whatever it can and it will do its best with the weather conditions it’s given.

If all else fails, just buy strawberries from your local farmer’s market when they are in season. Plan your shopping day to coincide with the picking that happens after a few really nice sunny days.

Happy pickin’!

Its harvest time: Drying herbs

I love herbs! I love growing them. I love smelling them. I love harvesting more than I can consume and I love eating them.

We’re now in the middle of June and today was harvest day; the day I cut back the oregano and shape it for the summer growth. A few years ago, I picked up a couple plants of common oregano at the nursery in little three inch containers. I planted them in the herb garden, a place just outside the master bedroom door, where there is a little spot of earth that gets full southern exposure to sunlight and watered when the sprinkler kicks in.

After the first year, I bent over some of the new growth and buried the branches underground in order to get the plant to sprout roots on the new limbs. After the roots were big enough to support the new plant, I severed the link between the mother plant and the new start. Now I’ve got Oregano plants all over the place! It doesn’t take long to fill the garden (that is, if you don’t give living plants away).

Oregano is best if you harvest the leaves when they are still relatively young. I like to do it before the first flowering in the spring. Thus today was a perfect day to cut it back. I filled three plastic grocery bags with cuttings and gave one bag to some close friends. The other two were left for me to dry and prep for usage.

It’s actually a lot more fun than you might think going through the harvesting process and hanging your herb to dry. During the cutting, I take good kitchen scissors and cut the branches just below half way. You want to leave enough leaves on the branch that the plant will continue to grow, but you want to have clipping that are long enough to hang. You want the freshest leaves to dry and use. Make sure you clip on a relatively dry day.

Today was hot and sunny. The plants where clean and dry. Just Perfect.

To properly cure the clippings you need a reasonably dark dry place to hang the herbs for a few weeks. You’ll know they are dry enough when the leave crack when you touch them. You’ll also want a good collection of rubber bands.

Here is how I dry Oregano, mint, basil and just about anything else that tickles my fancy.

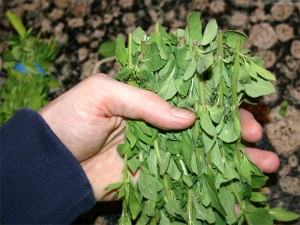
To start with, line your clippings up so the ends are all pretty event. Kind of like this:

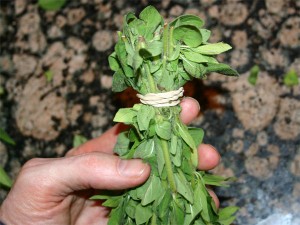
When you’ve got a collection of stems that fit nicely in the circle that is formed between your index finger and thumb, you’ve got just about the right amount. With that bunch, wrap a rubber band around it. It might look like this:

After you’ve bunched up your harvest, you need to hang them in a dry place with no direct sunlight. I use my garage. I’ve strung up a piece of garden twine that’s about 10 feet long that’s high enough that you can walk under without touching the hanging herbs.

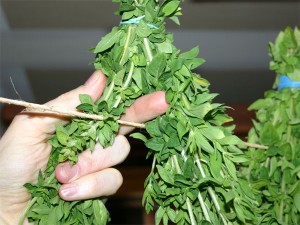
To place the herbs on the twine, I get an old chair that I keep in the garage just for this reason so that I can reach up high enough to set the bunches over the string. To do this, I split the bunch just about in half and work the leaves apart up to nearly the rubber band and then place the plant upside down over the string. This next picture pretty much sums up the process.

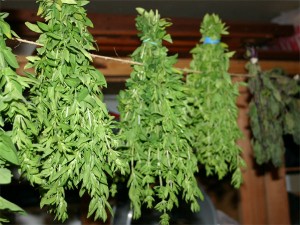
As you can see in the following picture, I space them far enough apart so that they don’t touch.

And if you look closely in the above picture, you’ll not only see the newly harvested oregano that’s being hung, but you’ll see some spearmint that I hung up about two weeks ago in the background. I’ve got a great harvest of spearmint this year. I love it fresh in green smoothies, tea is a second favorite.

Once it’s hung for a few weeks you’ll know it’s dry when the leaves crackle when you touch them. At that point you’ll want to store them for later use. What I use are paper bags. The paper bags you have to ask for when shopping; not the plastic bags. These paper bags keep the herbs dark and wick away any last bits of moisture.

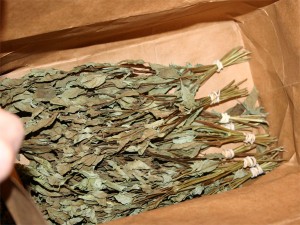
Here is a collection of basil that I dried last year.

Notice that I still haven’t taken the rubber bands off. I guess I got lazy last fall. Normally what I’ll do is unwrap the rubber bands and then strip the leaves off the steam while it’s all in the bag. The steams I’ll throw away and the leaves I’ll keep in the bag for long term storage. The basil that we’ll use for cooking (and what not) I keep stored in a glass mason jar in the herb cabinet. When that jar gets low, I simply refill it from this storage bag.

When it comes to drying basil, I always look for the best looking organic plants at the Saturday market when the plants are in season. When they look good, I’ll buy at least 10 bunches. That’s just about enough to last a year.

This oregano will be more than we’ll consume. That means I’ll be able to give gifts to people! I love sharing the abundance in my life. This is just another way that I get to do this.

If you’ve got a little land, put in an oregano plant and get it to produce a few brothers and sisters. Even if you don’t have full sunlight, these plants are hardy so you should get a pretty good harvest every spring. If you are as lucky as I am, drying it is a pie-of-cake.