Kale, Peach, Watermelon Smoothie

Kale is one of those amazing garden plants. You can plant it just about anywhere and you’ll get something that stands up big and strong. I’m sure it’s got ‘weed’ in its ancestral tree somewhere. The plants that came up in my garden this year took a while to come on, but when they did, a hand full of leaves really was all that it took.

But look at that, I’m writing as if the plants are dead and gone. Far from it! I just pick the bottom leaves and let the plant keep growing. They are all three feet tall now and still pumping out leaves. I fully expect that these will be the last greens that I get out of the garden this fall. Next year, I’m going to put in MORE and get enough to make kale chips. But that’s a posting for another day.

Recipe:

  • 2 peaches
  • Juice of 1 lemon (no seeds)
  • 1 inch wide slice of watermelon
  • 8 to 10 Kale leaves
  • 1 probiotic (optional)

I don’t like to add lemon seeds to my smoothies so I cut them in half and squeeze them over a bowl. Once I’ve extracted all the juice, I remove the seeds with a spoon before dumping the juice into the blender. It seems that life is just easier that way. 

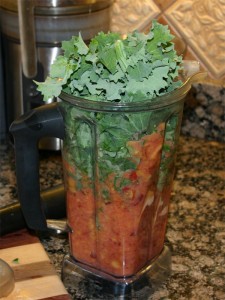
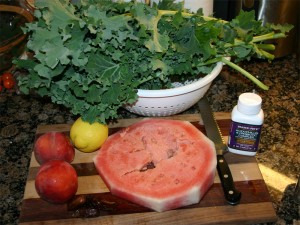
Notice that the watermelon has nearly filled the blender. I spun the fruit for a few seconds before removing the top to add the kale. When adding the kale, I pick off the leaf and leave being most of the steam. But I’m willing to bet that the stem is where the bulk of the metals are, for it’s a pretty stiff stem and, for some reason, it reminds me of bone.

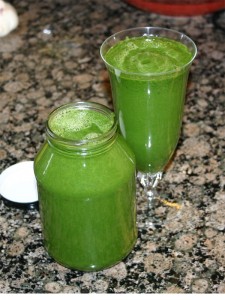
In sixty seconds, the blend makes easy work of this chewing concoction. The lemon juice if a must here. It counters the bitters in the kale with the acids from the citrus. Once these two balance each other out, it’s just a matter of adding a little sweetener – dates!

I’m sure I’ll have more of these come this fall when the weather really turns cold. If I had a little more gardening room, I’d grow a plant for you two.

Mike Blongiewicz’s Raw Home-Made Hummus

I’m pretty impressed. Turns out it’s really easy to make this version of home-made Hummus and it tastes good enough to eat! In fact, I got a couple comfortable nods just like Mike did in his video. It’s smooth – flavor wise – yet comforting. I’m sure I’m going to enjoy this the next couple days for lunch.

And thanks Marie for the query (See comment here), for when I found this video I felt inspired to sprout some garbanzo beans.

Making your own raw home-made hummus by Mike Blongiewicz:

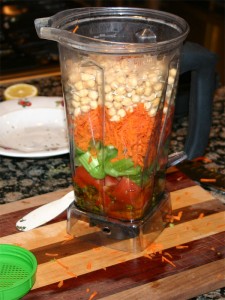
I like how easy he laid out the ingredients. I only added two cloves garlic for I like it a bit more mild. The lemon I went heavier with for I like that tang. For the veggies, I just added one medium tomato, almost all of one large carrot and three stocks of celery. I like to figure that it’s close enough.

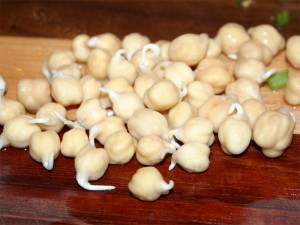
To all that, I added 36 hour old sprouted garbanzo beans. I like to wait until the roots are about as long as the bean.

Sprouted Garbanzo beans

Just like Mike, I added the liquid first.

Everything ready to go

When I powered on the blender, a swear I saw the lights flicker! This mixture sure did bog down that vita-mix. I’m sure if you’ve got a light duty blender, you’ll want to use a food processor instead.

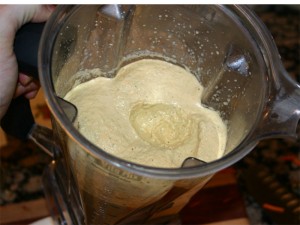
After about 60 seconds, it was rolling like a vanilla shake (just like the video) so I figured it was done.

Lunch for three days

This made about 6 cups – or three lunches. I love how the basil flakes shine through. That big dip in the center was the taster. I’m absolutely positive that this will go well with carrot sticks and celery.

Overall, I’m thinking this is a really good raw hummus base. I’ll really know in a couple days when it’s all gone!

Give it a try, I think you’ll like it too.

Blueberry Bliss Cheesecake

I’m excited because not only am I going to be able to show you a beautiful desert, but I’m going to be able to point you to the complete recipe!

This is one of the first raw deserts I learned to make. It’s wonderfully simple and seems to deliver amazing results every time. I’ve served it at Thanksgiving and eaten it for lunch many a times! Yum.

So here it is – Blueberry Bliss!

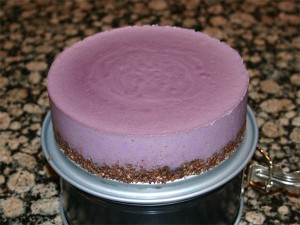
Look at that! Right out of the spring-form!

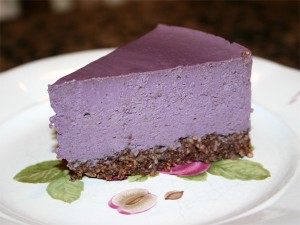
If that’s too much, here’s a little serving.

It’s amazing how the close-up shows all the details. I worked for at least a minute jiggling and dropping this spring-form just after pouring the berry mixture in and I still didn’t get all the bubbles out.

When making this desert, the one thing that I’d recommend more than anything else is to make sure you use the best cashews that you can find. Don’t get anything that’s old. Get whole nuts (beans) as fresh as can be.

Also, I use frozen berries (See my Oh My God – Blueberry Sorbet for a picture of the brand). But, when you use frozen berries, they thaw down to at least ½ size. Thus, I pour 4 cups berries into a measuring cup and place them in the dehydrator until they’ve warmed up to 100 degrees. Thus, with the recipe, I’m using a few more berries then what Carmella uses.

Also note that I also place the cacao butter/coconut mixture in the dehydrator to melt along with the berries.

Without further ado, the best write-up is from the source. The Sunny Raw Kitchen’s Bliss-full Blueberry Cheesecake.

Well, what did you think of her desert?  The blueberries over the top just seem … a little over the top. Thus, you don’t see that in my picture.

I also changed the crust a little simplifying it.

What the heck, I’ve changed it quite a bit. I guess I should include my measurements for comparison.

Crust:

  • ¾ cup soaked almonds
  • ¼ cup coconut flakes
  • 1 tablespoon cacao
  • 1 teaspoon vanilla powder
  • Pinch Celtic Sea Salt
  • 2 Medjhool dates
  • Little squeeze Raw Agave

I guess I don’t really like brazil nuts and I’ve found that I like the coconut flakes a little better than the powdered stuff. I put it all together like she does – using a food processor. With the almonds I soak them for maybe 6-8 hours and then let them dry. You want to work with dry nuts

Filling:

  • 4 cups frozen blueberries
  • 1 cup dry cashews – the best you can find
  • 5 Tbsp melted coconut butter
  • 2 Tbsp melted cacao butter
  • ¼ cup honey
  • 1 Tbsp lemon juice
  • Big pinch of Celtic Sea Salt.

Now, the real trick is getting it creamy without overdoing it. So, I approach the process just a little different than she does. I place the nuts in the blender and give them a whirl. It only takes 20 seconds (or so) before the nuts stick together and let the blade run free. At this point, I add everything else. The juice from the melted blueberries soaks down into the nuts softening them a little while you’re piling everything else on top.

Then, when you actually blend this up, let it run a little longer than you would normally do for smoothies. Remember that you started with warm ingredients, but you don’t want to cook them. Thus, feel the side of the blender as it’s getting creamy and make sure it’s not too hot.

Before pouring it into the spring-form, taste it. You should find yourself licking your fingers!

After you’ve poured the berry mixture into the pan, tap the pan so as to encourage the air bubbles to come to the surface. This might take a little extra coxing, so don’t by distracted by that little bit of mixture that you want to keep tasting!

When it cools, the butter and nuts will set-up giving it that standard cheesecake feel. I normally let it sit overnight.

It’s absolutely a keeper recipe. I make it for lunches!

Enjoy.