Mint-Chocolate Smoothie

If fresh fruit and greens it not your thing, mint-chocolate might be what the doctor’s calling for! I’m thankful to have a couple different types of mint growing in the garden, and as it turns out, this variety of spearmint is coming on strong right now. It’s amazingly refreshing when added to a smoothie and, as luck would have it, it doesn’t take much.

What I absolutely love about this smoothie is the fresh garden lettuce! Yes. It’s been a cold wet spring that there was absolutely no sunlight for growing – just enough to survive. The zucchini plants that I put in in may just sat there for more than a month. It wasn’t until the clouds parted that the plants actually started to grow. And, now that the sun has arrived, I’ve got a bounty of lettuce. These leaves are delicately succulent with no bitters. They’re so good, you could just graze your want through the garden – which is what I did today for lunch.

In any case, I had company over this morning and offered them a green smoothie. Being grateful guests, they willingly agreed to whatever I wanted to make. Knowing that one of my guests has a love affair with chocolate, I decided to sneak in just a little:
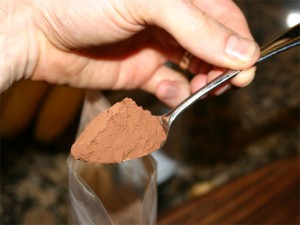
Little cacao goes a long way

And as you can see, it really wasn’t much. But the combination of flavors all mixed together to make for a mouth watering delight.

Mint-Chocolate Lettuce Smoothie
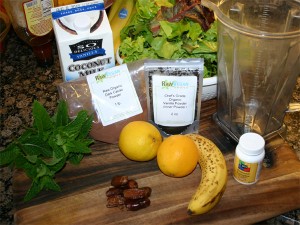
Love that garden lettuce

Clockwise from left (sort of):

Add milk, probiotic, dates to blender. Peal leaves off mint stocks and use only the leaves. Peal oranges and make sure no seeds make it into the blender. Add bananas and then stuff in the lettuce.
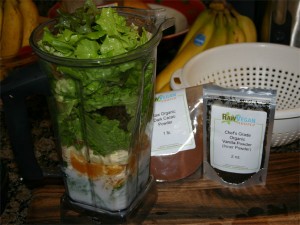
It all fit!

It’s hard to imagine that that entire bowl of lettuce fit into the blender at one time. It took a little packing, but it wasn’t too bad.

Blend for about 60 seconds. You’ll want to start out slow  and get the greens turning before you whip it up to high for the 60 seconds.

When good and smooth, add the little spoonful of cacao and about ¼ teaspoon vanilla. It really doesn’t take much vanilla at all. Blend for a couple seconds so the powders mix in.

Serve.
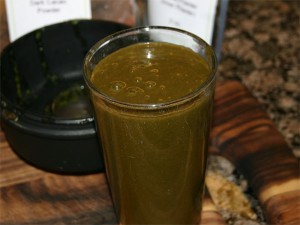
Just part of the results

With the volume from the oranges, bananas and coconut milk, the end result was nearly 8 cups. After using the nice glasses for the guests, I ended up with what was left over. It was probably 2 cups that tasted great and went down smooth.

I’m going to have to get me some descent party glasses that I can use for breakfast on the weekends. As much as I love me quart size jar (with lid), I don’t really need it around the house on a lazy Sunday morning.

If you love mint and chocolate, you’ll probably love this one. Life’s too short to not give it a try!

Enjoy.

Raw Chocolate Bark – the best ever!

It’s hard to find someone that doesn’t like chocolate. For years, I was the only person I knew that would actually say “no thank you” when offered some decadent chocolate concoction. The only thing I would touch was white chocolate or imported Belgium chocolates. The white chocolate really wasn’t all that good and the Belgium chocolates were really hard to come by. At times, I’d pick up a freshly made truffle or two for a special occasion, but you still couldn’t get me to whole-heartedly experience the treats.

Today, it’s a different story. No, you won’t find me running out to buy some confectioner’s favorite $2 oz treat only to have it stuff my nose up and clog my throat. Those days are long over. Instead, I put together my own treats and share it with the people that I really love.

My favorite chocolate concoction right now is Macadamia Nut Apricot Bark. It’s really easy to make, lasts a long time (if you show a little self control) and will always bring a smile to your face – or anyone that you share it with. Everyone that I know that’s tried it has always asked for a second piece.

You have an hour?  If so, clean out a little place in the fridge and break out the raw ingredients for a melt in your mouth treat is just a few pictures away.

Macadamia Nut Apricot Bark Confection

Ingredients

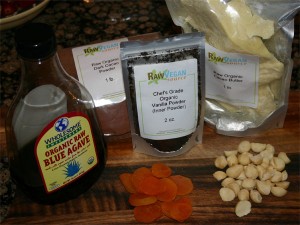
This one is amazingly simple. Gather the following:

The quality of the end result depends on how these ingredients are all mixed together. Let’s go through the process.

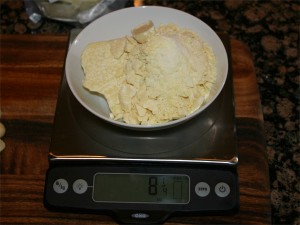
Let’s start with the cacao. If you buy it in a 1 lb bag, divide it in ½. We only want about 8 ounces.

1/2 pound butter

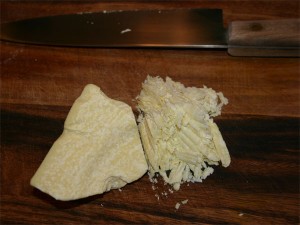
With the larger pieces, place them on a cutting board and shave it down to bits.

Shaving

When you shave the cacao, you increase the surface area that will radically speed up the melting process.

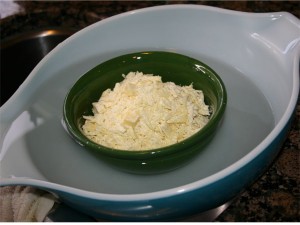
Next, if you don’t have a dehydrator, you’ll want to work up a hot water bath.

Very hot water bath

Notice here I’ve got a larger bowl tilted in the sink that I’ve filled with the hottest tap water I can get. To that, I ‘float’ the bowl of shaved cacao. As the heat radiates through the bowl it melts the cacao that touches the bowl to look like this:

mixing to melt faster

It might take about an hour to get the cacao to completely melt and you’ll want to stir it regularly so as to spread the melted cacao around the shaving so that they melt faster.

So, while the cacao is busy melting, it’s time to prepare the ‘mold’. I use a glass casserole pan that’s 9 by 12. The larger the pan, the thinner the chocolate bark. I like it on the thinner side so that it’s easy to break up after it hardens.

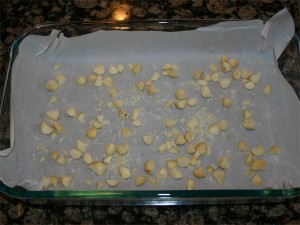
Inside the casserole pan, I line it with parchment paper. The following picture pretty much sums it up.

Nuts on paper

Now, with the collection of Macadamia Nuts, quarter them. If you chop the nuts up too small, you won’t be able to taste them. If they are two large, they overpower the chocolate. And don’t waste any crumb. Just through that in!

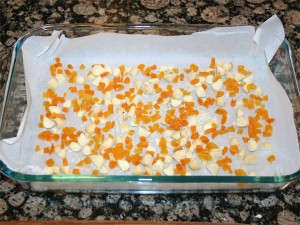
With the apricots, I cut them lengthwise into four strips before cutting them into little cubes. You’ll notice that they are smaller than the Macadamia Nut quarters.

Added Apricots

When I lay them into the pan, I drop them in so that they are pretty evenly spaced. You want each bite to have a bit of nut and fruit.

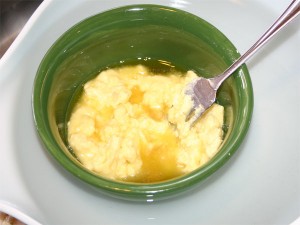
By this time, the butter should be translucent. Or, basically, look like melted butter. Remove it from the bath and stir in the 1 cup cacao powder and 1 tsp vanilla powder.

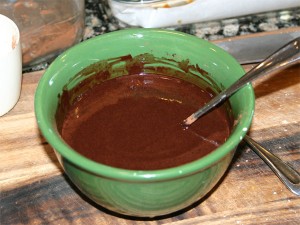
Liquid chocolate

You’ll want to stir this for a while. Make sure all the little dry clumps dissolve and that the vanilla powder breaks down. It tends to stick together so you’ll have to really work it. You’ll know that you’ve got it thoroughly mixed up when you stop stirring and little bubble rise to the surface.

At this point, it’s ready for the Agave. Add the five tablespoons and then start stirring again. The Agave tends to sink to the bottom, because it’s heavier and colder than the warm butter. As you stir it, it will warm (and cool the butter) as it evens out in the mixture.

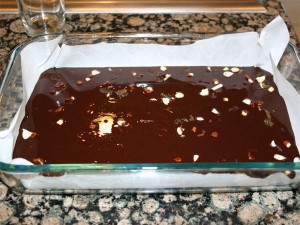
Now, carefully pour it into the pan on top of the nuts and fruit.

Soft

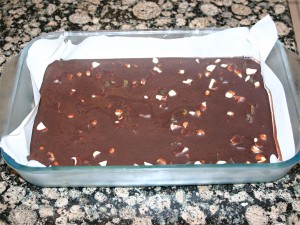
At this point, it’s ready for the fridge. Let it cool (level) until hard. I let it go for a few hours.

Hard

Notice in this picture that the chocolate has shrunk away from the parchment paper just a tad.

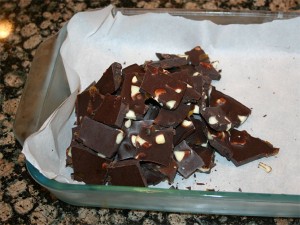
Now comes the fun part, breaking it up into bite size pieces.

Bite size chunks of bliss

These taste like pure butter bits as then warm and melt in your mouth. The nuts satisfy that need to bite down on something and the fruit makes you chew it for a while.

And I have to say there is something magical about this combination of ingredients.

So, there you have it. It’s not hard, it just takes a little time for the cacao to melt. If you show a little self control, one half pound should last a couple weeks. I make it a point to only eat a few bits a day. You’ll be surprised how much of a kick it has, but it’s not like a cup of tea or coffee.

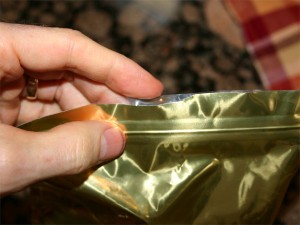
Oh, I just about forgot. The in thing (environmentally) now a days is to sell ‘product’ in little plastic Ziploc top bags. These things can be a pain to open for the plastic likes to stick together. So, to make it a little easier to open, I always make a second cut on the top so that one side is just a little longer than the other.

Tip for making bags easier to open

As you can see, I can now easily grab both sides of the bag to pop open the Ziploc. Give this a try next time you get a bag and see how it helps.

Enjoy your chocolate!

Blueberry Bliss Cheesecake

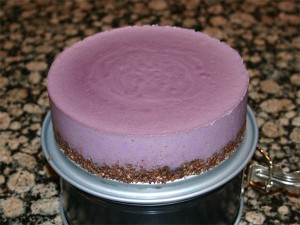
I’m excited because not only am I going to be able to show you a beautiful desert, but I’m going to be able to point you to the complete recipe!

This is one of the first raw deserts I learned to make. It’s wonderfully simple and seems to deliver amazing results every time. I’ve served it at Thanksgiving and eaten it for lunch many a times! Yum.

So here it is – Blueberry Bliss!

Look at that! Right out of the spring-form!

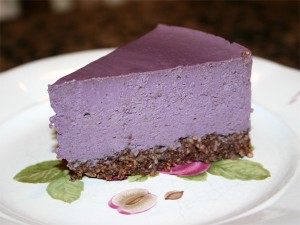
If that’s too much, here’s a little serving.

It’s amazing how the close-up shows all the details. I worked for at least a minute jiggling and dropping this spring-form just after pouring the berry mixture in and I still didn’t get all the bubbles out.

When making this desert, the one thing that I’d recommend more than anything else is to make sure you use the best cashews that you can find. Don’t get anything that’s old. Get whole nuts (beans) as fresh as can be.

Also, I use frozen berries (See my Oh My God – Blueberry Sorbet for a picture of the brand). But, when you use frozen berries, they thaw down to at least ½ size. Thus, I pour 4 cups berries into a measuring cup and place them in the dehydrator until they’ve warmed up to 100 degrees. Thus, with the recipe, I’m using a few more berries then what Carmella uses.

Also note that I also place the cacao butter/coconut mixture in the dehydrator to melt along with the berries.

Without further ado, the best write-up is from the source. The Sunny Raw Kitchen’s Bliss-full Blueberry Cheesecake.

Well, what did you think of her desert?  The blueberries over the top just seem … a little over the top. Thus, you don’t see that in my picture.

I also changed the crust a little simplifying it.

What the heck, I’ve changed it quite a bit. I guess I should include my measurements for comparison.

Crust:

  • ¾ cup soaked almonds
  • ¼ cup coconut flakes
  • 1 tablespoon cacao
  • 1 teaspoon vanilla powder
  • Pinch Celtic Sea Salt
  • 2 Medjhool dates
  • Little squeeze Raw Agave

I guess I don’t really like brazil nuts and I’ve found that I like the coconut flakes a little better than the powdered stuff. I put it all together like she does – using a food processor. With the almonds I soak them for maybe 6-8 hours and then let them dry. You want to work with dry nuts

Filling:

  • 4 cups frozen blueberries
  • 1 cup dry cashews – the best you can find
  • 5 Tbsp melted coconut butter
  • 2 Tbsp melted cacao butter
  • ¼ cup honey
  • 1 Tbsp lemon juice
  • Big pinch of Celtic Sea Salt.

Now, the real trick is getting it creamy without overdoing it. So, I approach the process just a little different than she does. I place the nuts in the blender and give them a whirl. It only takes 20 seconds (or so) before the nuts stick together and let the blade run free. At this point, I add everything else. The juice from the melted blueberries soaks down into the nuts softening them a little while you’re piling everything else on top.

Then, when you actually blend this up, let it run a little longer than you would normally do for smoothies. Remember that you started with warm ingredients, but you don’t want to cook them. Thus, feel the side of the blender as it’s getting creamy and make sure it’s not too hot.

Before pouring it into the spring-form, taste it. You should find yourself licking your fingers!

After you’ve poured the berry mixture into the pan, tap the pan so as to encourage the air bubbles to come to the surface. This might take a little extra coxing, so don’t by distracted by that little bit of mixture that you want to keep tasting!

When it cools, the butter and nuts will set-up giving it that standard cheesecake feel. I normally let it sit overnight.

It’s absolutely a keeper recipe. I make it for lunches!

Enjoy.

The Raw Chocolate Recipe

When biting into a raw chocolate truffle that snaps between your teeth and then melts over the tongue blasting your mouth with the succulent essence of cacao, you can’t help but feel how good it can really be!

When I first read that raw chocolate is actually good for you I couldn’t help but think back to all the candy bars I consumed as a kid. On Saturdays or summer holidays (from school) I’d scrounge up all the nickels and quarters I could find and when I’d get enough for a Milky Way bar, I’d peddle the couple miles to either the grocery store or trailer town (where they sold candy to the people in the park). Pounds and pounds of candy melted in my mouth, but never did I feel anything but a sugar high!

That all changed a few months ago when I tried raw chocolate for the first time. I ate a couple truffles worth of chocolate and found myself feeling good all afternoon. I’d heard that there was a compound in chocolate that would give you a sense of euphoria, but I’d never experienced it. As it turns out, looks like there’s a compound called anandamide that might be responsible for this reaction. I found a little bit might explain this reaction from Exploratorium.  

THC, however, is not found in chocolate. Instead, another chemical, a neurotransmitter called anandamide, has been isolated in chocolate. Interestingly, anandamide is also produced naturally in the brain. Both diTomaso and Piomelli went to great lengths to explain that this finding doesn’t mean that eating chocolate will get you high, but rather that there are compounds in chocolate that may be associated with the good feeling that chocolate consumption provides.

It’s funny that they relate it to THC because my experience what nothing like that!  Lol.

The important part is that I’ve never felt this way from eating refined (cooked) chocolate. Maybe this molecule is sensitive and breaks down under the heat of the refining process.

Here is another little tidbit from antoine.frostburg.edu.

A make you feel happy molecule: Anandamide

Anandamide’s long hydrocarbon tail makes it fat-soluble and allows it to easily slip across the hydrocarbon-rich curtain that isolates the brain from the bloodstream. Notice that its three-dimensional shape strongly resembles that of THC. But unlike THC, anandamide is fragile. It breaks down very quickly in the body. That explains why anandamide doesn’t produce a perpetual natural ‘high’.

In any case, you’re not going to find me eating a lot of “cooked” chocolate. I think I’d rather take advantage of, not only the calories, but the feeling that chocolate in the raw provides.

So, I’ve been making it for a while now and everyone asks – how do you make it?  Well, it’s pretty easy. Take the following ingredients:

And combine. Well, actually, you’ll want to melt the cacao into a liquid so that you can mix everything in. When I first started, I sliced the cacao thinly, placed in a bowl and then placed that bowl in a hot water bath until it melted. Now I just place it in the dehydrator. Once it’s melted, mix it all together. Make sure you taste it. If the vanilla is not all that strong, you may find you’ll have to add a little more. Or, if the dark cacao is a bit more bitter, you’ll find a little more Agave will mellow it out.

After it tastes right (you’ll get a better feel after making it a couple times) you’ll want to cool it in the fridge. I do this by lining a casserole pan with some parchment paper so that I can just pour the mix (to make bark chocolate). After it sits in the fridge for a few hours, the mix sets up.

Go easy on the stuff for it might keep you up all night.  I try to limit myself to only a few pieces around lunch.

There are lots of great sources on the web that talk about raw chocolate. One of my favorite sites is The Sunny Raw Kitchen’s For the love of chocolate page. That page has lots of recipes that include coconut oil, which softens the chocolate.

Also check out EssentialLivingFoods website and view the raw cacao video. Or view it on YouTube.

Enjoy!