Blueberry Coconut Sorbet

Looks like blueberry treats are the in thing for me this week.  Lol.  I wonder if I’ll start turning blue like the bad girl in the movie Willy Wonka and the Chocolate Factory? As it turns out, I drank a little too much carrot juice last spring and noticed that my skin started to pick up the color of carrots. I think I’d rather turn blue.

This Blueberry Sorbet is to die for! When I served this to my daughter a couple days ago, her first words where “Oh my God” as the semi-frozen cream melted in her mouth. She couldn’t get over how fresh it tasted. It’s definitely decadent.

I’ve been making this for a while and it freezes great. If you make too much (which I try to always do) you just pour it into a Tupperware container (or Glad or whatever) and place it in the freezer. Make sure you freeze it in single serving sizes because it doesn’t serve up like ice cream.

So here we go. I will assure you that it’s definitely worth your time here.
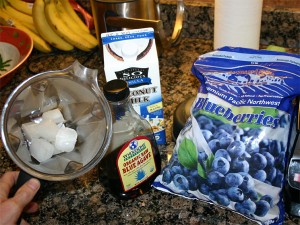
The Young Thai Coconut water ice cubes make this!

The list of ingredients is really simple:

  • 6 Young Thai Coconut water ice cubes
  • ½ – ¾ cup coconut milk (vanilla flavor)
  • Frozen blueberries
  • Raw Agave

Ok, this one will take a little creative writing for I don’t normally measure how much I use of everything when I whip this up. Thus the next picture may help.
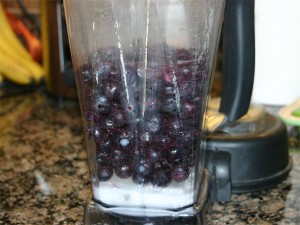
4 cups berries, 3/4 up coconut milk (I think), 6 ice cubes and agave

Looks like I put in about four cups frozen berries. Because they are hard and cold, they will blend down a bit. I think the finished amount was about 3 cups. With the agave, you put in as much as you would like – for me, it’s a squirt about 2 seconds log. I would guess about 2 tablespoons worth.

When blending, start slow and work your way up (speed wise). You’ll definitely have to work this one. The berries will not want to drop into the blades so you’ll have to coax them. I end up turning the blender on and off a number of times as I work this mixture with the Vita-mix supplied plunger.

But the end result is definitely worth it!
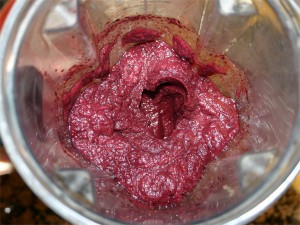
Just Amazing!

The real trick with this one is the young Thai Coconut milk (water) that you freeze into ice cubes. The recipe is definitely not the same if you pass on this process. Thus, the next time you make Coconut Cream Pie, save the extra water in ice cube trays knowing that it won’t be long before you’ll be making this amazing sorbet! Also note that the Coconut Cream Pie posting has information about opening coconuts that you might want to review if you haven’t opened them before.

I have to admit that the best part about making this recipe is that it’s really fast. You don’t have to soak anything or thaw anything, you just drop it all in and blend it up.

This frozen blueberry roll that I’ve been on makes me think that I’ve got to get to the store and buy some more fresh fruit! It’s cherry season and I shouldn’t be spending my time with frozen stuff. The fresh stuff only (really) comes around for a short time every year. I’ve got to take advantage of it.

Try this and let me know what you think.

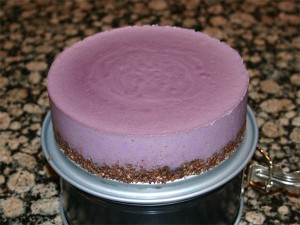
Blueberry Bliss Cheesecake

I’m excited because not only am I going to be able to show you a beautiful desert, but I’m going to be able to point you to the complete recipe!

This is one of the first raw deserts I learned to make. It’s wonderfully simple and seems to deliver amazing results every time. I’ve served it at Thanksgiving and eaten it for lunch many a times! Yum.

So here it is – Blueberry Bliss!

Look at that! Right out of the spring-form!

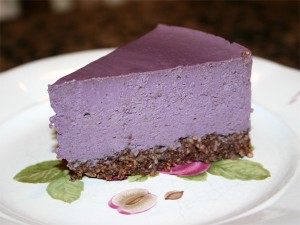
If that’s too much, here’s a little serving.

It’s amazing how the close-up shows all the details. I worked for at least a minute jiggling and dropping this spring-form just after pouring the berry mixture in and I still didn’t get all the bubbles out.

When making this desert, the one thing that I’d recommend more than anything else is to make sure you use the best cashews that you can find. Don’t get anything that’s old. Get whole nuts (beans) as fresh as can be.

Also, I use frozen berries (See my Oh My God – Blueberry Sorbet for a picture of the brand). But, when you use frozen berries, they thaw down to at least ½ size. Thus, I pour 4 cups berries into a measuring cup and place them in the dehydrator until they’ve warmed up to 100 degrees. Thus, with the recipe, I’m using a few more berries then what Carmella uses.

Also note that I also place the cacao butter/coconut mixture in the dehydrator to melt along with the berries.

Without further ado, the best write-up is from the source. The Sunny Raw Kitchen’s Bliss-full Blueberry Cheesecake.

Well, what did you think of her desert?  The blueberries over the top just seem … a little over the top. Thus, you don’t see that in my picture.

I also changed the crust a little simplifying it.

What the heck, I’ve changed it quite a bit. I guess I should include my measurements for comparison.

Crust:

  • ¾ cup soaked almonds
  • ¼ cup coconut flakes
  • 1 tablespoon cacao
  • 1 teaspoon vanilla powder
  • Pinch Celtic Sea Salt
  • 2 Medjhool dates
  • Little squeeze Raw Agave

I guess I don’t really like brazil nuts and I’ve found that I like the coconut flakes a little better than the powdered stuff. I put it all together like she does – using a food processor. With the almonds I soak them for maybe 6-8 hours and then let them dry. You want to work with dry nuts

Filling:

  • 4 cups frozen blueberries
  • 1 cup dry cashews – the best you can find
  • 5 Tbsp melted coconut butter
  • 2 Tbsp melted cacao butter
  • ¼ cup honey
  • 1 Tbsp lemon juice
  • Big pinch of Celtic Sea Salt.

Now, the real trick is getting it creamy without overdoing it. So, I approach the process just a little different than she does. I place the nuts in the blender and give them a whirl. It only takes 20 seconds (or so) before the nuts stick together and let the blade run free. At this point, I add everything else. The juice from the melted blueberries soaks down into the nuts softening them a little while you’re piling everything else on top.

Then, when you actually blend this up, let it run a little longer than you would normally do for smoothies. Remember that you started with warm ingredients, but you don’t want to cook them. Thus, feel the side of the blender as it’s getting creamy and make sure it’s not too hot.

Before pouring it into the spring-form, taste it. You should find yourself licking your fingers!

After you’ve poured the berry mixture into the pan, tap the pan so as to encourage the air bubbles to come to the surface. This might take a little extra coxing, so don’t by distracted by that little bit of mixture that you want to keep tasting!

When it cools, the butter and nuts will set-up giving it that standard cheesecake feel. I normally let it sit overnight.

It’s absolutely a keeper recipe. I make it for lunches!

Enjoy.

The Raw Chocolate Recipe

When biting into a raw chocolate truffle that snaps between your teeth and then melts over the tongue blasting your mouth with the succulent essence of cacao, you can’t help but feel how good it can really be!

When I first read that raw chocolate is actually good for you I couldn’t help but think back to all the candy bars I consumed as a kid. On Saturdays or summer holidays (from school) I’d scrounge up all the nickels and quarters I could find and when I’d get enough for a Milky Way bar, I’d peddle the couple miles to either the grocery store or trailer town (where they sold candy to the people in the park). Pounds and pounds of candy melted in my mouth, but never did I feel anything but a sugar high!

That all changed a few months ago when I tried raw chocolate for the first time. I ate a couple truffles worth of chocolate and found myself feeling good all afternoon. I’d heard that there was a compound in chocolate that would give you a sense of euphoria, but I’d never experienced it. As it turns out, looks like there’s a compound called anandamide that might be responsible for this reaction. I found a little bit might explain this reaction from Exploratorium.  

THC, however, is not found in chocolate. Instead, another chemical, a neurotransmitter called anandamide, has been isolated in chocolate. Interestingly, anandamide is also produced naturally in the brain. Both diTomaso and Piomelli went to great lengths to explain that this finding doesn’t mean that eating chocolate will get you high, but rather that there are compounds in chocolate that may be associated with the good feeling that chocolate consumption provides.

It’s funny that they relate it to THC because my experience what nothing like that!  Lol.

The important part is that I’ve never felt this way from eating refined (cooked) chocolate. Maybe this molecule is sensitive and breaks down under the heat of the refining process.

Here is another little tidbit from antoine.frostburg.edu.

A make you feel happy molecule: Anandamide

Anandamide’s long hydrocarbon tail makes it fat-soluble and allows it to easily slip across the hydrocarbon-rich curtain that isolates the brain from the bloodstream. Notice that its three-dimensional shape strongly resembles that of THC. But unlike THC, anandamide is fragile. It breaks down very quickly in the body. That explains why anandamide doesn’t produce a perpetual natural ‘high’.

In any case, you’re not going to find me eating a lot of “cooked” chocolate. I think I’d rather take advantage of, not only the calories, but the feeling that chocolate in the raw provides.

So, I’ve been making it for a while now and everyone asks – how do you make it?  Well, it’s pretty easy. Take the following ingredients:

And combine. Well, actually, you’ll want to melt the cacao into a liquid so that you can mix everything in. When I first started, I sliced the cacao thinly, placed in a bowl and then placed that bowl in a hot water bath until it melted. Now I just place it in the dehydrator. Once it’s melted, mix it all together. Make sure you taste it. If the vanilla is not all that strong, you may find you’ll have to add a little more. Or, if the dark cacao is a bit more bitter, you’ll find a little more Agave will mellow it out.

After it tastes right (you’ll get a better feel after making it a couple times) you’ll want to cool it in the fridge. I do this by lining a casserole pan with some parchment paper so that I can just pour the mix (to make bark chocolate). After it sits in the fridge for a few hours, the mix sets up.

Go easy on the stuff for it might keep you up all night.  I try to limit myself to only a few pieces around lunch.

There are lots of great sources on the web that talk about raw chocolate. One of my favorite sites is The Sunny Raw Kitchen’s For the love of chocolate page. That page has lots of recipes that include coconut oil, which softens the chocolate.

Also check out EssentialLivingFoods website and view the raw cacao video. Or view it on YouTube.

Enjoy!